Using Pleasanter MCP with Claude Desktop (configuration file)
Overview
This page explains how to use the Pleasanter MCP server by editing the configuration file of Claude Desktop.
What to Check First
- Before you follow the steps below, confirm that you have completed the steps in Using Pleasanter MCP.
- For how to use the extension of Claude Desktop, check the steps in Using Pleasanter MCP with Claude Desktop (extension).
Installing Node.js
Download Node.js from the following URL and install it following the instructions on the screen.

Installing Claude Desktop
Download Claude Desktop from the following URL and install it following the instructions on the screen.

At the first login, when you enter your mail address a verification code is sent to you. When you enter the verification code, you can start using Claude Desktop.
Configuring Claude Desktop
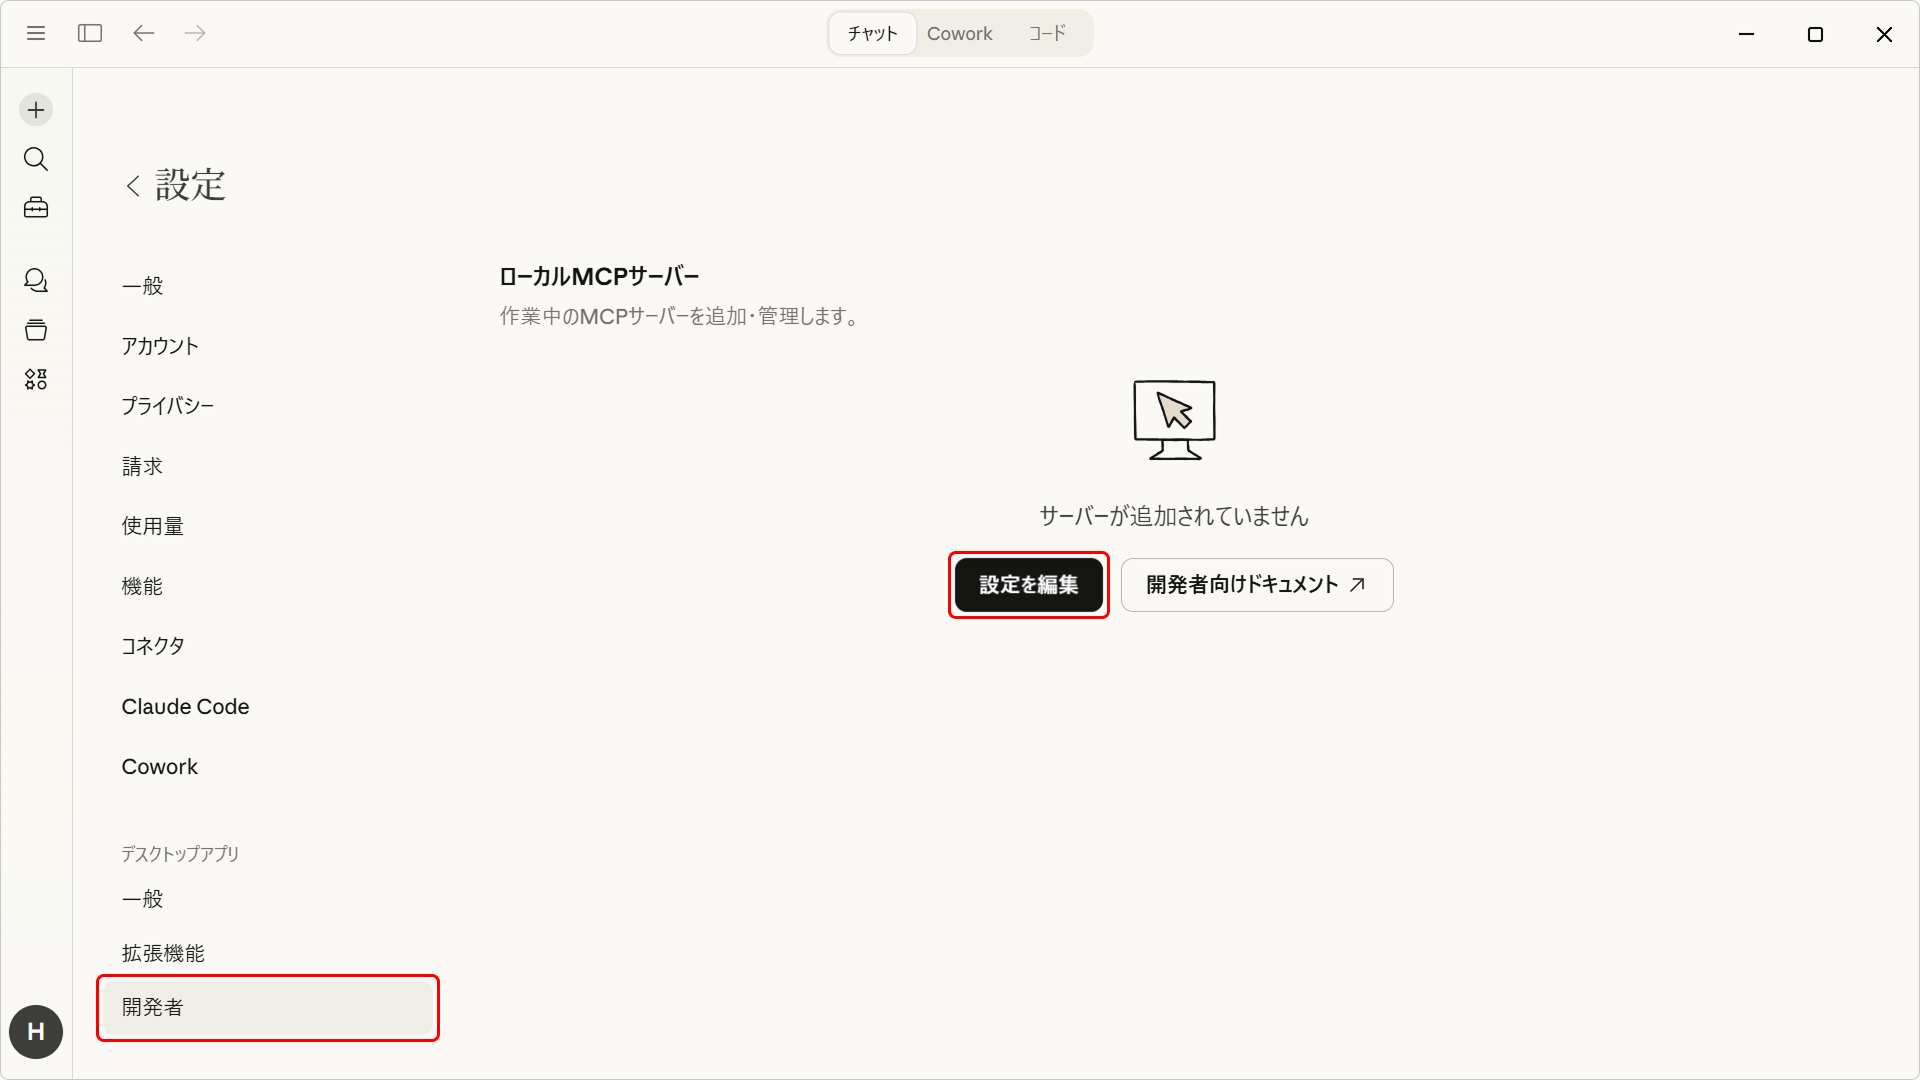
Open the settings screen of Claude Desktop.

Select "Developer" and click the "Edit Config" button.
Explorer starts, the C:\Users\
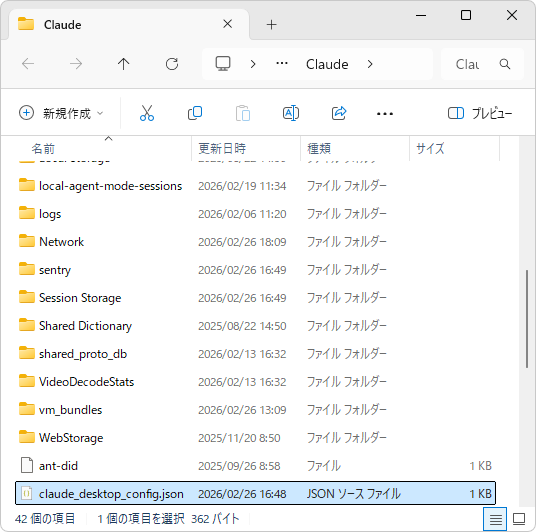
Open claude_desktop_config.json with Notepad or a similar editor, and copy and paste the following content into it.
| When you use only Pleasanter MCP as the MCP server | |
|---|---|
- {server name} and {path} can differ depending on how you set up Pleasanter.
- Check the URL you actually use and change it as needed.
-
The following are examples of the URL in each environment.
Server Name Path Example of the URL localhost none http://localhost/mcp example.com pleasanter https://example.com/pleasanter/mcp
Most problems connecting to the MCP server are caused by a mistake in editing this file. If the settings do not work, refer to FAQ: What to check if modified configuration files or API requests (JSON format) are not recognized correctly.
Registering the API Key in a User Environment Variable
Click the "Start" button on the taskbar, type Env, and select "Edit environment variables for your account".

Click the "New" button under the user environment variables in the upper part of the screen and set the following information.
| Variable Name | Variable Value |
|---|---|
| PLEASANTER_API_KEY | The API key issued in Using Pleasanter MCP |
When other MCP servers are already configured
When other MCP servers are already configured in claude_desktop_config.json, edit it as shown in the red text below, for example. Note that a comma (,) is added at the end of the existing settings, and that the range to copy changes.

Quitting Claude Desktop
Once the settings are done, quit Claude Desktop completely so that the changes take effect. To quit Claude Desktop completely, you need to select "Quit" from the task tray.
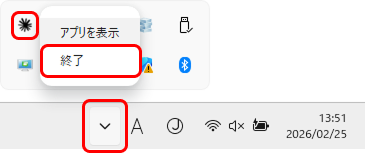
Checking the Connection of the Connector
Start Claude Desktop, open the "Settings" screen and select "Developer". If it is configured correctly, you can see the display "running". If it does not work, review the steps, focusing on the settings in claude_desktop_config.json.
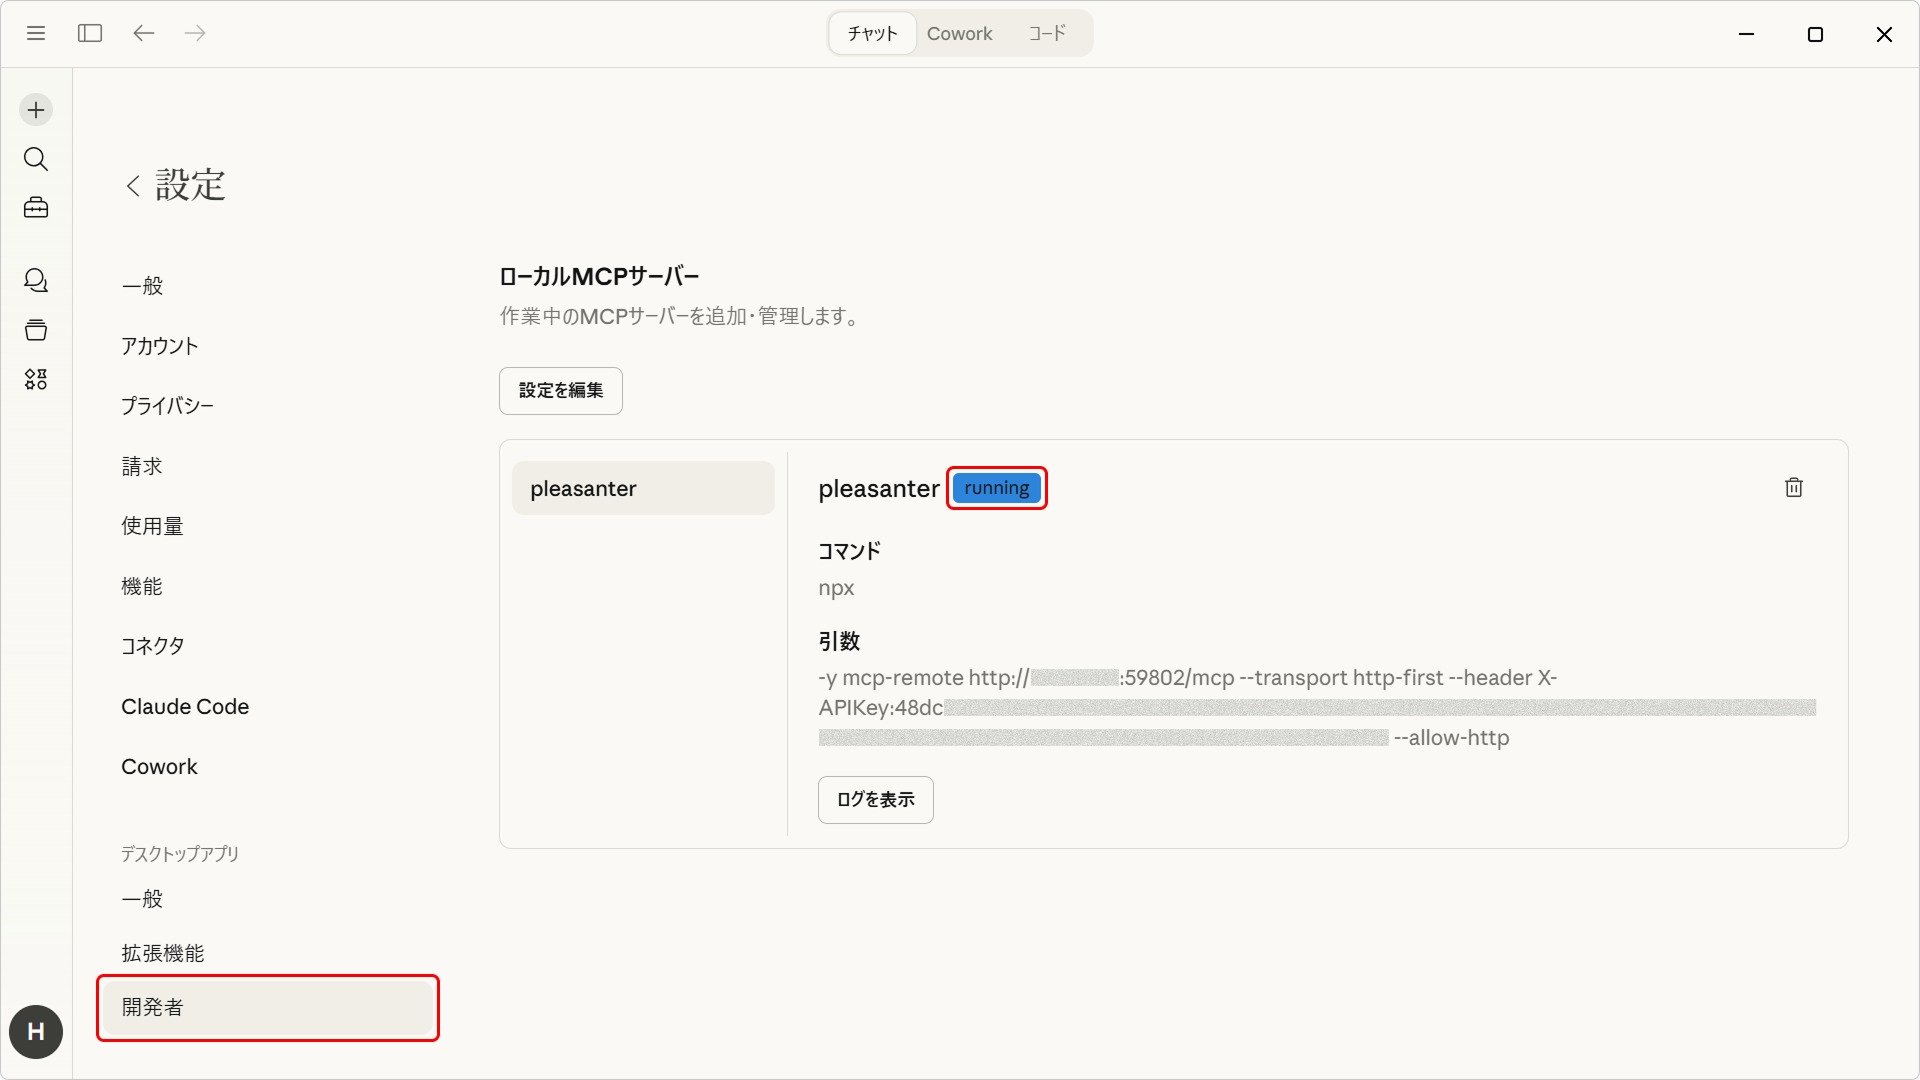
Checking That Claude Desktop Works
Open a new chat (Ctrl+Shift+O) and enter the following message.
If you get a display like the following, the initial setup is complete. Note that, by the nature of AI, there is no guarantee that you get exactly the same display even when you ask the same question.

Precautions
- The answers generated by AI can contain errors. Always check the content of the answers.
- This manual is based on Claude Desktop (Claude for Windows) as of the release of Pleasanter 1.5.3.0.
- Claude Desktop is updated frequently and parts of the screens can change. Read them as appropriate.
Supported Versions
| Supported Version | Description |
|---|---|
| 1.5.2.0 and later | Function added |
| 1.5.3.0 and later | Creating a new record and deleting a record added |