Using Pleasanter MCP with Claude Desktop (Extension)
Overview
This guide explains how to use Pleasanter MCP, provided as an extension for Claude Desktop.
Prerequisites
- Before following the steps below, confirm that the steps in "Using Pleasanter MCP" have been completed.
- If the extension is not available, refer to the steps in "Using Pleasanter MCP with Claude Desktop (Configuration File)."
Installing Node.js
Download Node.js from the URL below and install it by following the on-screen instructions.
https://nodejs.org/ja/download

Installing Claude Desktop
Download Claude Desktop from the URL below and install it by following the on-screen instructions.
https://claude.com/ja-jp/download

At first login, enter your email address and you will receive a verification code. Enter the verification code to start using Claude Desktop.
Configuring Claude Desktop
Open the Claude Desktop settings screen.

Select Extensions and click the Browse Extensions button.

Type "Pleasanter MCP" in the search box and select Pleasanter MCP.

Enter the Pleasanter URL and API key, then click the Save button.

Set the Pleasanter URL in the following format:
- {ServerName} and {Path} may differ depending on your setup.
- Check the URL you are actually using and modify it accordingly.
-
The following are example URLs for each environment:
Server Name Path Example URL localhost None http://localhost/mcp example.com pleasanter https://example.com/pleasanter/mcp
For API key, enter the API key you noted down in "Using Pleasanter MCP." The entered API key will be stored in the OS keychain.
Click the toggle to switch it to Enabled, and a list of tools available in Pleasanter MCP will be displayed. Tools are listed in ascending alphabetical order.

The dropdown menu in the upper right of the list allows you to set permissions for all tools at once. To configure permissions per tool, use the button displayed to the right of each tool name.
Dropdown Menu Options
| Icon | Option | Meaning |
|---|---|---|
 | Always Allow | Automatically approves the use of all tools. |
 | Approval Required | Requests user approval the first time each tool is used. |
 | Blocked | Blocks the use of all tools. |
 | Custom | Applies different permission settings per tool. |
By default, Approval Required is set for all tools.
Exiting Claude Desktop
Once the extension settings are complete, fully exit Claude Desktop to apply the changes. To fully exit Claude Desktop, you need to select Quit from the system tray.

Verifying Claude Desktop Operation
Launch Claude Desktop, open a new chat (Ctrl+Shift+O), and enter the following message:
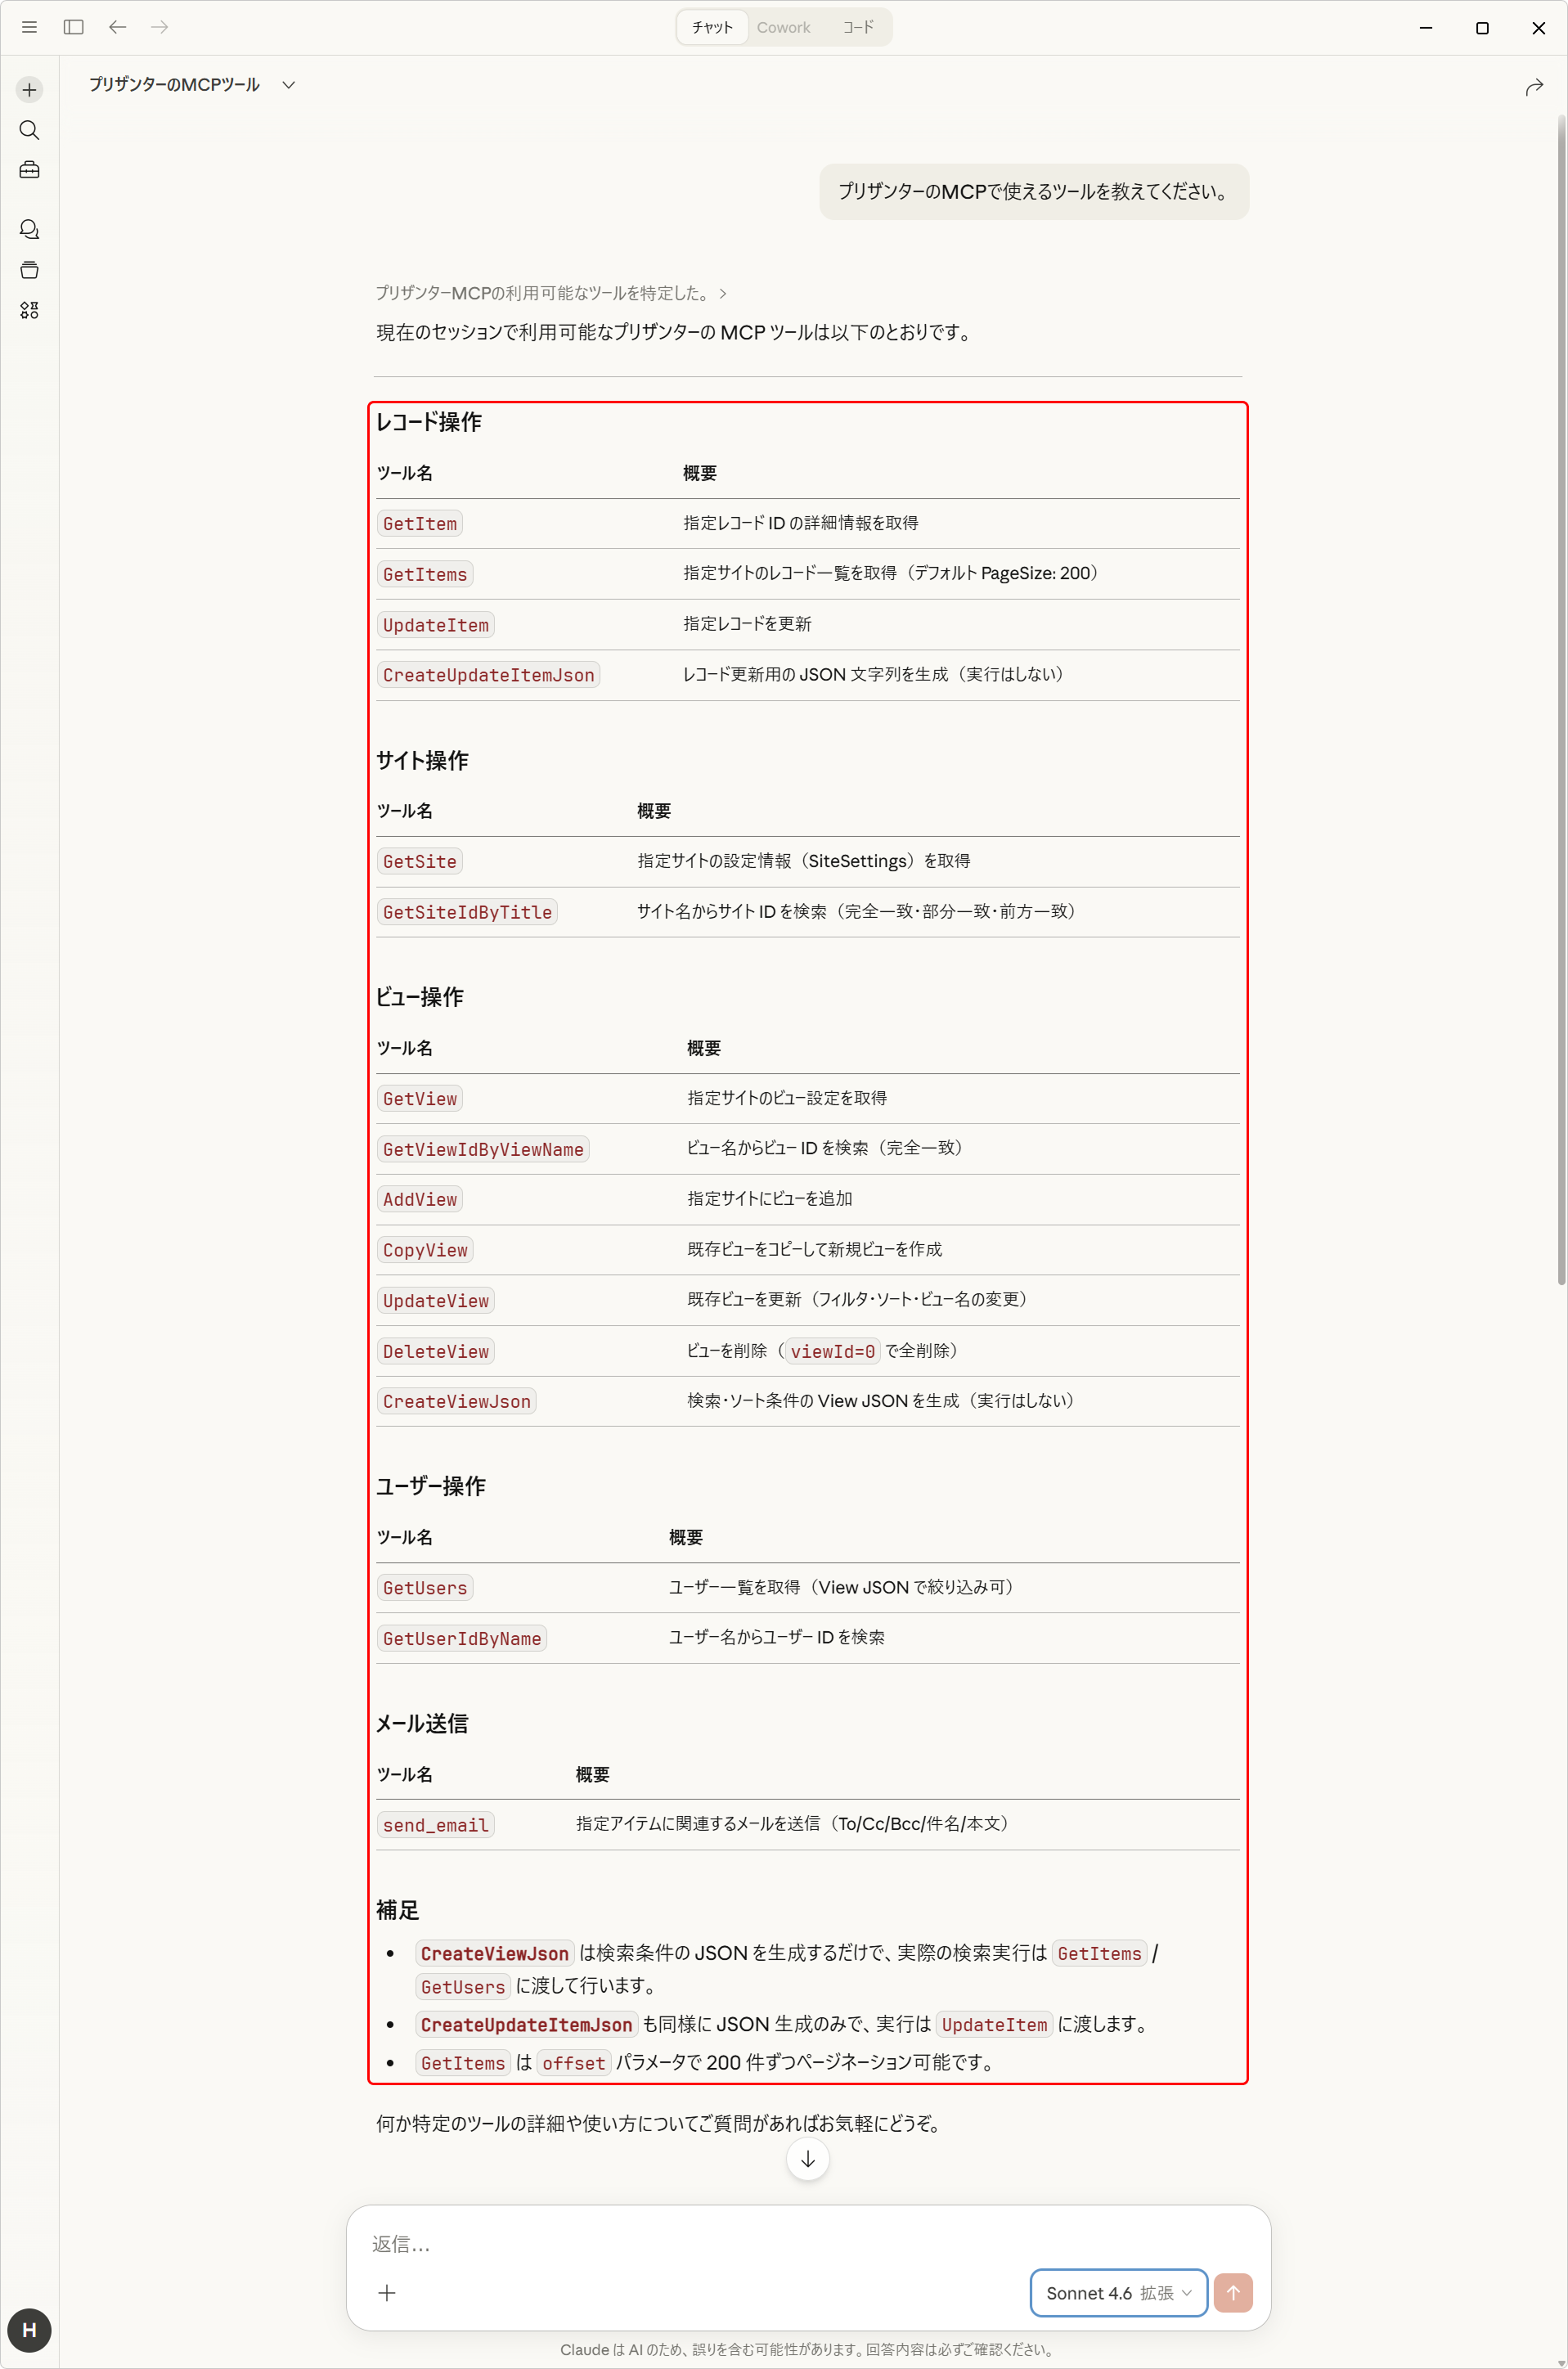
If the response appears as shown below, the initial setup is complete. Note that due to the nature of AI, the same question does not guarantee the same response.
Supplementary Information on Claude Plans
Pleasanter MCP is available on the Free Claude (free) plan as well. Each plan is subject to usage limits set by Anthropic, the developer of Claude Desktop. When the usage limit is reached, the following message will be displayed:

In such cases, you can resume operation by: ① waiting until the displayed time, ② enabling the Extra Usage option (paid), or ③ reviewing your subscription plan.
For details, refer to the Claude Desktop help.

Notes
- AI-generated responses may contain errors. Always verify the content of responses.
- This manual is based on Claude Desktop (Claude for Windows) 1.1.4.88, released with Pleasanter 1.5.2.0.
- Claude Desktop is updated frequently, and parts of the interface may change. Please read accordingly.
Supported Versions
| Supported Version | Details |
|---|---|
| 1.5.2.0 and later | Feature added |