Using Pleasanter MCP with Visual Studio Code
Overview
This page explains how to use Pleasanter MCP with Visual Studio Code.
What to Check First
- Before you follow the steps below, confirm that you have completed the steps in Using Pleasanter MCP.
- The steps below assume that Visual Studio Code is already installed.
Installing the Pleasanter MCP Extension
With the Pleasanter MCP extension you can use Pleasanter MCP from Visual Studio Code.
Open the "Extensions" view (Ctrl+Shift+X). Enter "Pleasanter MCP" in the "Search Extensions in Marketplace" text box and click the "Install" button.

Initial Settings of the Pleasanter MCP Extension
Open the Command Palette with the shortcut key Ctrl+Shift+P and run "Pleasanter MCP: Open the settings screen".

Enter the "Pleasanter URL" and the "API key" and click the "Save" button.

Set a URL like the following for "Pleasanter URL".
- {server name} and {path} can differ depending on how you set up Pleasanter.
- Check the URL you actually use and change it as needed.
-
The following are examples of the URL in each environment.
Server Name Path Example of the URL localhost none http://localhost/mcp example.com pleasanter https://example.com/pleasanter/mcp
For "API key", enter the API key you noted down in Using Pleasanter MCP. The API key you enter is saved in the keychain of the OS.
Checking That It Works in Visual Studio Code
Open a "New Chat Editor".

Enter the following message.
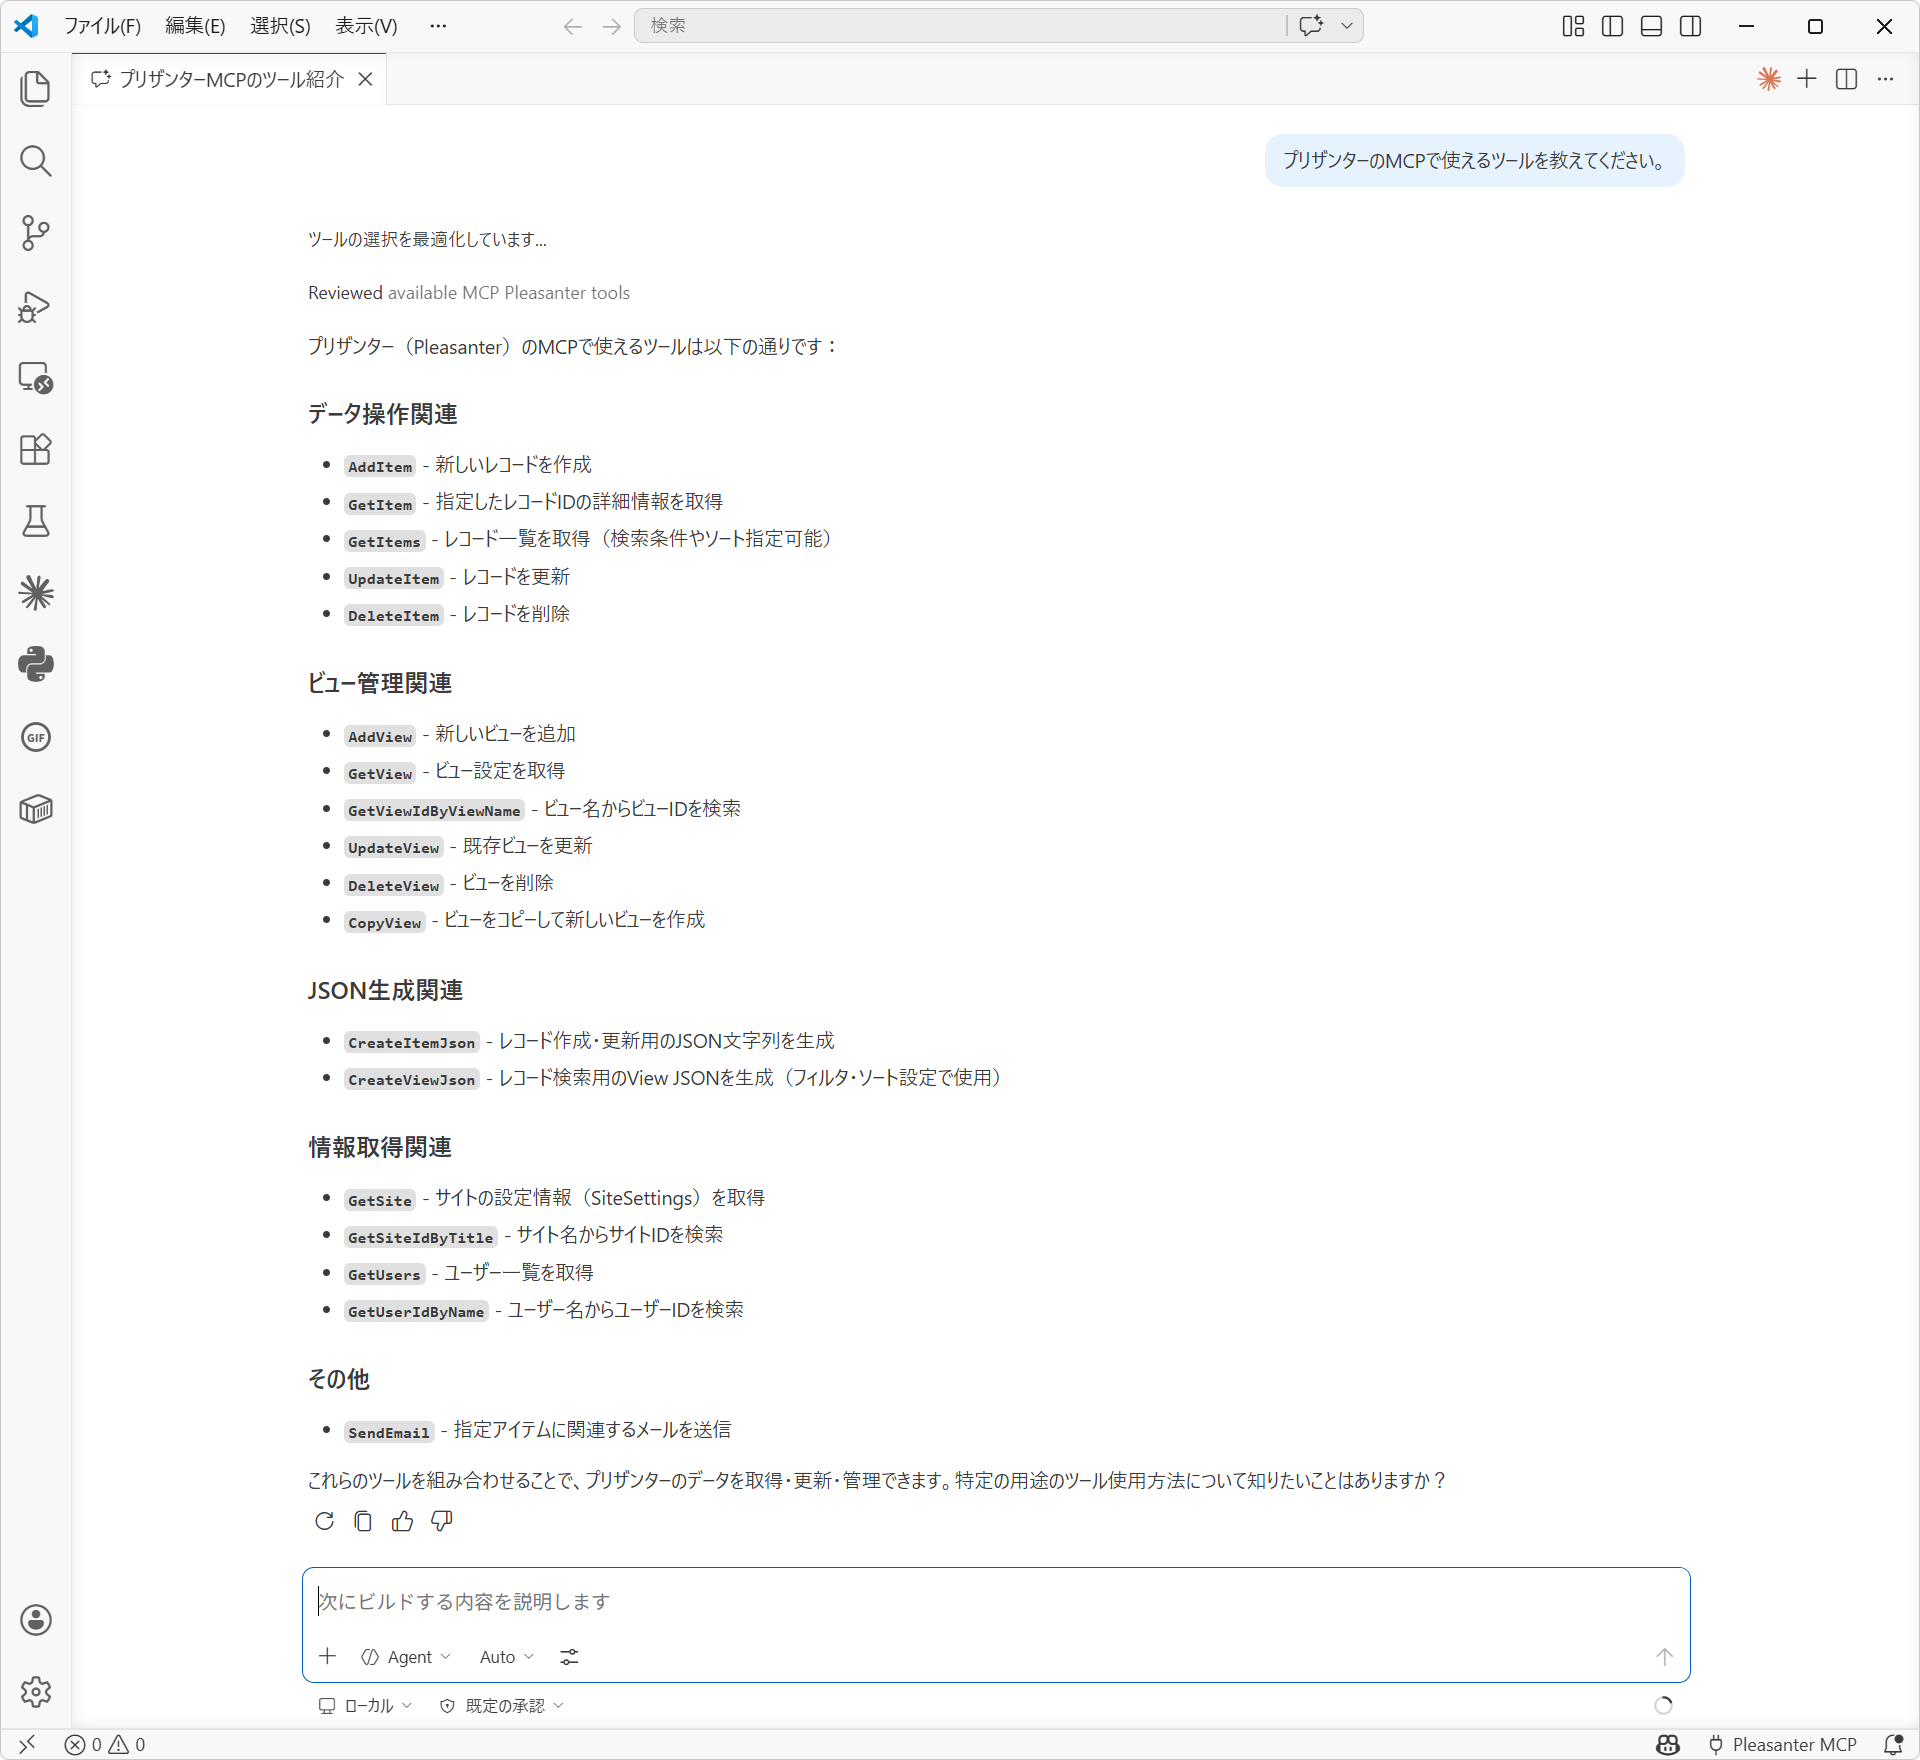
If you get a display like the following, the check is complete. Note that, by the nature of AI, there is no guarantee that you get exactly the same answer even when you ask the same question.
Cautions
- The answers generated by AI can contain errors. Always check the content of the answers.
- This manual is based on Visual Studio Code as of the release of Pleasanter 1.5.3.0.
Supported Versions
| Supported Version | Description |
|---|---|
| 1.5.2.0 and later | Function added |
| 1.5.3.0 and later | Creating a new record and deleting a record added |