Developer Function: Extensions: Enhanced HTML
Usage Notes
To use this function, you need to know HTML. If you configure it incorrectly, you may not be able to use Pleasanter, so please test it thoroughly before using it.
How To Set Extended Styles
.¥Pleasanter¥App_Data¥Parameters¥ExtendedHtmls¥ Create a text file containing HTML code below and restart IIS.
The ExtendedHtmls subdirectory can be organized as a folder. In this case, all HTML files under the folder will be loaded.
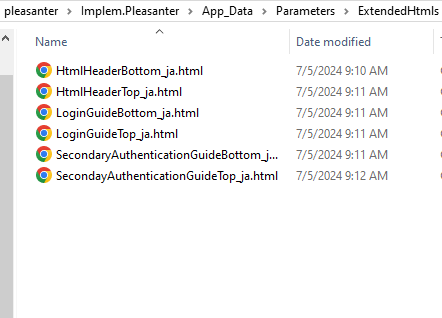
Display Block and File Name
The list of currently available HTML extension files is given below.
| No. | Display block ID | File name | Insertion location |
|---|---|---|---|
| 1 | LoginGuideTop | LoginGuideTop_ja.html | Top of login screen input form |
| 2 | LoginGuideBottom | LoginGuideBottom_ja.html | Bottom of login screen input form |
| 3 | SecondaryAuthenticationGuideTop | SecondaryAuthenticationGuideTop_ja.html | Top of two-step authentication code input area |
| 4 | SecondaryAuthenticationGuideBottom | Secondary AuthenticationGuideBottom_ja.html | Bottom of two-step authentication code input area |
| 5 | HtmlHeaderTop | HtmlHeaderTop_ja.html | Beginning of HTML header tag |
| 6 | HtmlHeaderBottom | HtmlHeaderBottom_ja.html | End of HTML header tag |
| 7 | ColumnTop | ColumnTop_ja.html | Top of edit screen column |
| 8 | ColumnBottom | ColumnBottom_ja.html | Bottom of edit screen column |
| 9 | HtmlBodyTop | HtmlBodyTop_ja.html | Beginning of HTML body tag |
| 10 | HtmlBodyBottom | HtmlBodyBottom_ja.html | End of HTML body tag |
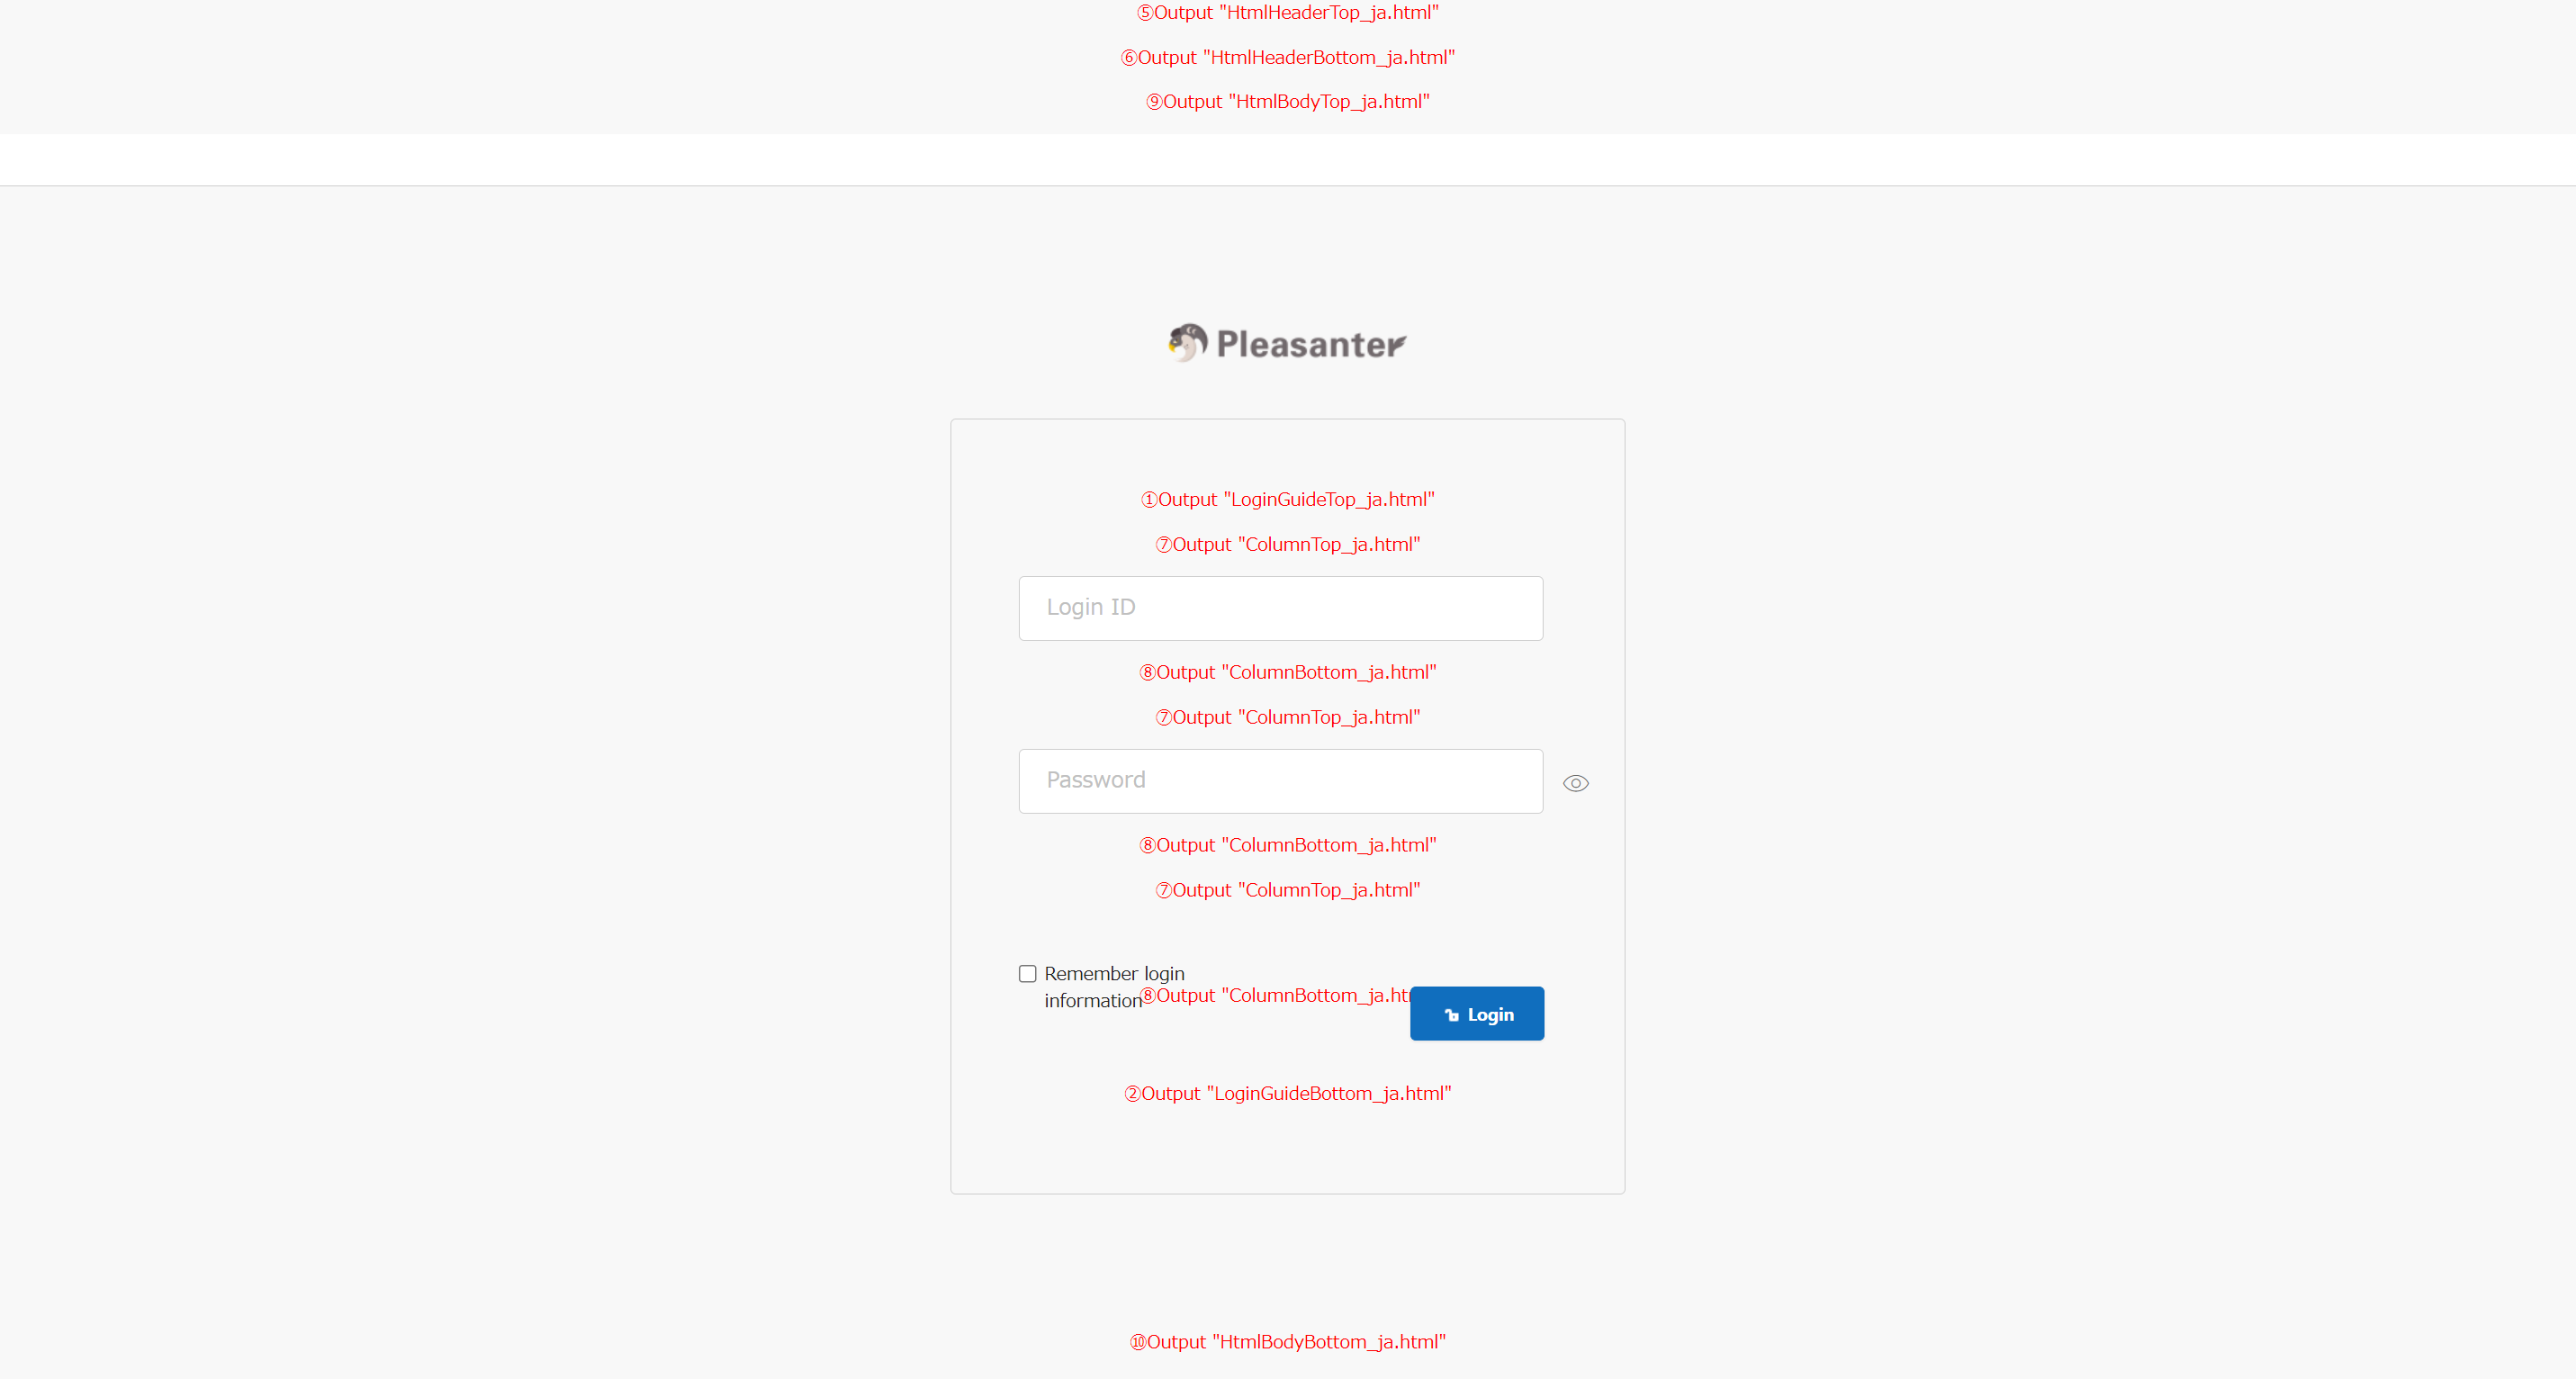

Example of Use
LoginGuideTop_ja.html when installed.
HTML
<span style="color: red; font-size: 2em; display: inline-block; width: 100%; text-align: center; margin-bottom: 1em;">
Login instructions, etc.<br>
HTML tags can also be used.
</span>
