Settings for Safer Use
<< Manage Table: Form: Basic Settings
5. Preventing Unauthorised Access by Bots with CAPTCHA
The Form function supports "CAPTCHA", one of the security services that protect a website from unauthorised access by bots. This function supports the following three CAPTCHA services.
- Cloudflare Turnstile
- Google reCAPTCHA v3 (no user action required)
- Google reCAPTCHA v2 (user action required)
5.1. Obtaining the site key and the secret key
Go through the sign-up procedure at the links below and obtain the Site Key and the Secret Key.
For details of each service, check the website of the company that provides it.
5.2. Setting up CAPTCHA
The following explains the setup steps for each service. Note that once the settings are done, a badge is displayed at the bottom of the page; the position of the badge cannot be changed.
For Cloudflare Turnstile, see here
Edit the parameter "CaptchaConfig" of the configuration file "Security.json" as follows.
Replace the site key and the secret key with the keys you obtained.
When you open the published address in a web browser, a badge is displayed at the bottom of the page (just before the command button area, centred horizontally) and the verification starts automatically. Note that in some cases it is not verified automatically and you need to act manually. This is not controlled by Pleasanter; it is the specification of Turnstile.

The display after the verification completes is as follows.
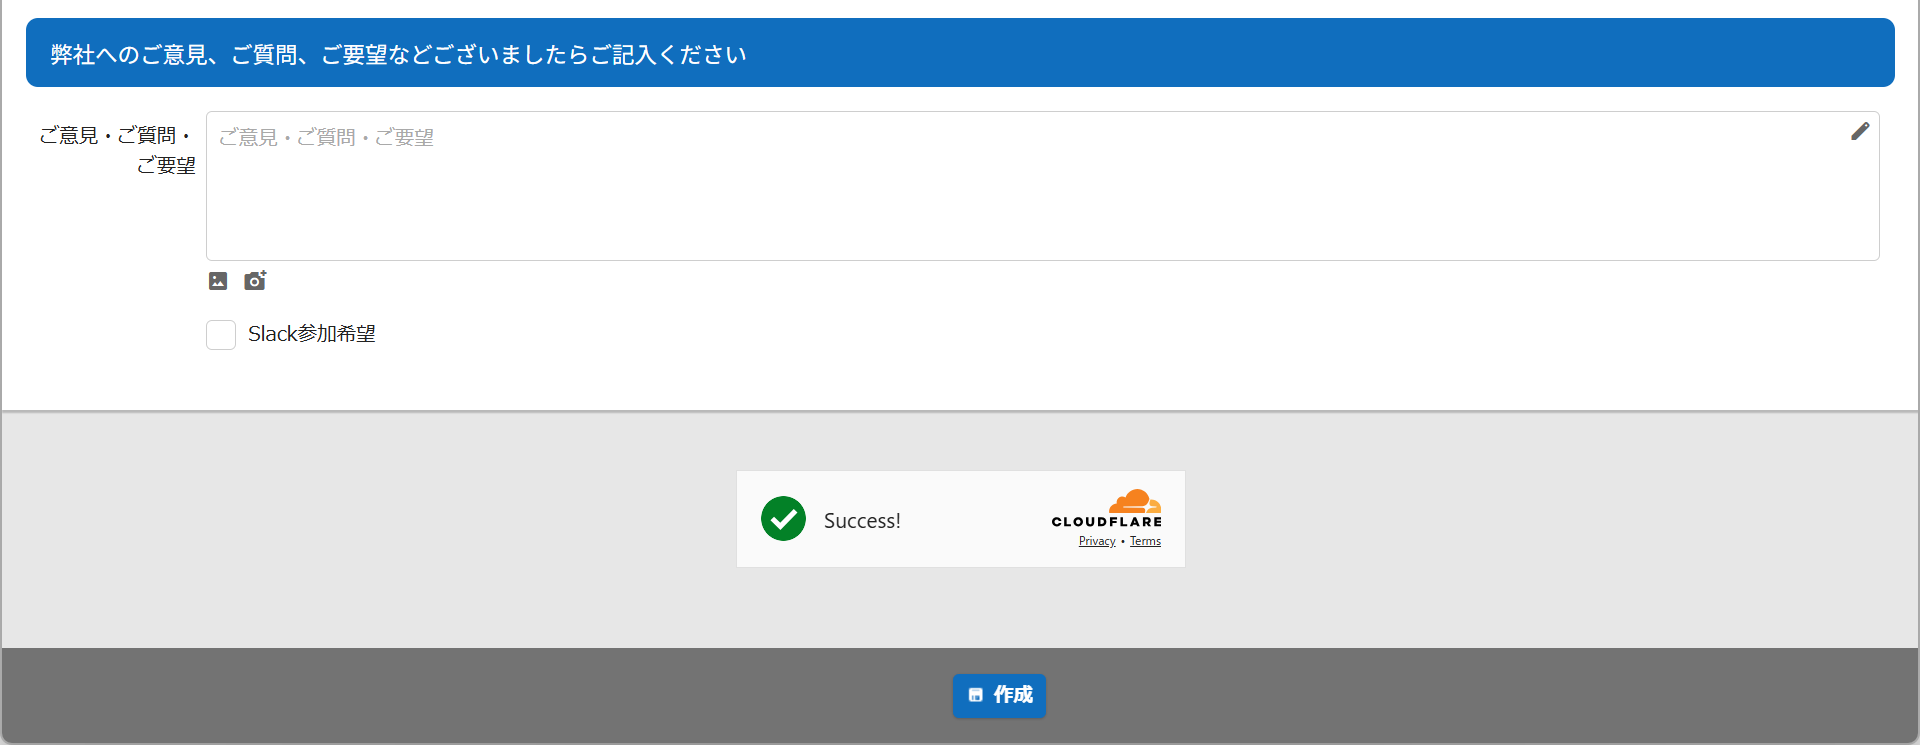
Links to the Privacy policy and the Terms are displayed, so be sure to check them before you run it in production.
For Google reCAPTCHA v3, see here
Edit the parameter "CaptchaConfig" of the configuration file "Security.json" as follows.
Replace the site key and the secret key with the keys you obtained.
    "CaptchaConfig": {
        "Type": "RecaptchaV3",
        "SiteKey": "the site key",
        "SecretKey": "the secret key",
        "RecaptchaV3": {
            "DefaultScoreThreshold": "0.7"
        }
    }
When you open the published address in a web browser, the verification runs automatically and a badge is displayed at the bottom right of the page. The badge shows links to the privacy policy and the terms of service. Google also discloses matters based on the Act on the Protection of Personal Information and the Telecommunications Business Act for users in Japan. Check this before you run it in production.

When you put the cursor over the badge, the display expands.

For Google reCAPTCHA v2, see here
Edit the parameter "CaptchaConfig" of the configuration file "Security.json" as follows.
Replace the site key and the secret key with the keys you obtained.
    "CaptchaConfig": {
        "Type": "RecaptchaV2",
        "SiteKey": "the site key",
        "SecretKey": "the secret key"
    }
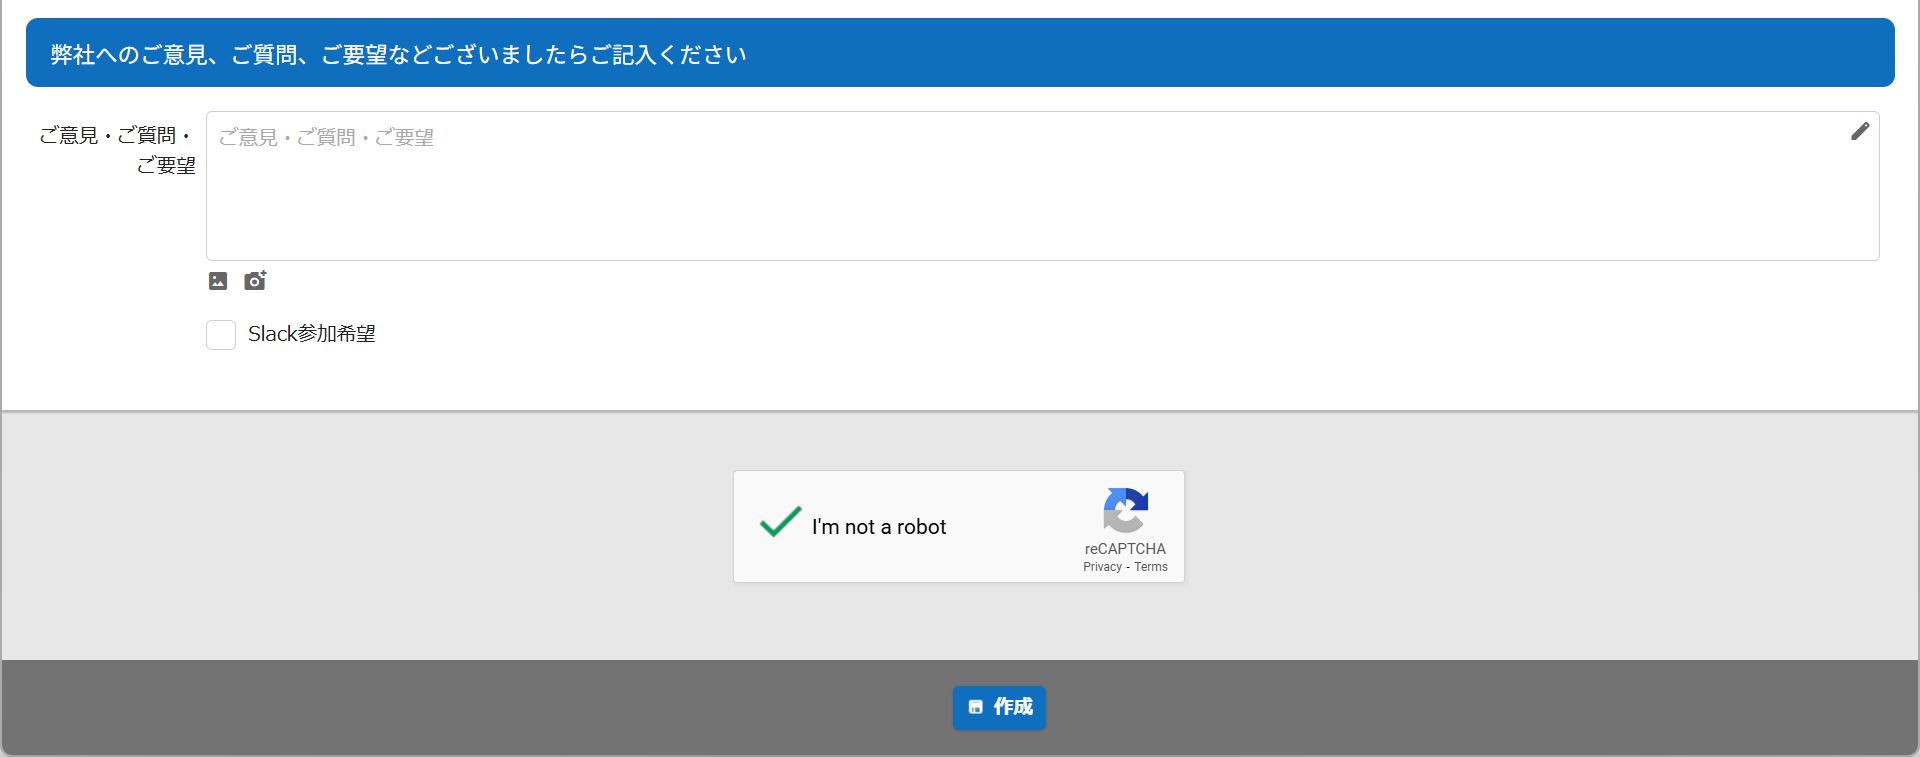
When you open the published address in a web browser, a badge is displayed at the bottom of the page (just before the command button area, centred horizontally). The badge shows links to the privacy policy and the terms of service. Google also discloses matters based on the Act on the Protection of Personal Information and the Telecommunications Business Act for users in Japan. Check this before you run it in production.

When you click the checkbox, the verification runs. When it completes, it is displayed as follows.
5.3. Setting the CSP
To use a CAPTCHA service correctly, you need to set the CSP (Content Security Policy).
Rewrite the directives under the parameter "ContentSecurityPolicy" of the configuration file "Security.json" as follows and save it. After saving it, restart Pleasanter and the change takes effect.
Which directives you should rewrite differs depending on the CAPTCHA service provider (Cloudflare / Google).
For Cloudflare Turnstile, see here
The settings recommended by Cloudflare may change.
Check the official information as well.
    "ContentSecurityPolicy": {
        "Enabled": false,
        "ReportOnlyEnabled": true,
        "Values": [
            {
                "default-src": "'self'",
                "script-src": "'self' 'strict-dynamic' https://challenges.cloudflare.com",
                "script-src-attr": "'self' 'unsafe-inline'",
                "script-src-elem": "",
                "style-src": "'self'",
                "style-src-attr": "'self' 'unsafe-inline'",
                "style-src-elem": "'self' 'unsafe-inline'",
                "img-src": "'self' data:",
                "font-src": "'self' data:",
                "object-src": "'none'",
                "connect-src": "'self'",
                "frame-src": "'self' https://challenges.cloudflare.com",
                "manifest-src": "",
                "media-src": "",
                "worker-src": "",
                "base-uri": "'self'",
                "form-action": "'self'",
                "frame-ancestors": "",
                "report-uri": "/CspReport/Report",
                "report-to": "",
                "sandbox": "",
                "upgrade-insecure-requests": false
            }
        ]
For Google reCAPTCHA (common to v3 and v2), see here
The settings recommended by Google may change.
Check the official information as well.
    "ContentSecurityPolicy": {
        "Enabled": false,
        "ReportOnlyEnabled": true,
        "Values": [
            {
                "default-src": "'self'",
                "script-src": "'self' 'strict-dynamic' https://www.google.com/recaptcha https://www.gstatic.com/recaptcha",
                "script-src-attr": "'self' 'unsafe-inline'",
                "script-src-elem": "",
                "style-src": "'self'",
                "style-src-attr": "'self' 'unsafe-inline'",
                "style-src-elem": "'self' 'unsafe-inline'",
                "img-src": "'self' data:",
                "font-src": "'self' data:",
                "object-src": "'none'",
                "connect-src": "'self' https://www.google.com/recaptcha",
                "frame-src": "'self' https://www.google.com https://www.google.com/recaptcha https://recaptcha.google.com/recaptcha",
                "manifest-src": "",
                "media-src": "",
                "worker-src": "",
                "base-uri": "'self'",
                "form-action": "'self'",
                "frame-ancestors": "",
                "report-uri": "/CspReport/Report",
                "report-to": "",
                "sandbox": "",
                "upgrade-insecure-requests": false
            }
        ]
6. Settings for the Page Transition When an Unauthenticated User Accesses
Pleasanter is designed to move to the login screen when a URL that Pleasanter can interpret is accessed while not logged in to Pleasanter. If this transition is a security concern when you use the Form function, set the value of the parameter "ShowLoginPageOnAuthError" of the configuration file Security.json to false.
| Value | Meaning |
|---|---|
| true | Moves to the login screen. This is the default setting. |
| false | A 404 error occurs. On the destination page, the "Back" button and the link on the logo are not displayed. |
7. Disabling the CAPTCHA Function
When you do not need the CAPTCHA function, for example when you use the Form function inside a company intranet, edit the parameter "CaptchaConfig" of the configuration file "Security.json" as follows.
Also return the CSP settings to what they were.
Related Information
- Manage Table: Form: Basic Settings
- Cloudflare Turnstile
- Google reCAPTCHA v3
- Cloudflare Turnstile (sign up)
- Google reCAPTCHA (admin)
- Disclosure of matters based on the Act on the Protection of Personal Information and the Telecommunications Business Act
- Cloudflare: Content Security Policy
- Google: reCAPTCHA FAQ (Content Security Policy)