Formula
Overview
Set the formula using arithmetic operations and dedicated functions. The formula works when a table is added, changed, or deleted.
When Formulas Run
Formulas run at the following times.
- When the screen is displayed
- When a record is added
- When a record is updated
- When a record is deleted
Calculation Method
You can select the following as the calculation method.

-
Default
Perform arithmetic operations on the numerical value column. Date calculations and function specifications are not possible.
For details, refer to Manage Table: Formula (Default). -
Extension
In addition to the Numerical value column, you can set formulas for class columns, date columns, description columns, and check columns. In addition to arithmetic operations, you can use dedicated functions.
For details, refer to Manage Table: Formula (Extended).
When Conditions Are Met / Not Met
When a table has views, a condition dropdown will be displayed.
If you select a view as a condition, the formula will execute when the view's filter conditions are met, and the "when conditions are not met" case will execute when the view's filter conditions are not satisfied.

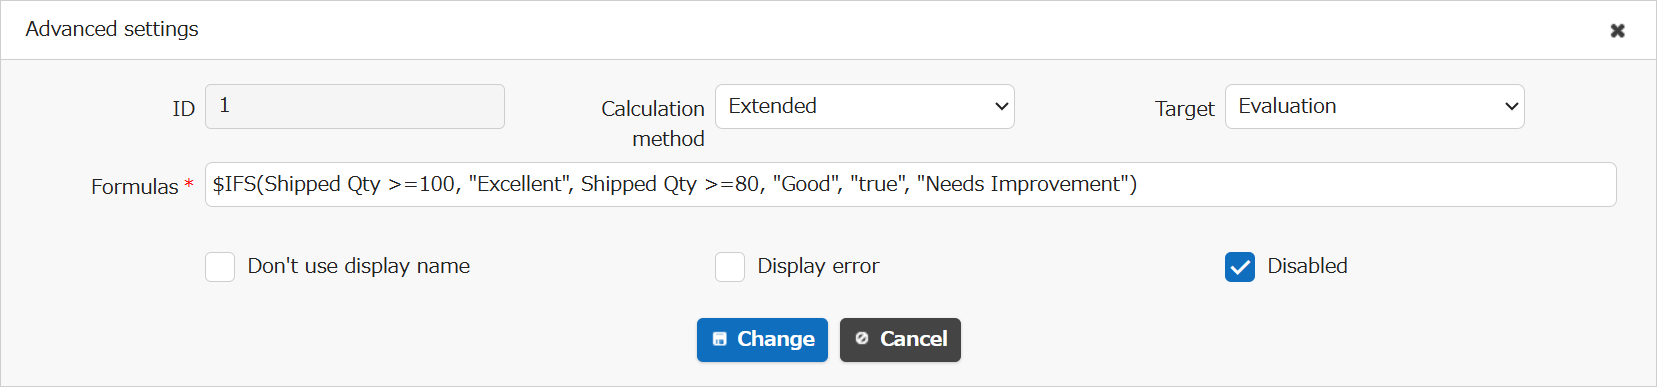
Disabled
You can disable created formulas without deleting them.
Prerequisites
- "Site Administration Permission" is required to configure settings.
Manage Table: Formulas Tab
The "Formulas" tab on the Manage Table screen displays a list of the formulas that have been created and added.
By selecting formulas with the checkboxes at the left edge of the list, you can perform the following operations.
| Button Name | Function |
|---|---|
| Move up | Moves the selected formula up by one. |
| Move down | Moves the selected formula down by one. |
| Copy | Duplicates the selected formula. The duplicated formula is added to the bottom of the list. |
| Delete | Deletes the selected formula from the list. When you click the Delete button, a confirmation dialog is displayed. Clicking the OK button deletes it from the list. |
New
Clicking the "New" button opens the "Advanced settings" screen of the formula, where you can add a formula to the list. For details, refer to the following manuals.
After adding a formula, click the "Update" button in the command button area.
Synchronize
Clicking the "Synchronize" button runs the selected formulas at any time. This is useful in the following cases.
- When a formula that has already been added is updated
- When a formula is added to a table that already contains records
Editing Formulas That Have Been Created and Added
Clicking a row in the list opens the "Advanced settings" screen of the formula, where you can edit the created formula. After editing a formula, click the "Update" button in the command button area.
Output log
When "Output log" is enabled, the formula settings, the values of the columns to be calculated, and the calculation results are output to the developer tools console. Use this when a formula does not work as intended. For details, refer to Output the Log.
Get error details
When "Display error" is enabled in the "Advanced settings" of a formula, Pleasanter outputs error messages to the system log. By enabling "Get error details" in addition to "Display error", you can also check the error messages output to the system log in the "Console" of the developer tools.
Supported Versions
| Supported versions | Body |
|---|---|
| 1.5.1.0 and later | Added "Get error details" |
Related Information
- Numeric Value
- Column Advanced Settings: Name Displayed
- Correspondence of Column name and Name in the system in the Database
- Class
- Date
- Description
- Check
- Logical Expression Used in Formula (Extended) Function
- Formula (Extended) Function List
- Manage Table
- Formulas (Default)
- Formula (Extended)
- Output the Log