Information Disclosure Function
Overview
This function allows users who are not logged in to view Pleasanter tables. The following limitations are added when publishing.
1. Navigation menu cannot be used
1. Cross-search cannot be used
1. Breadcrumb list is not displayed
1. Record operations cannot be performed (new registration, update, deletion, import, export)
1. Change history cannot be viewed
Limitations
- The "Relating Column" function cannot be used when publishing, so please disable the setting. If you publish with the column link function set, the following error message will be displayed.
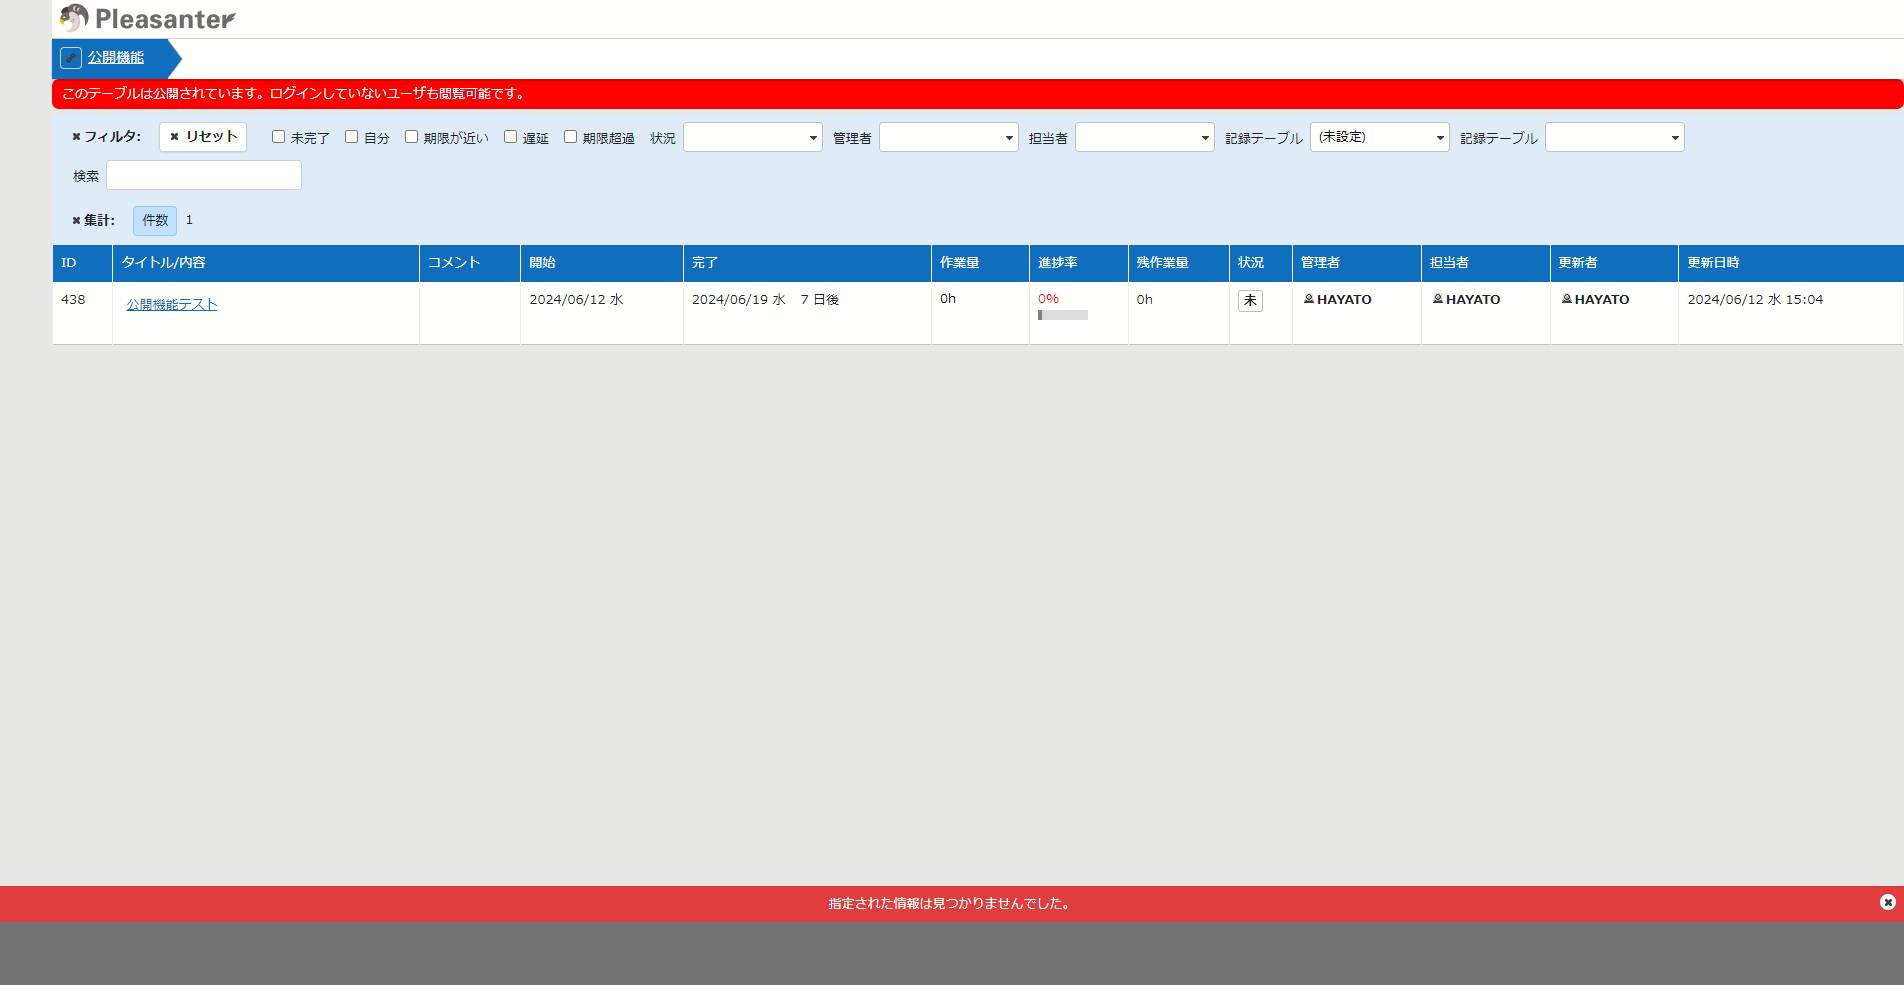
- Information on tables linked to published tables cannot be displayed.
Prerequisites
- If using Pleasanter.net, please subscribe to the optional "Information Disclosure Function" and the Standard Plan.
Information Disclosure Function Setting Method
Set up Pleasanter's information publication function by following the steps below.
1. Enable the information disclosure function for the target tenant
1. Enable the information disclosure function for the target site
1. Enable the information disclosure function for the target tenant
Open SQL Server Management Studio or Azure Data Studio (*1)
Select "Database" → "Implem.Pleasanter" → "Table" → "dbo.Tenants" and click "Edit top 200 rows". Select the row for the relevant site and enter the following in the "ContractSettings" column.
json
(*1) For PostgreSQL, use PgAdmin, etc.
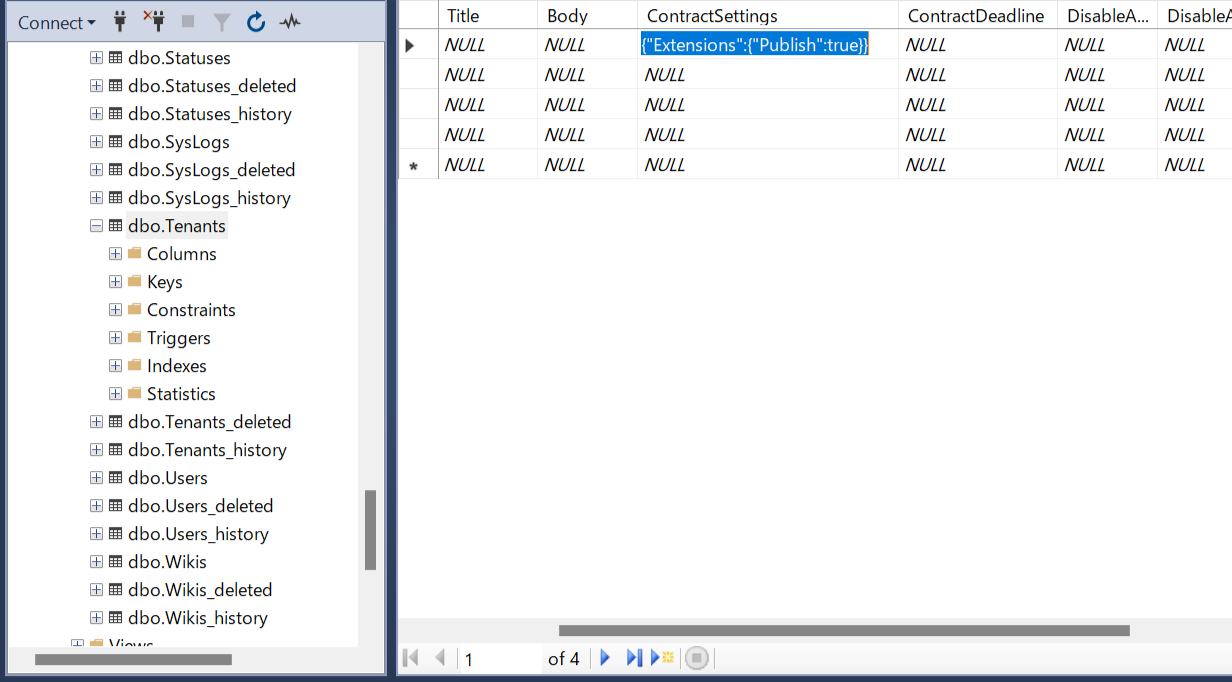
If the target record does not exist
If there is no record in dbo.Tenants, click the update button in the navigation menu "Manage" → "Tenant Management".
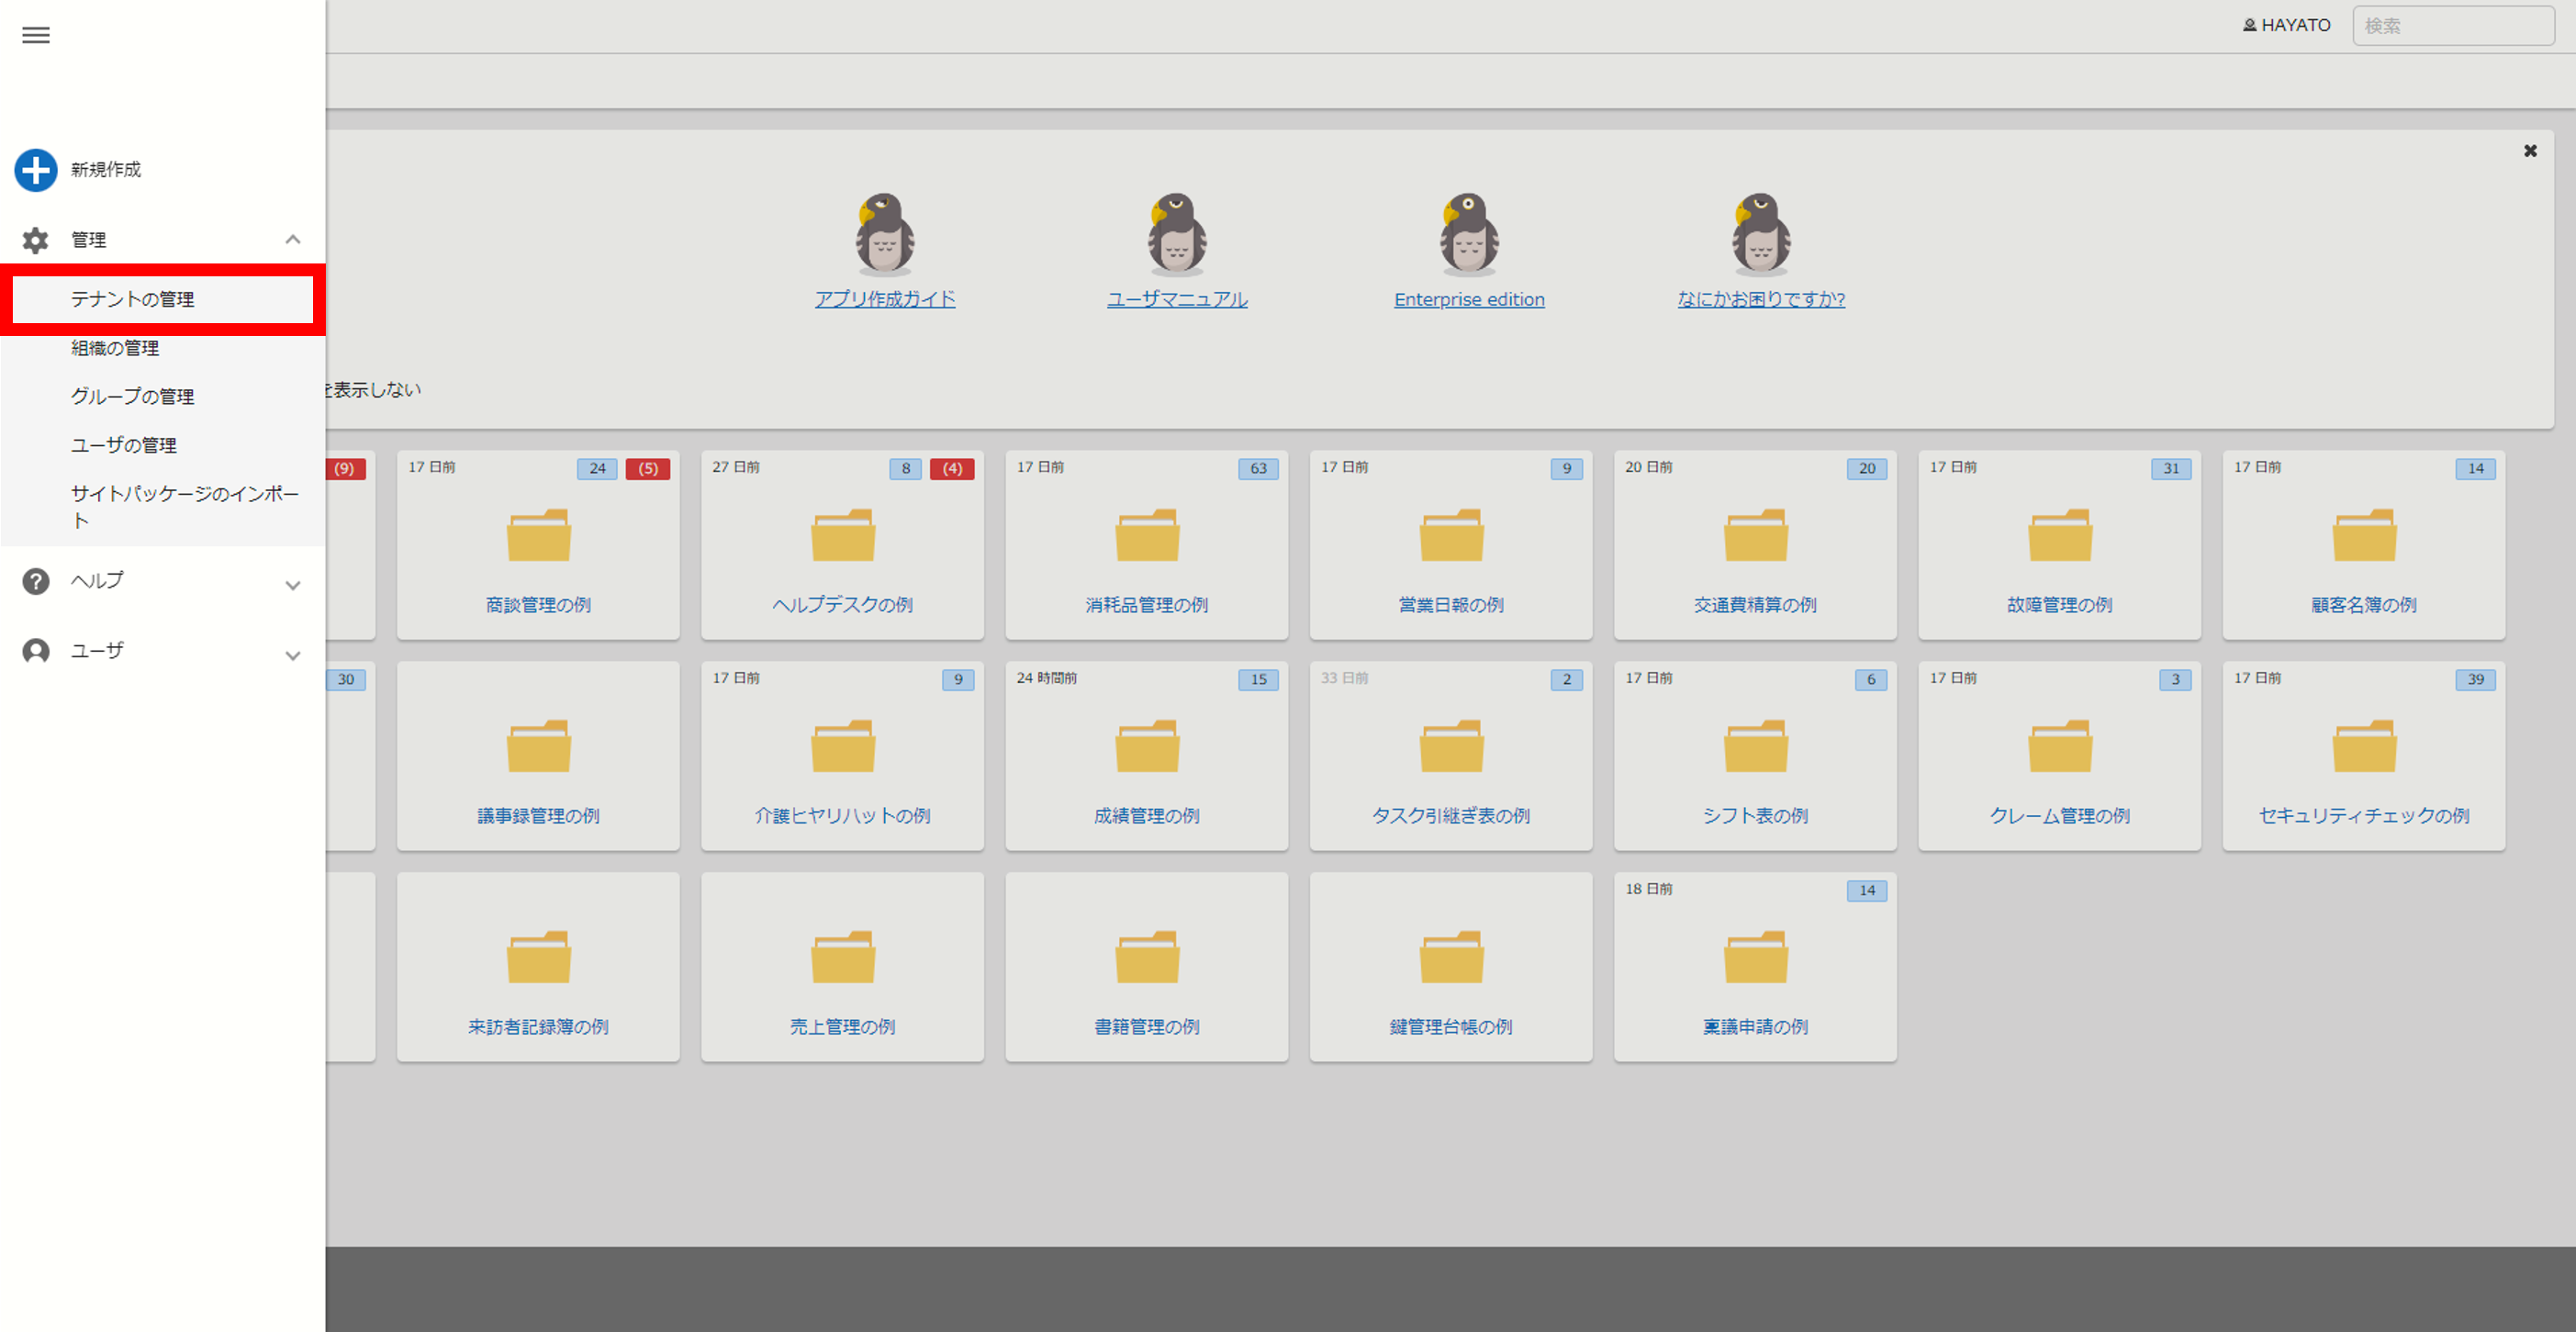
2. Enable the information disclosure function for the target site
Open the table you want to make public and open the Manage Table screen. Click the "Public" tab in the red frame below and check "Publish to anonymous users".
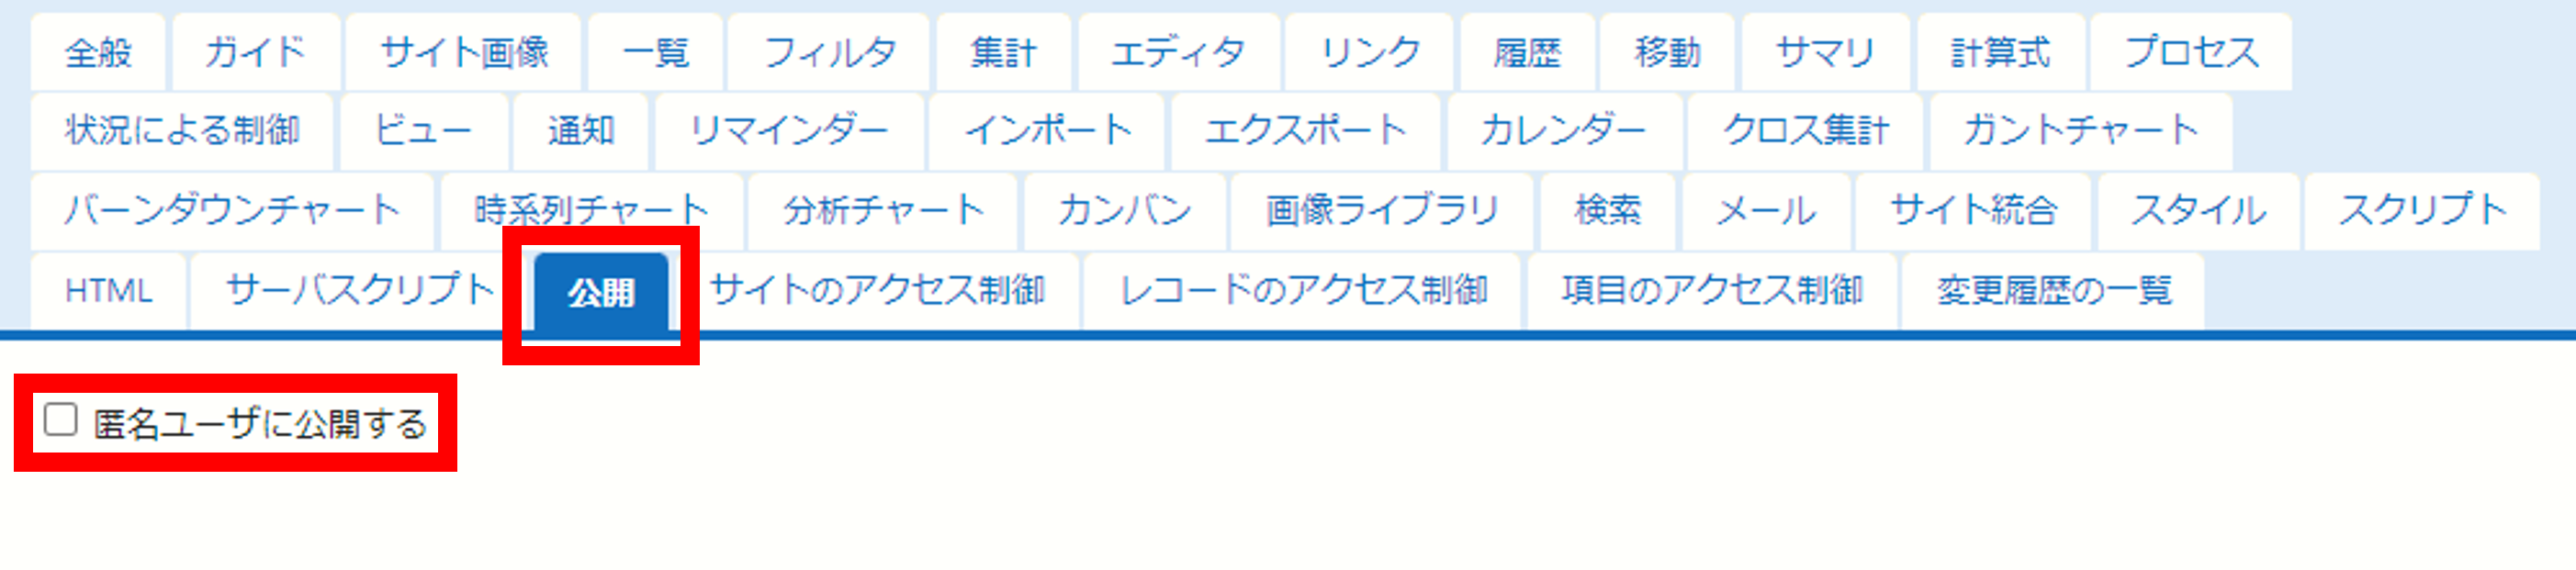
Display the Published Table
Access the published table with the following URL.
https://servername/publishes/xxx/index
*xxx is the site ID of the published table.
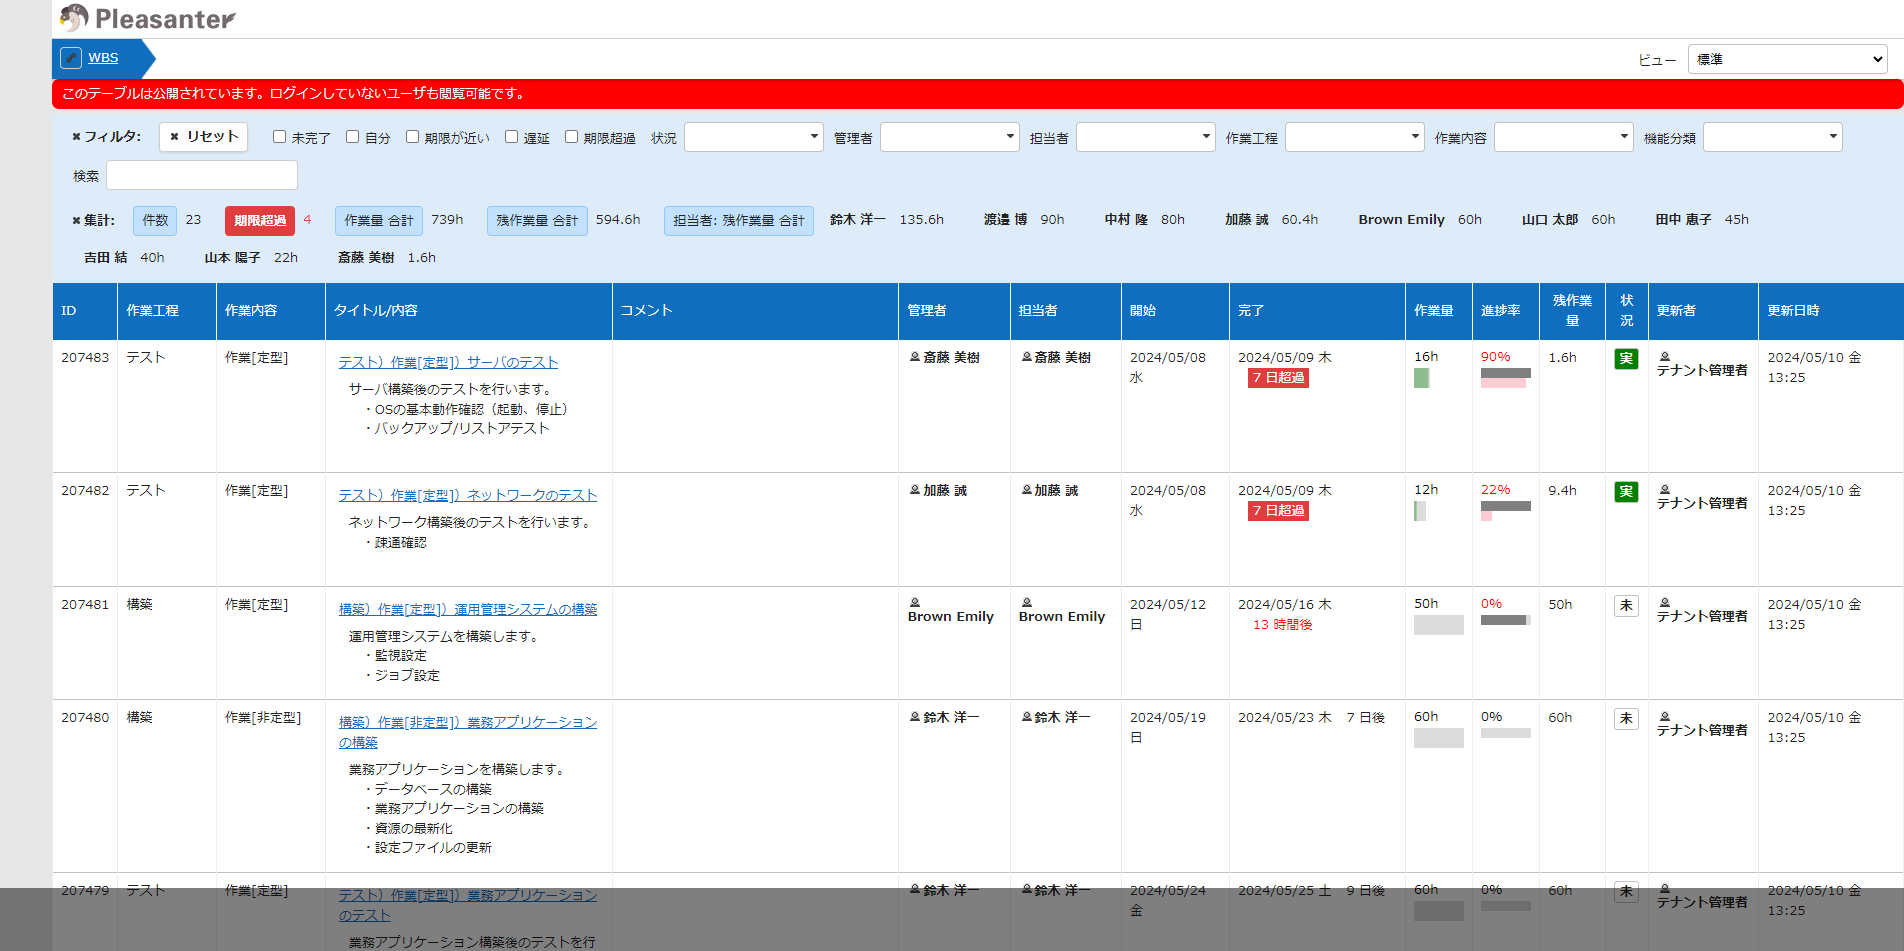
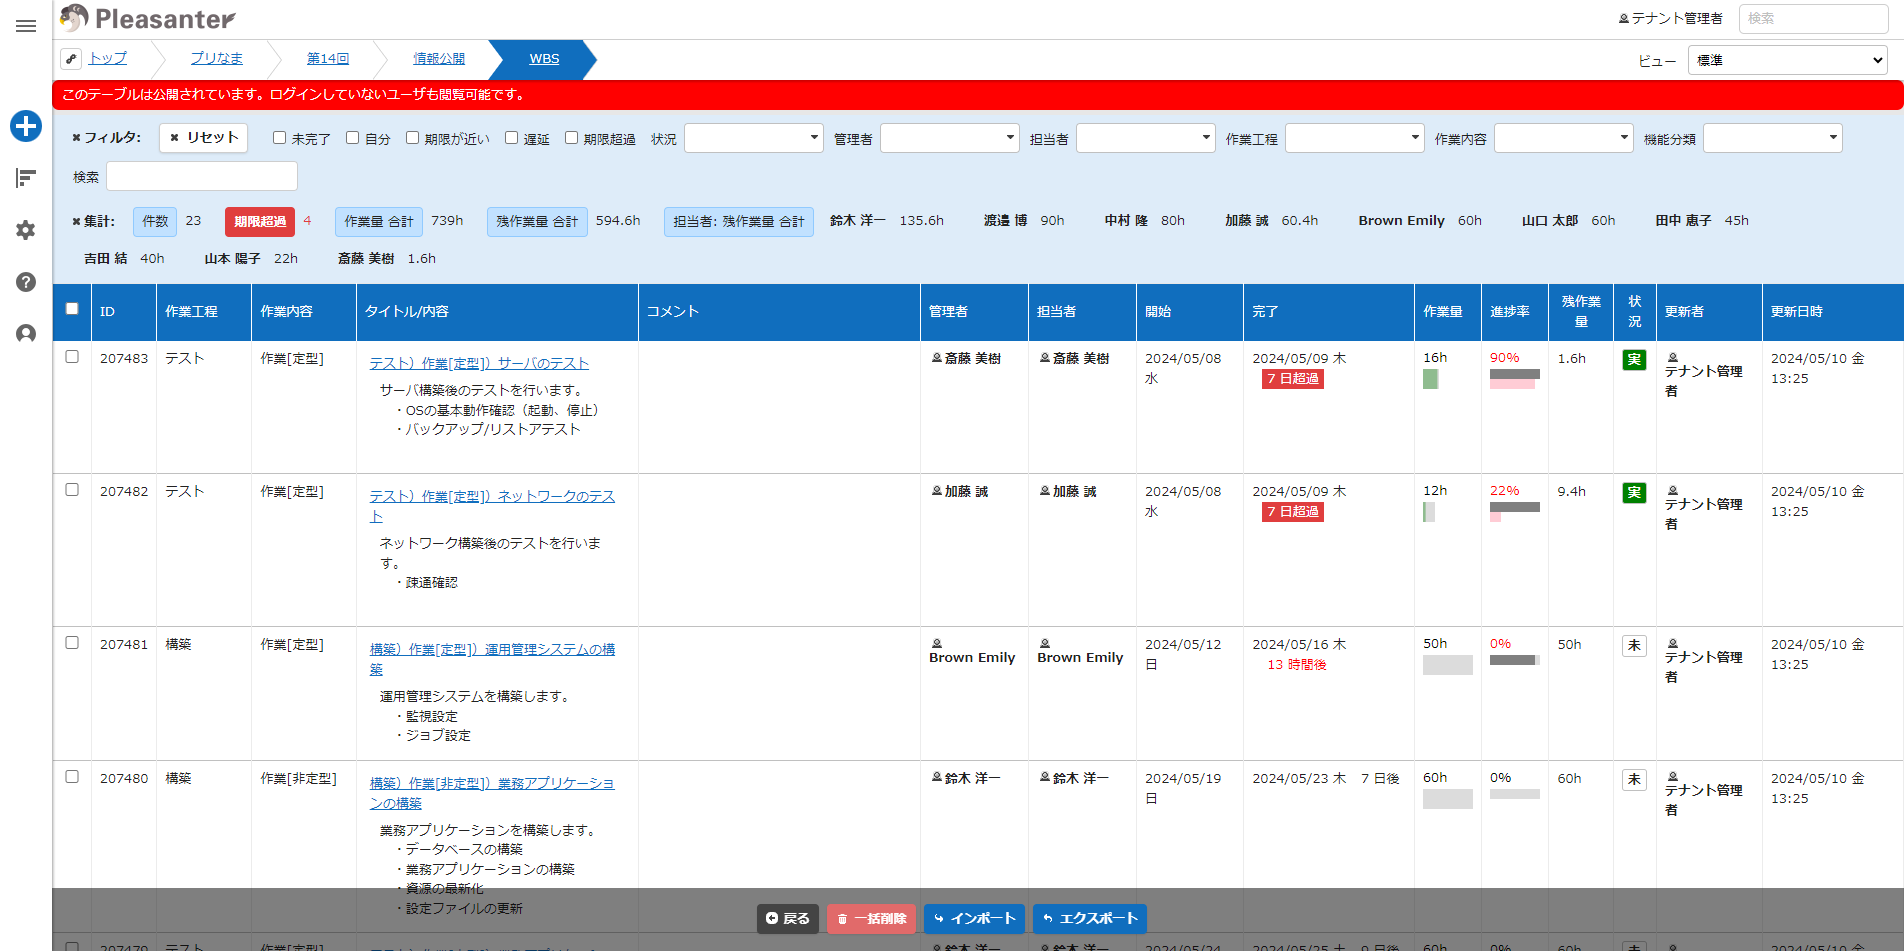
Every time you click the red bar on the screen, it will switch between public and private, and part of the URL address will also change, as shown in the example below.
E.g. : Published: https://servername/publishes/xxx/index
E.g. : Unpublished: https://servername/items/xxx/index
Published
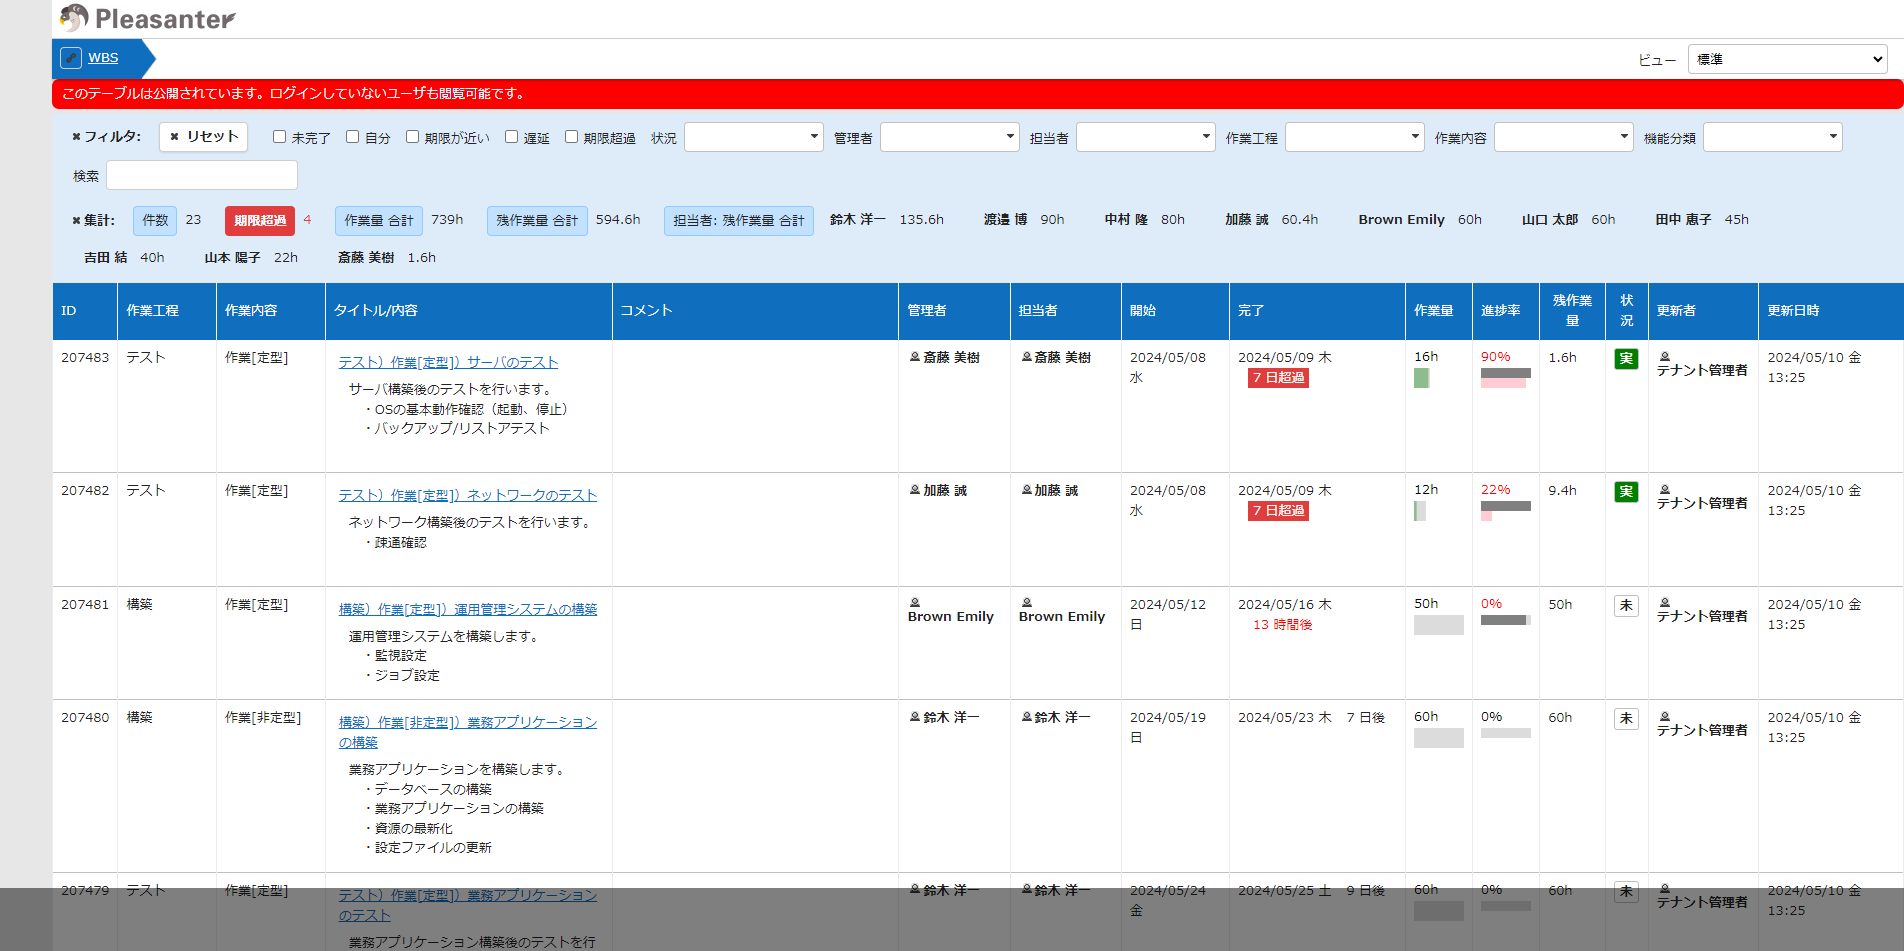
Unpublished
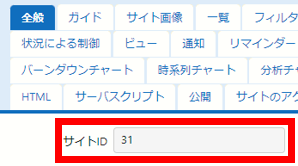
How to Check the Site ID
Open the table to be published, open "Manage" → "Manage Table" in the navigation menu, and check "Site ID" in the "General" tab.
You can also check the site ID in the browser address bar when the table to be published is open.
