Job Management Screen


(This feature can be tried with the Pleasanter Extensions Trial.)
Overview
The "Job Management Screen" displays a list of the jobs registered in the queue and lets you perform various operations on them. Each job registered in the queue is given an ID, and jobs are run in order, starting with the job registered first.
Prerequisites
- Set the BackgroundQueue parameter in BackgroundJobs.json to true to enable queuing.
Operation Procedure
Perform an operation that supports queuing, such as "Export" of records. The job is queued, and the message "Background Jobs has been registered. (ID:n)" (where n is the job ID) is displayed above the command button area.
1. Viewing
- Select "Background Jobs" in the navigation menu, or click the job ID in the message.
- The job management screen opens, and the jobs registered in the queue are displayed in ascending order of "Job Enqueued Time".
- As on the record "Index" screen, you can narrow down the display with filters and sort it.
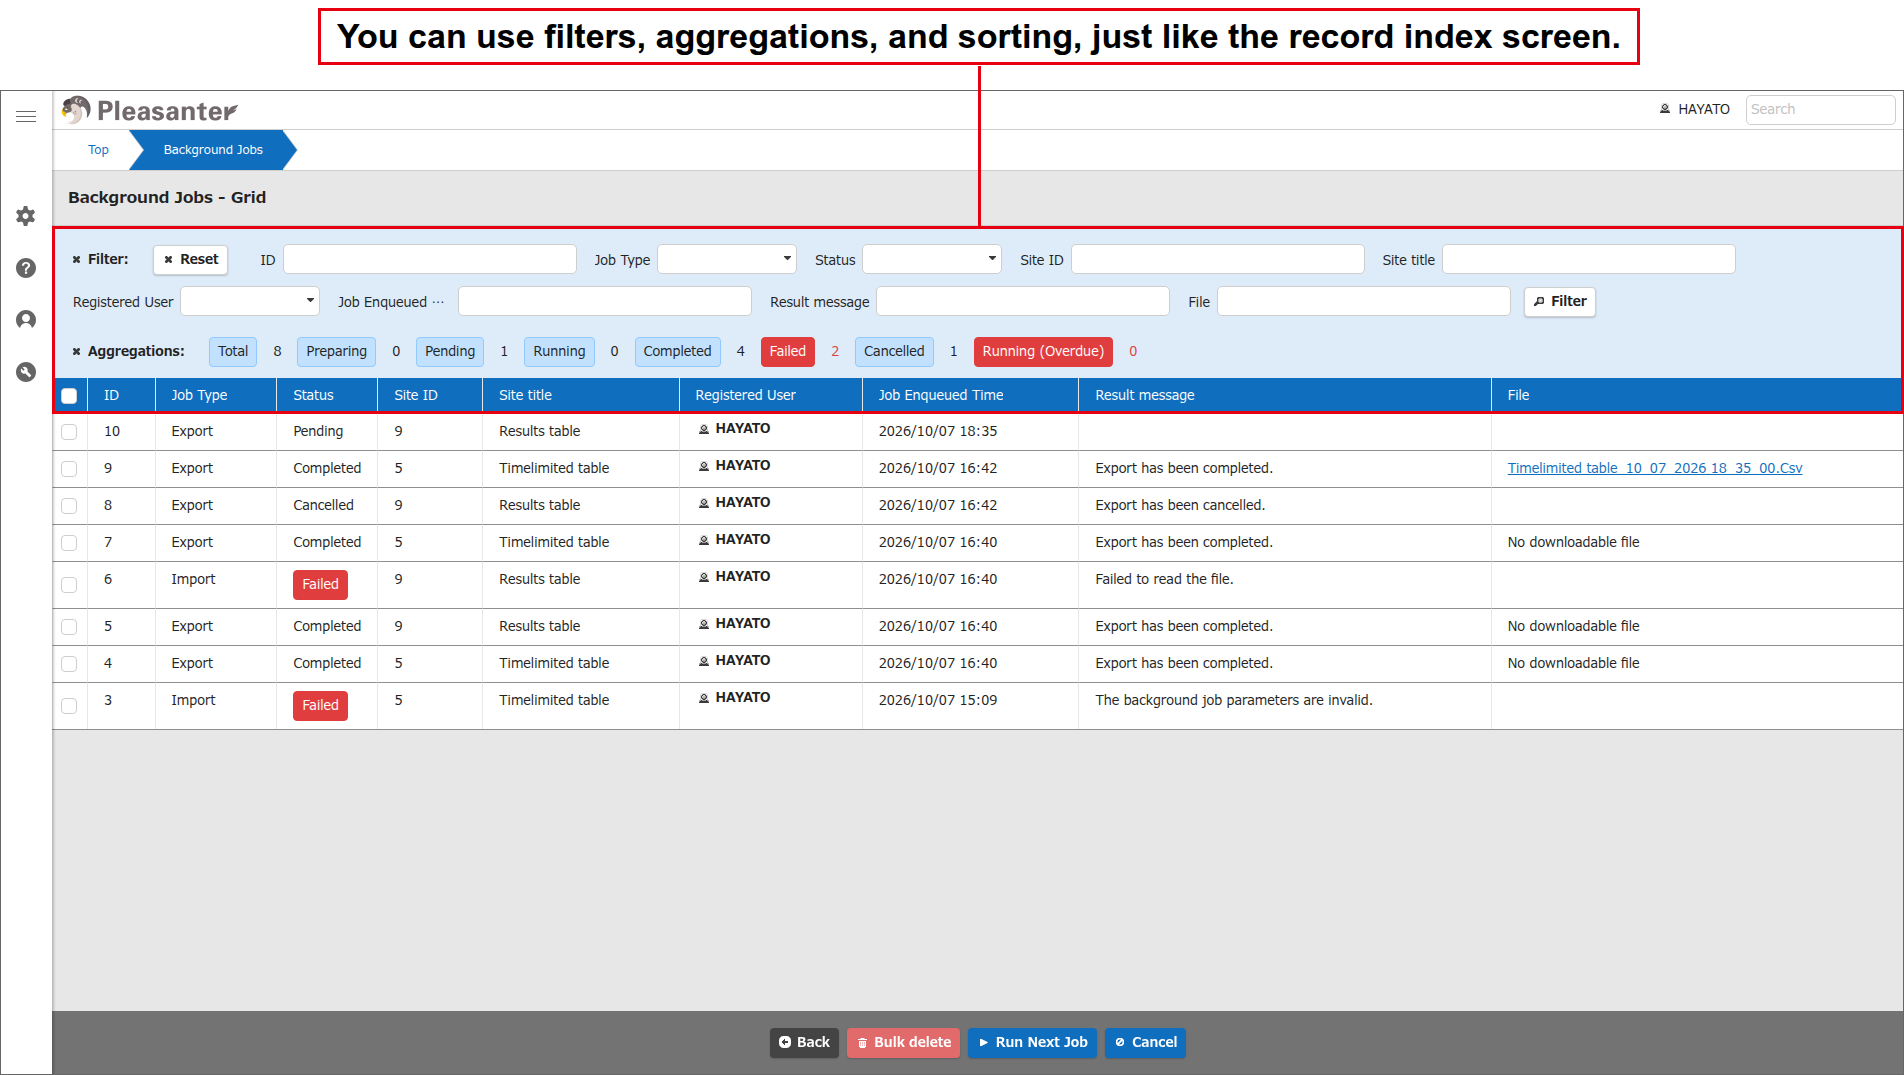
| Column name | Description |
|---|---|
| ID | Displays the number unique to the job. |
| Job Type | Displays the type of processing managed by the queue among the operations on the screen. For the supported job types, see "Supported Job Types" in Queuing. |
| Status | Displays the status of the job at the time the job management screen was opened. |
| Site ID | Displays the ID of the site (table) on which the operation managed by the queue was performed. |
| Site title | Displays the title of the site on which the operation managed by the queue was performed. |
| Registered User | Displays the user name of the user who registered the job. |
| Job Enqueued Time | Displays the date and time when the job was registered in the queue. |
| Result message | Displays the content described in "Result Messages" below, according to the status of the job. |
| File | For jobs that output a file when completed, displays a download link to the output file. If the output file has been deleted while the job record remains, "No downloadable file" is displayed. |
Result Messages
The following information is displayed in the result message.
- "{Job type}" is replaced with the display name of the job type, such as "Export".
| Result message | When it is displayed |
|---|---|
| {Job type} has been cancelled. | When the job is cancelled |
| {Job type} has been completed. | When the job has finished running |
| The service restarted while the job was running. Marked as failed to prevent automatic re-execution. | When Pleasanter restarted while the job was running and the job was marked as failed |
| The default job execution time has been exceeded. Please click the "Run Next Job" button if necessary. | When the run time of the job exceeds the threshold set in the parameters. See "Handling Long-Running Jobs" in Queuing. |
| The background {Job type} failed. | When the job ends in an error, such as an export error |
2. Downloading
When a background job "Completed", for job types such as export, the output file is saved in the specified folder. When saving is complete, a link to the output file is generated in the "File" column. Click the link to download the output file.
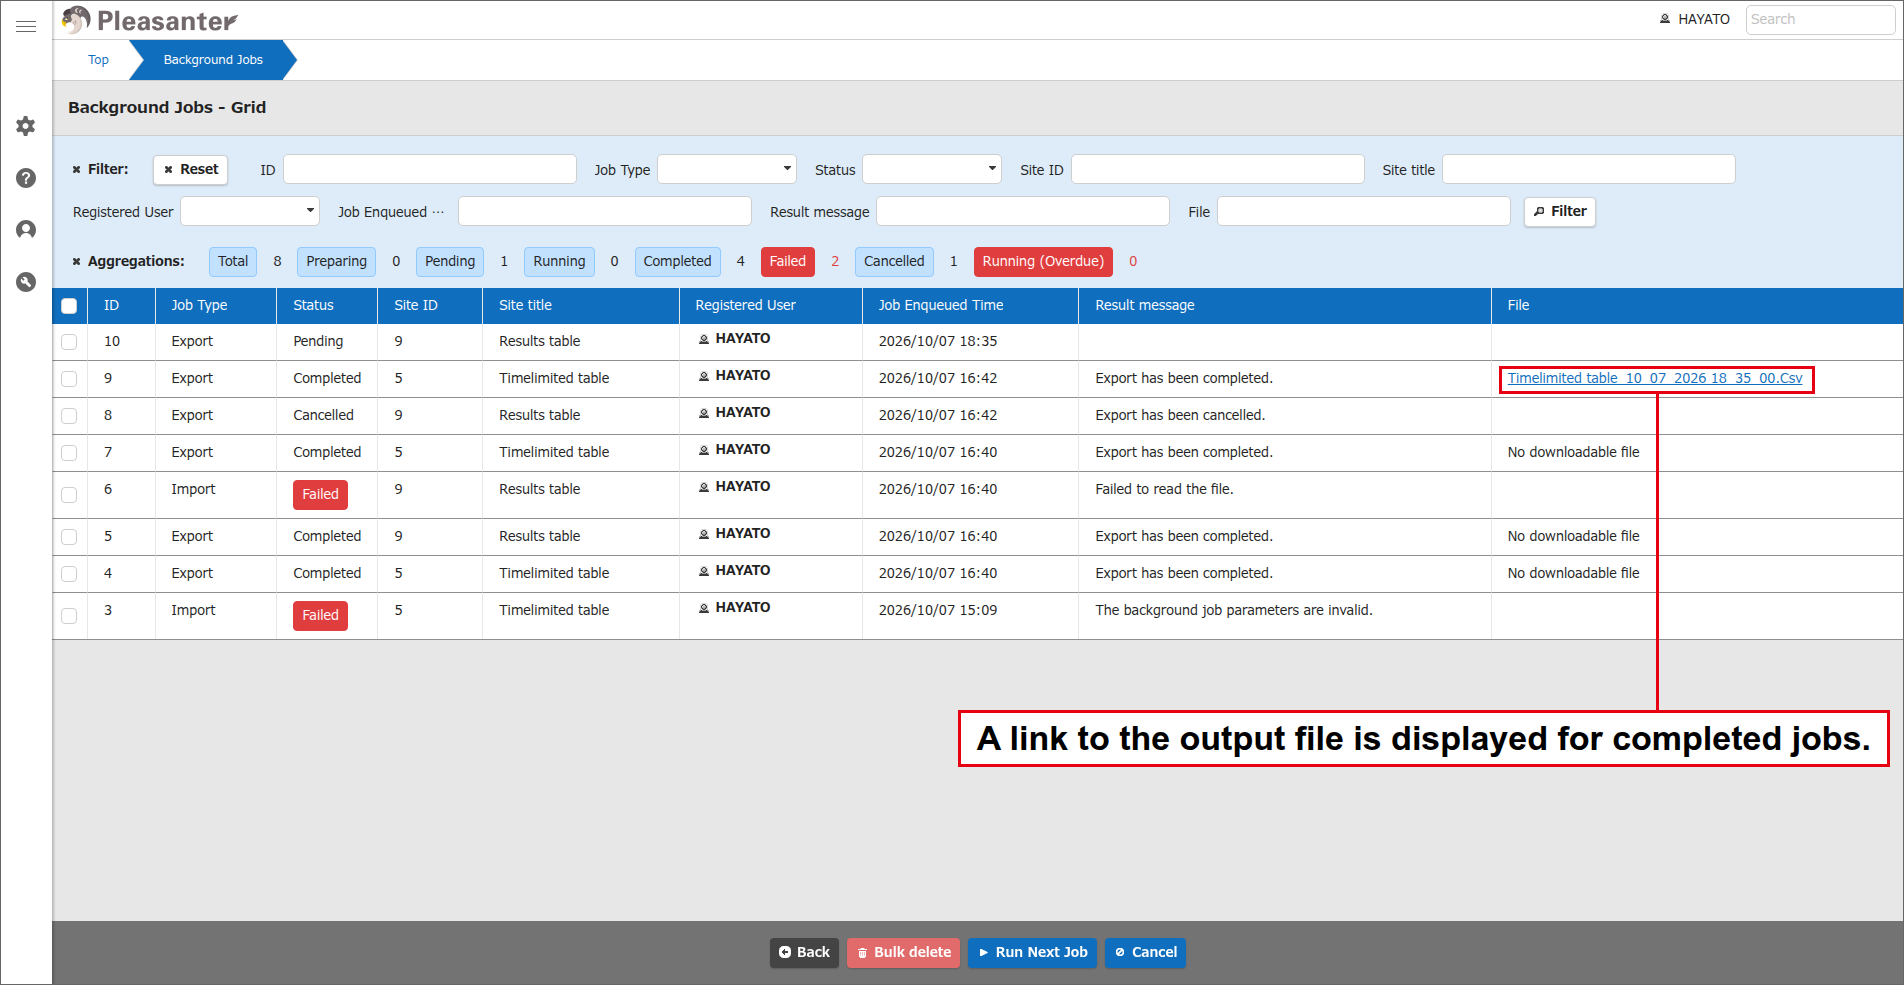
If no downloadable file can be found even though the "Status" is "Completed", "No downloadable file" is displayed.
The folder where output files are saved is specified with the OutputFilePath parameter in BackgroundJobs.json.
3. Cancelling
You can cancel background jobs whose "Status" is "Pending". "Running" background jobs cannot be cancelled.
- Click the check box on the left of the screen to select the background jobs to cancel.
- Click the "Cancel" button in the command button area.
- The selected background jobs are cancelled.
4. Deleting
You can delete background jobs whose "Status" is anything other than "Running". For background jobs that generate an output file, such as "Export", the output file is deleted at the same time as the background job.
- Click the check box on the left of the screen to select the background jobs to delete.
- Click the "Bulk delete" button in the command button area.
- The selected background jobs are deleted.
You can also delete old background jobs that have passed the retention period automatically by setting the following parameters in BackgroundService.json.
- DeleteBackgroundJobs
- DeleteBackgroundJobsTime
- BackgroundJobsRetentionPeriod
5. Updating the Information
To update the display, reload the screen.
6. Details Screen
Click a record to open the details screen of the background job.
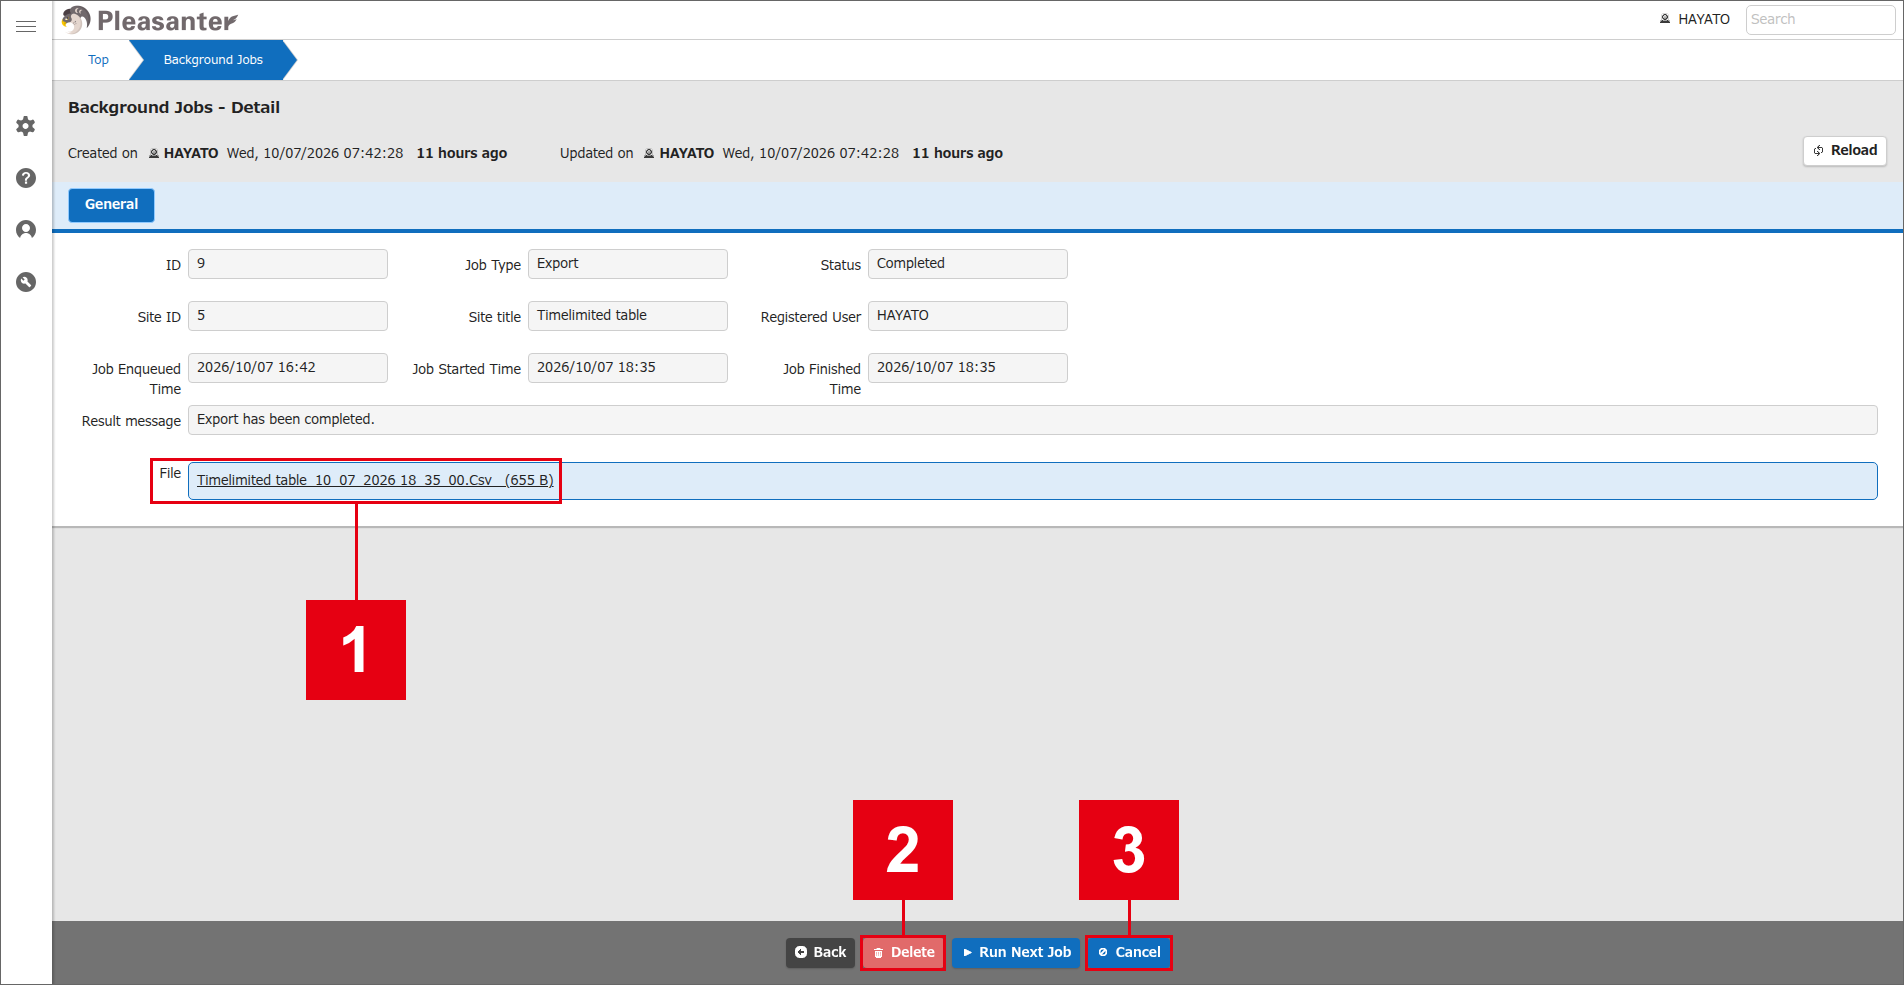
The following operations can be performed on the details screen.
| No | Operation |
|---|---|
| 1 | Download the output file |
| 2 | Delete the displayed job |
| 3 | Cancel the displayed job |
Supported Versions
| Supported versions | Body |
|---|---|
| 1.5.6.0 and later | Added the feature |
| 1.5.7.0 and later | Added "Import" to the supported job types |
| 1.5.8.0 and later | Added "AI Connect" to the supported job types |
| 1.5.9.0 and later | Added "Bulk delete" to the supported job types |