Install MySQL (Windows OS)
This page is part of the setup procedure for Pleasanter, a free, open-source no-code/low-code development tool.
This is the procedure for installing MySQL on Windows OS.
Cautions
- MySQL is supported from version 1.4.9.0 or later. Versions of Pleasanter before 1.4.9.0 do not support MySQL.
Microsoft Visual C++ Download the redistributable package
- Access the following URL.
https://learn.microsoft.com/en-us/cpp/windows/latest-supported-vc-redist?view=msvc-170 - Click on the latest supported x64 version fixed link and download the installer.

Microsoft Visual C++ Installation of the redistributable package
- Run the downloaded file and install the latest Microsoft Visual C++ Redistributable package.
Download MySQL
- Access the following URL.
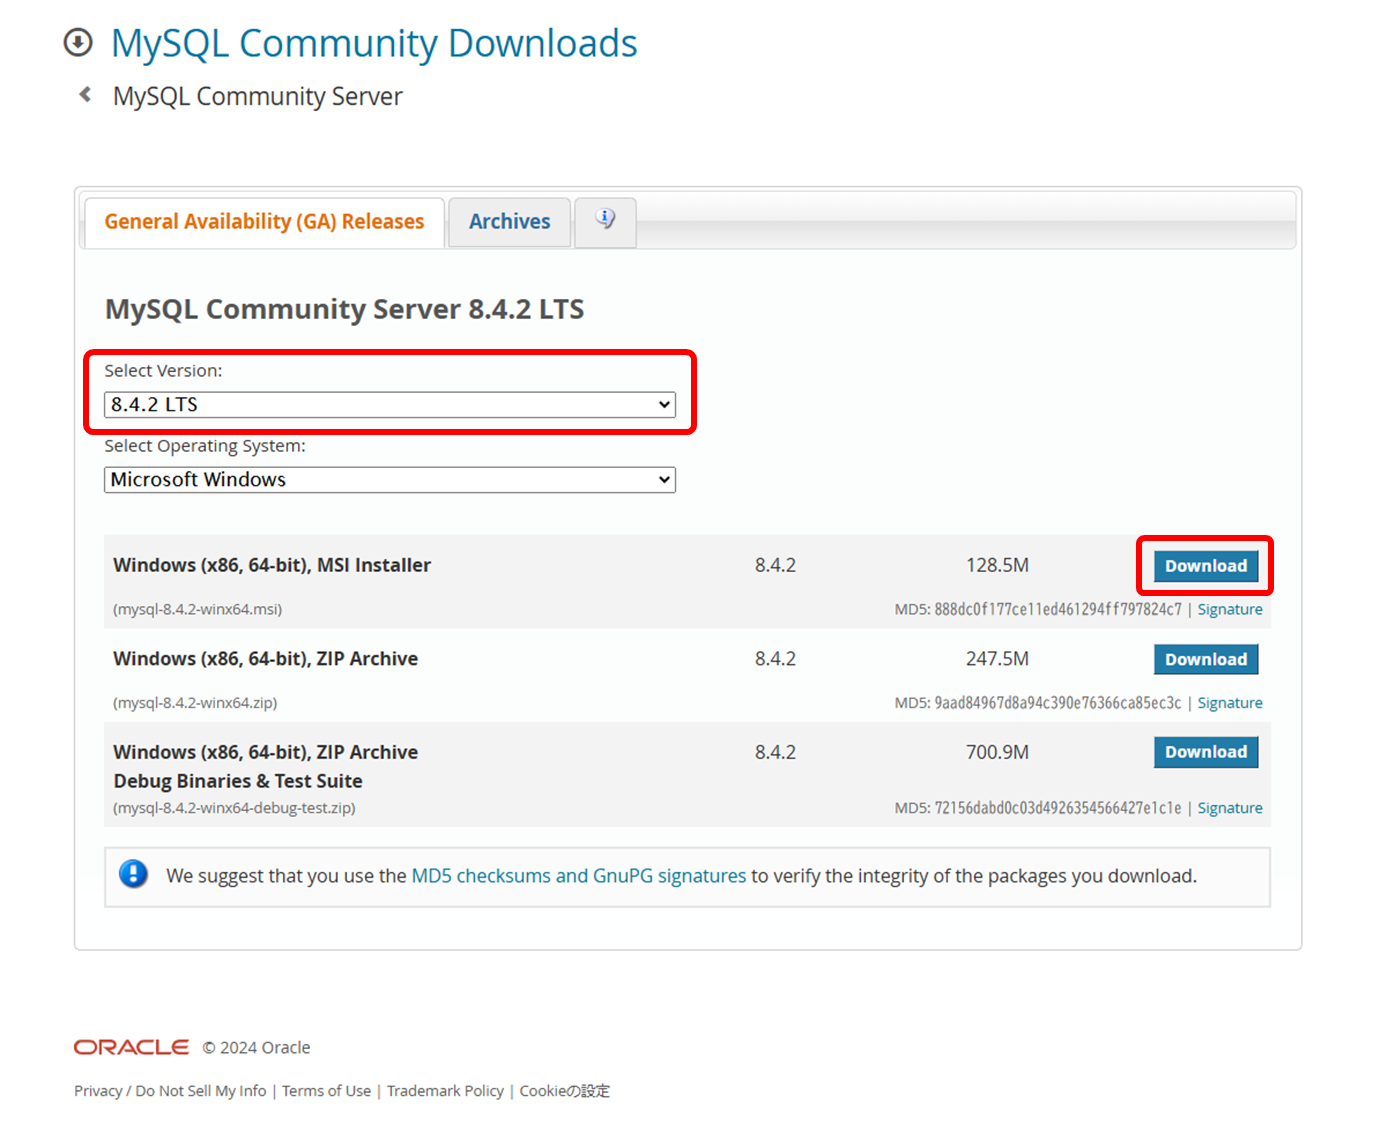
https://dev.mysql.com/downloads/mysql/ - Select version "8.4.x LTS"
- Click the "Download" button in the "Windows (x86, 64-bit), MSI Installer" row.
- Click the "No thanks, just start my download." link to download the installer.

MySQL Installation
- Run the downloaded file.
- Click the "Next" button.

- Check "I accept the terms in the License Agreement" and click the "Next" button.

- Click the "Custom" button.

- Change the installation directory as needed and click the "Next" button. (If there are no special requirements, simply click the "Next" button.)

- Click the "Install" button.

- Check "Run MySQL Configurator" and click the "Finish" button.

- Confirm that the MySQL Configurator is running and click the "Next >" button.

- Change the MySQL data directory location as necessary and click the "Next >" button. (If there are no special requirements, simply click the "Next >" button.)

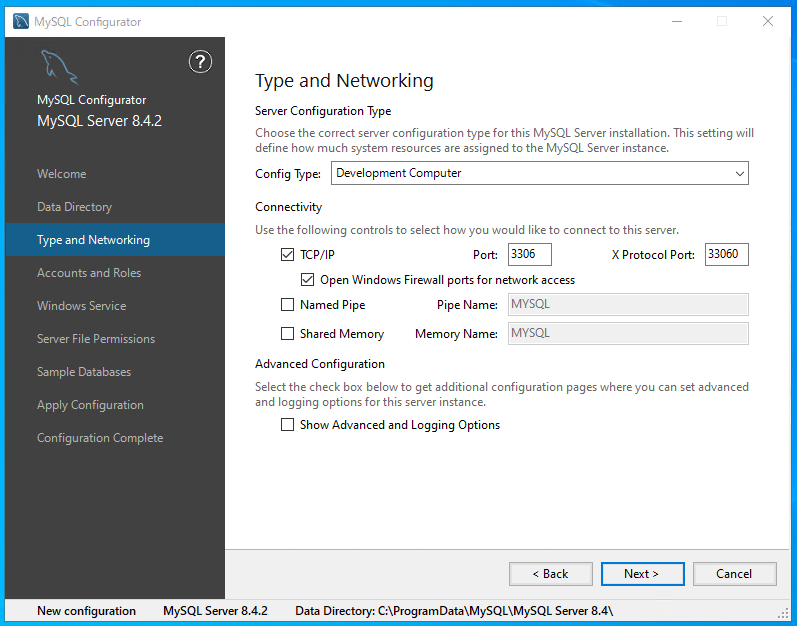
- Modify the Config Type, Connectivity, and Advanced Configuration as necessary, then click the "Next >" button. (If there are no special requirements, simply click the "Next >" button.)
- Enter the root user password and click the 'Next >' button. The password you enter here will be used in the connection string settings of 'Rds.json', so make sure to note it down.

- Change the Windows Service Name and Run Windows Service as... as needed, and click the 'Next >' button. (If there are no special requirements, simply click the 'Next >' button.)

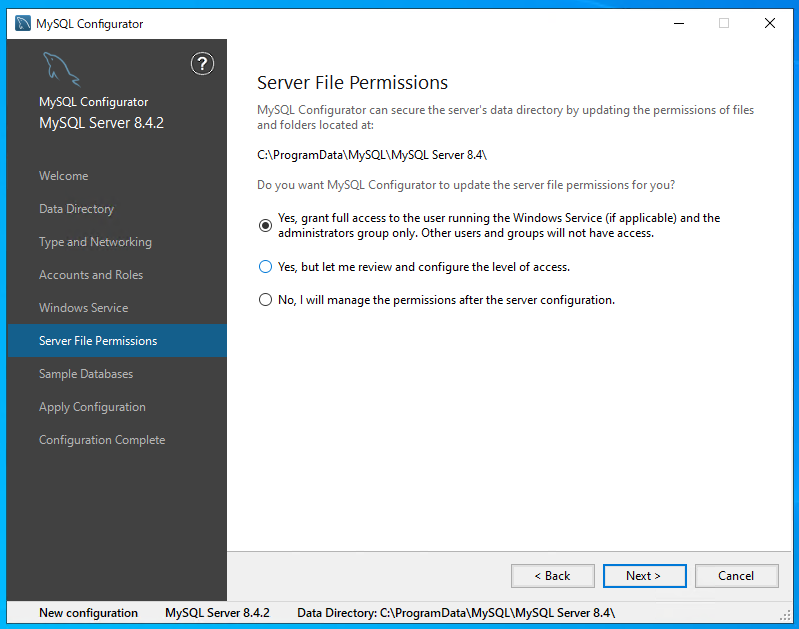
- Change the access rights of the MySQL data files as needed, and click the "Next >" button. (If there are no special requirements, simply click the "Next >" button.)
- Change whether to create the sample database as needed, and click the "Next >" button. (If there are no special requirements, simply click the "Next >" button.)

- Click the "Execute" button.

- Wait until the installation is complete, then click the "Next >" button once finished.

- Click the "Finish" button to complete this procedure.

Supported Versions
| Supported Version | Body |
|---|---|
| 1.4.9.0 or later | New documentation created to support MySQL |
When you have finished, install Pleasanter. Next step: Install Pleasanter