Install and Configure SQL Server 2017 Express
This page is part of the setup procedure for Pleasanter, a free, open-source no-code/low-code development tool.
Limitations
SQL Server 2017 Express with Advanced Services is limited to a maximum database size of 10 GB. If you want to use more than 10GB, you need to migrate to a higher edition or Microsoft Azure.
Download SQL Server 2017 Express with Advanced Services
-
Access the following URL and click the "Download" button.
https://www.microsoft.com/en-us/download/details.aspx?id=55994 -
The file download is complete, click the "Run (R)" button.
-
When the message "Do you want to allow the following program to make changes to this computer?" is displayed, click the "Yes (Y)" button.
-
Click "Download Media (D)".

-
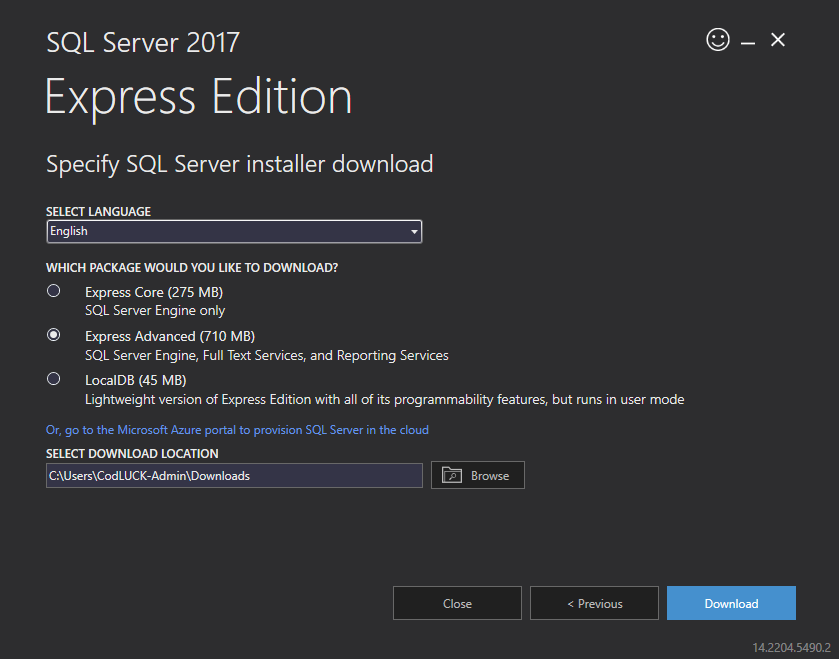
Check "Express Advanced" and click the "Download (D)" button.
-
Wait until the download is complete.

-
When the "Download successful" message is displayed, click the "Open Folder" button.

Install SQL Server 2017 Express with Advanced Services
-
Double-click "SQLEXPRADV_x64_ENU".

-
The "Choose Directory For Extracted Files" dialog will appear, so click the "OK" button.

-
Wait until preparation for extraction is complete.

-
Click "New SQL Server stand-alone installation or add features to an existing installation".

-
Check "I accept the license terms (A)" and click the "Next (N)>" button.

-
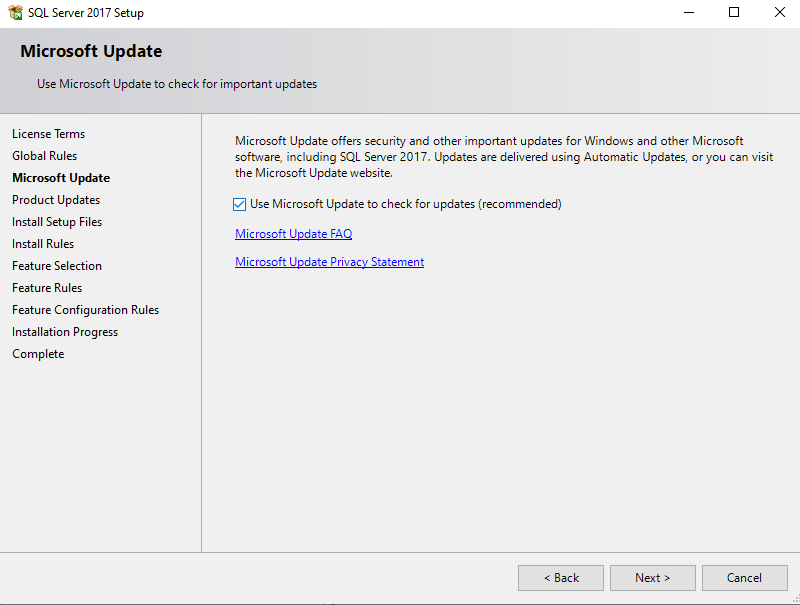
Check "Use Microsoft Update to check for updates (Recommended) (M)" and click the "Next (N)>" button.
-
Click "Next (N)>" on the "Install Rules" screen.

-
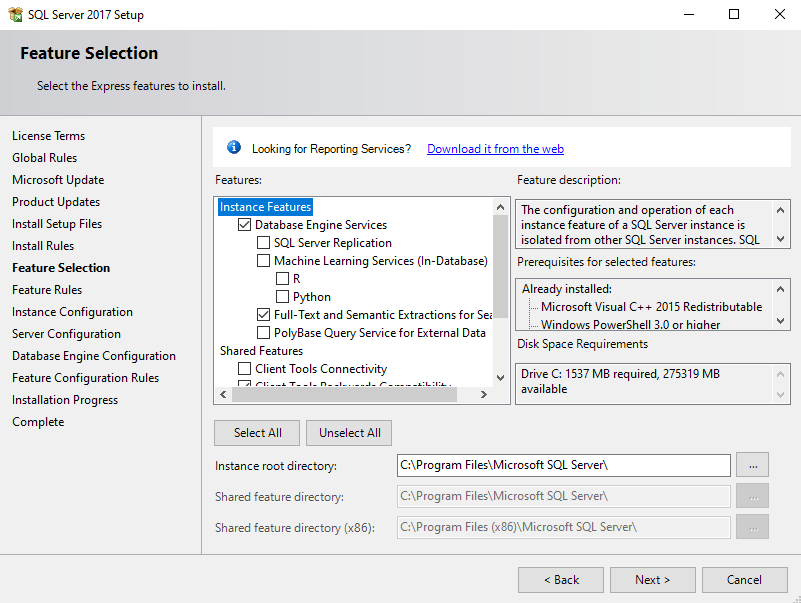
Check only "Database Engine Services" and "Full-text and Semantic Extractions for Search" and click the "Next (N)>" button.
-
Check "Default Instance (D)" and click the "Next (N)>" button.

-
Click the "Next (N)>" button.

-
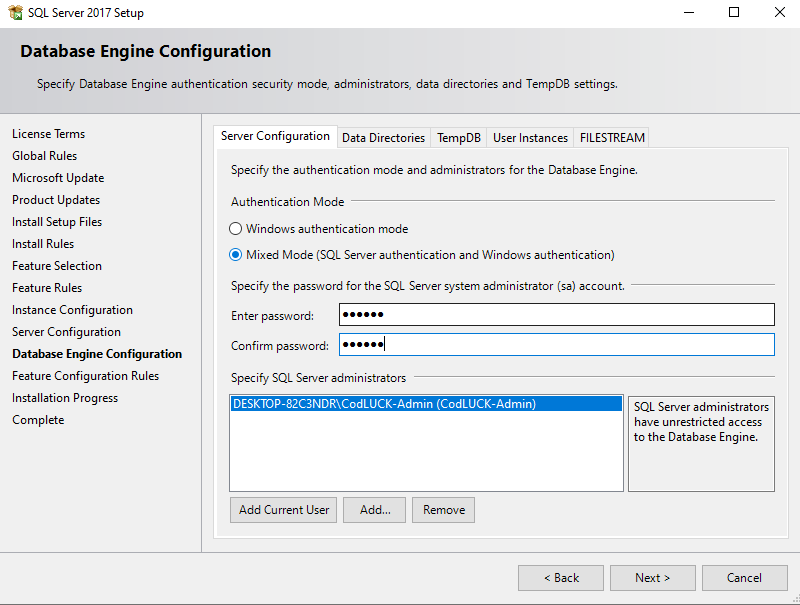
Check "Mixed Mode (SQL Server Authentication and Windows Authentication) (M)" and set a password of your choice. Please note the password you set as it will be used in "Install Pleasanter". Then click the "Next (N)>" button.
-
Wait until the installation is complete.

*Error: 1638 occurs, uninstall Microsoft Visual C++ 2017 and install SQL Server again.
- Confirm that the installation has been completed and click the "Close" button.

Set SQL Server 2017 Express with Advanced Services
-
Click the Start button, and launch "Microsoft SQL Server 2017" - "SQL Server 2017 Configuration Manager".
-
In the left pane, select "SQL Server Network Configuration" - "Protocols for MSSQLSERVER". Then, right-click "TCP/IP" in the right pane and click "Enable (E)".

-
In the left pane, select "SQL Server Services". Then, in the right pane, select "SQL Server (MSSQLSERVER)" and click "Restart (T)".

-
The reboot is complete, this procedure is complete.
When you have finished, install Pleasanter. Next step: Install Pleasanter