Enable Windows Features (Windows Server 2016)
This page is part of the setup procedure for Pleasanter, a free, open-source no-code/low-code development tool.
Enable Windows Features
-
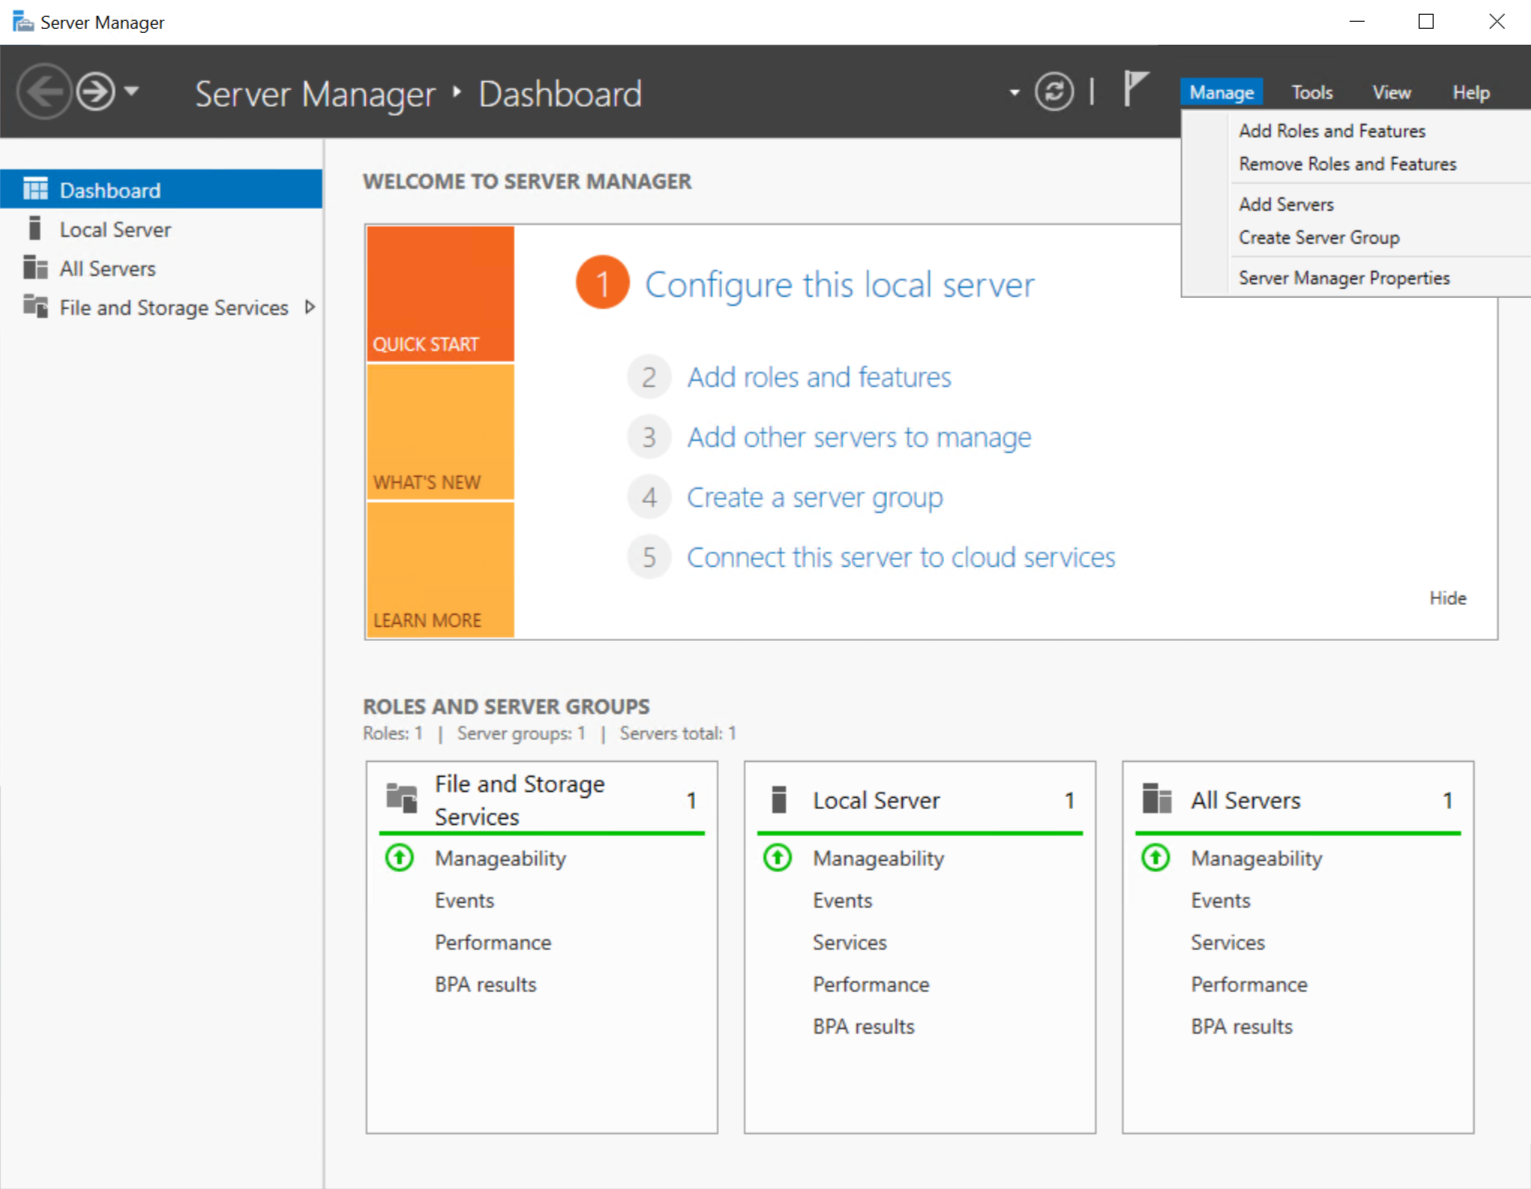
Start "Server Manager".
-
Open the "Management (M)" menu and click "Add Roles and Features".
-
The "Before you begin" screen will be displayed, so click the "Next (N)" button.

-
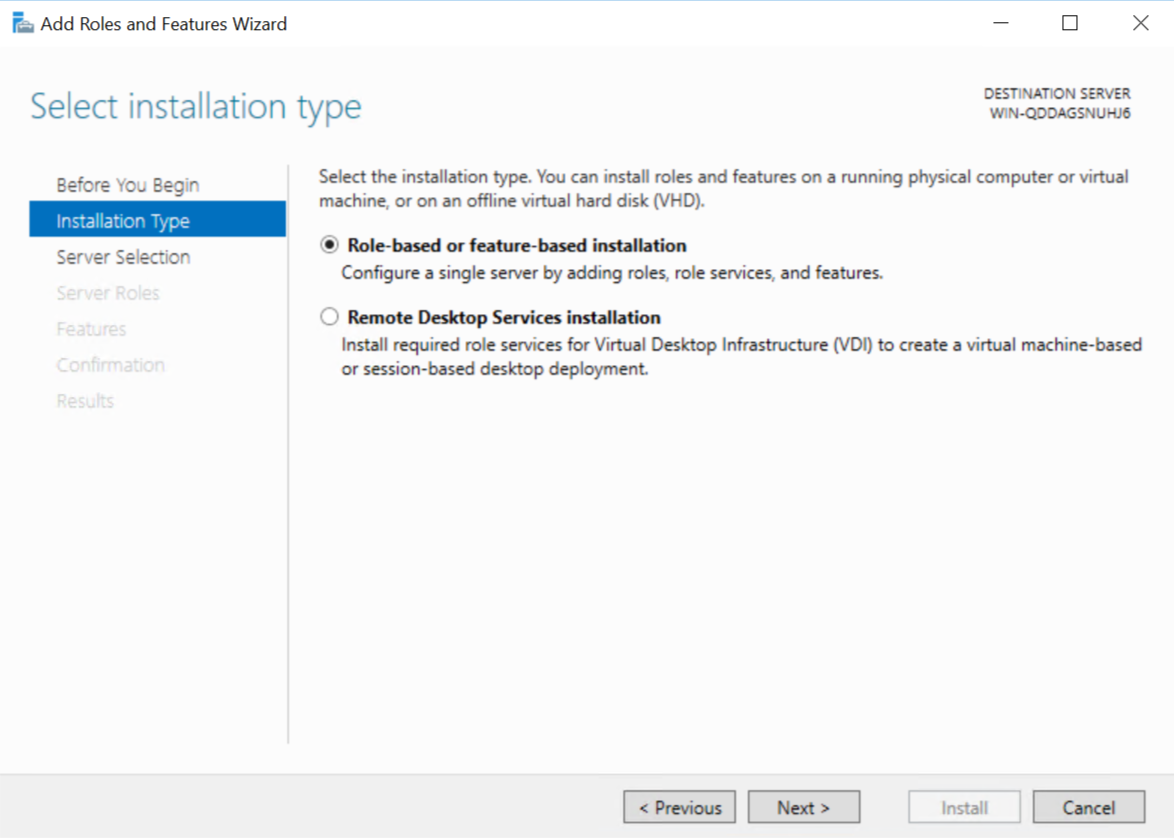
The "Select Installation Type" screen will be displayed, so click the "Next (N)" button.
-
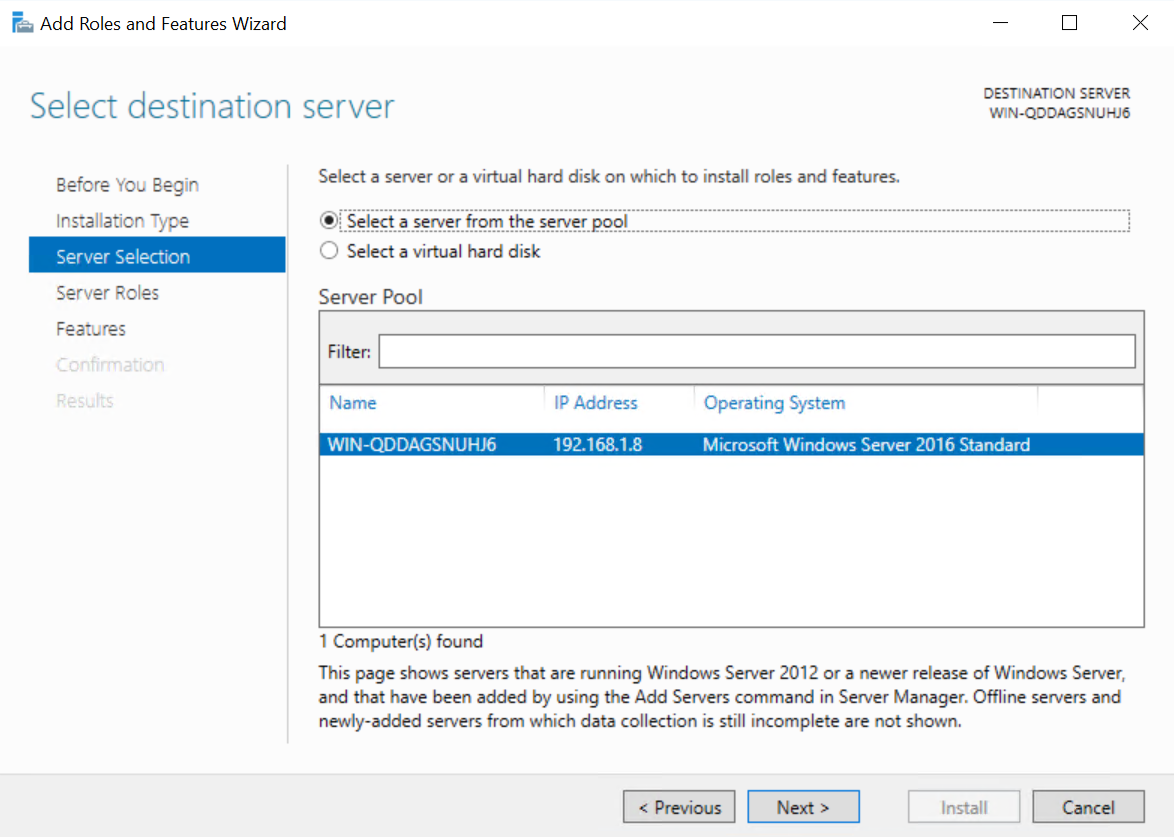
The "Select Server" screen will be displayed, so select the target server and click the "Next (N)" button.
-
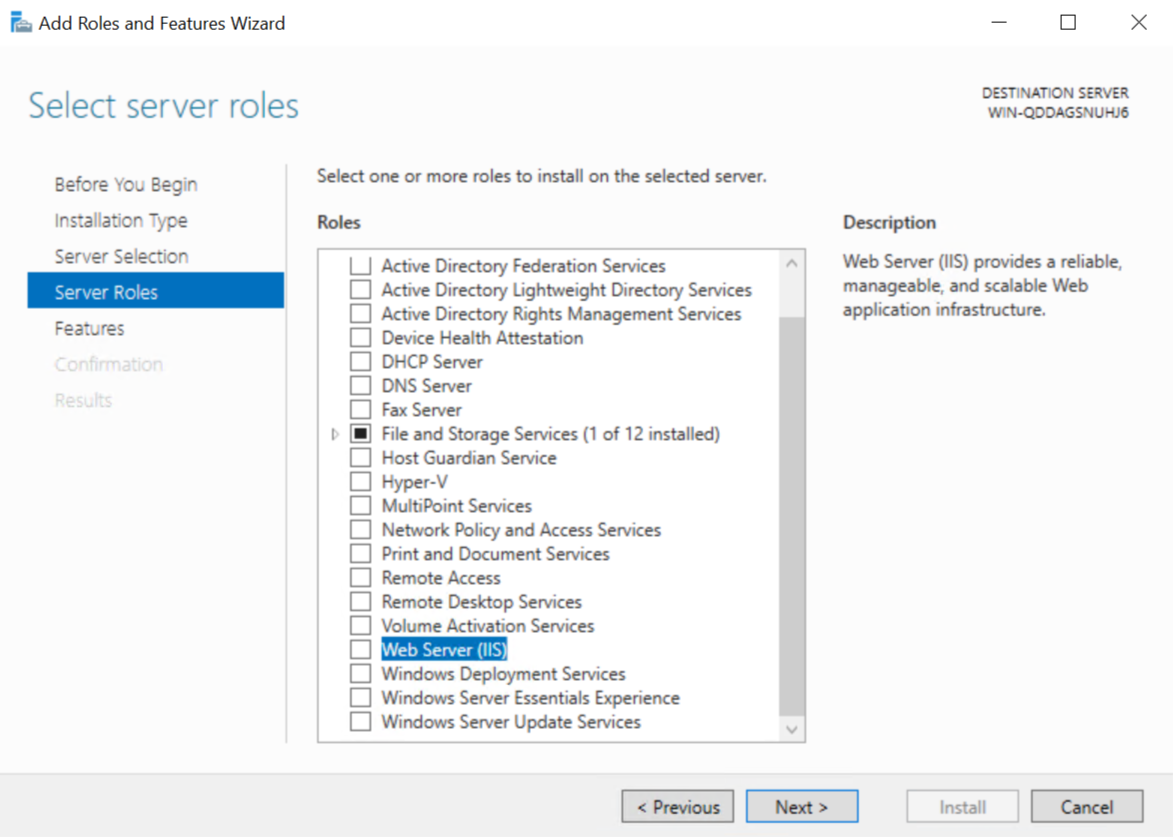
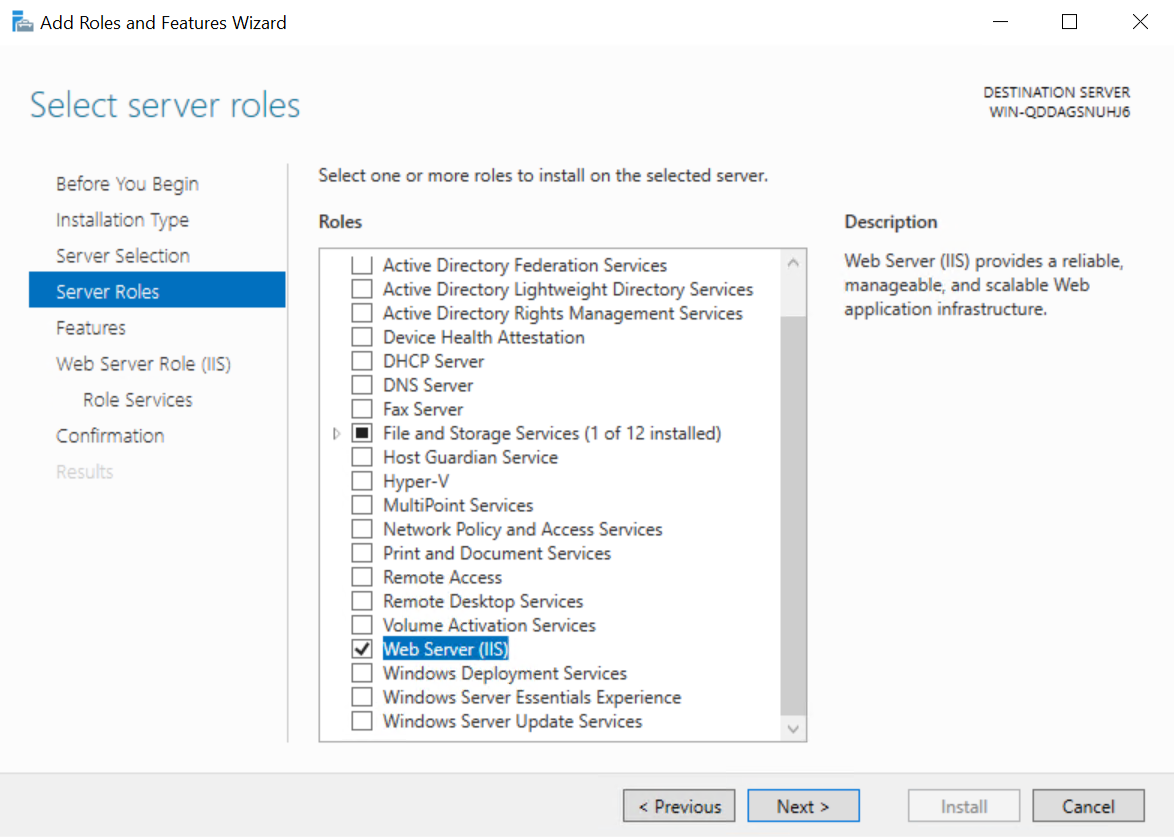
The "Select Server Role" screen will be displayed, so check "Web Server (IIS)".
-
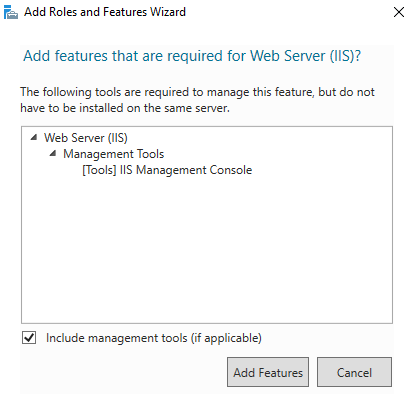
The "Do you want to add required features to the Web Server (IIS)?" screen will be displayed, so check "Include management tools (if present)" and click the "Add Features" button.
-
Confirm that "Web Server (IIS)" is checked and click the "Next (N)" button.
-
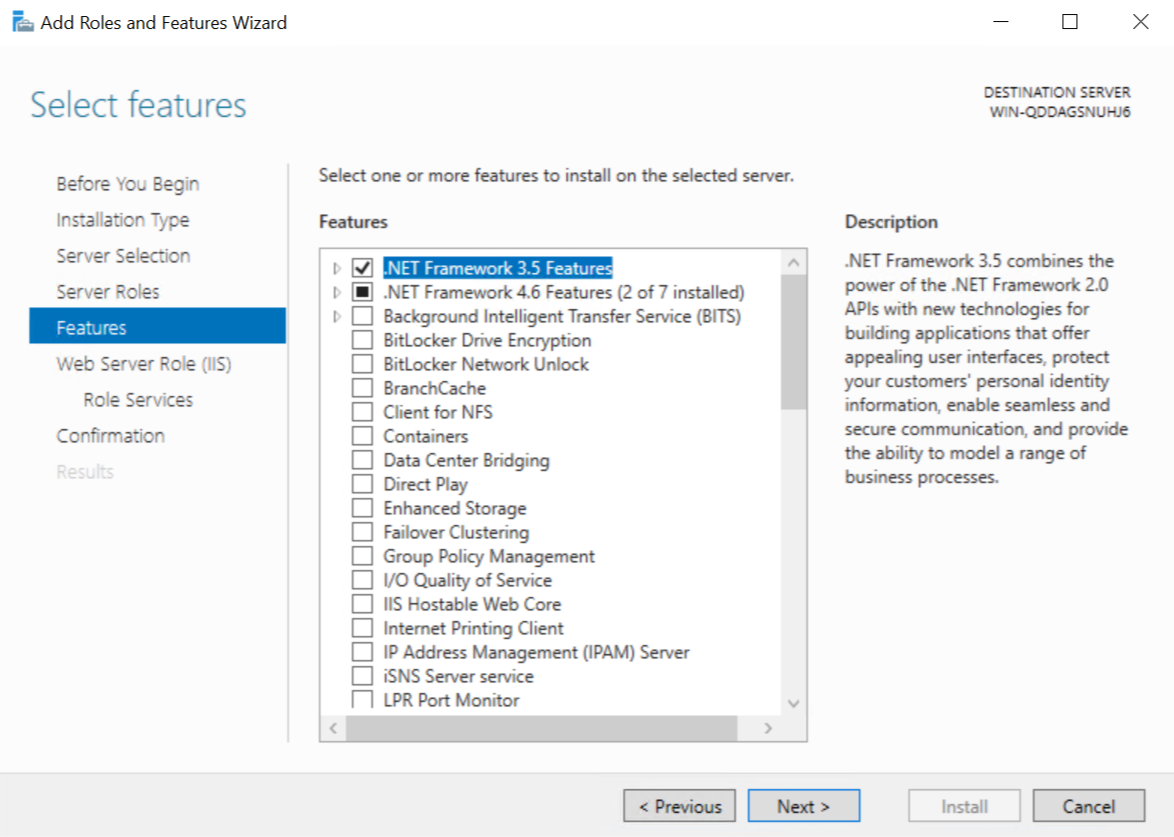
The "Select Features" screen will be displayed, so check ".NET Framework 3.5 Features" and click the "Next (N)" button.
Suppose the error "The request to add or remove features on the specified server failed" occurs. In that case, you may continue the installation normally by leaving ".NET Framework 3.5 Features" unchecked (unchecked).
-
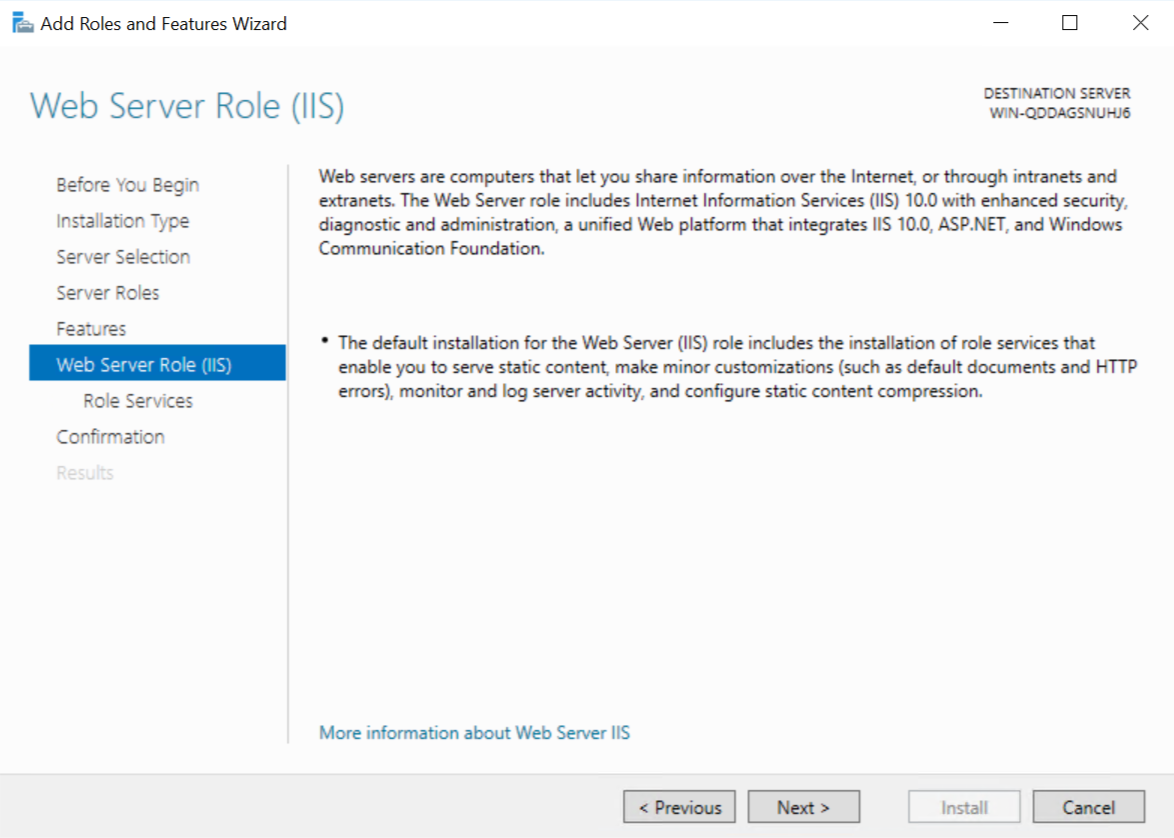
The "Web Server Role (IIS)" screen will be displayed, so click the "Next (N)" button.
-
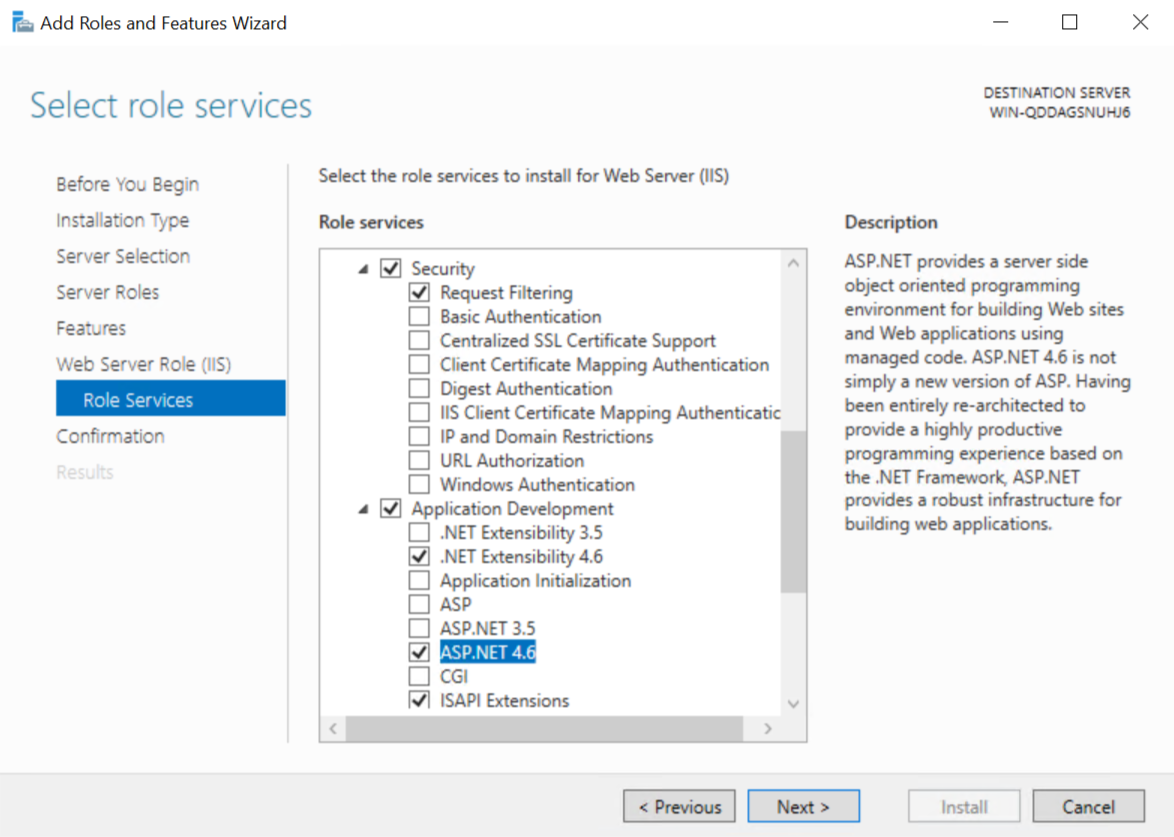
The "Select Role Service" screen will be displayed, so check "ASP.NET 4.6" under "Application Development".

-
The "Do you want to add required features to ASP.NET 4.6?" screen will be displayed, so click the "Add Features" button.

-
Confirm that "ASP.NET 4.6" is checked and click the "Next (N)" button.
-
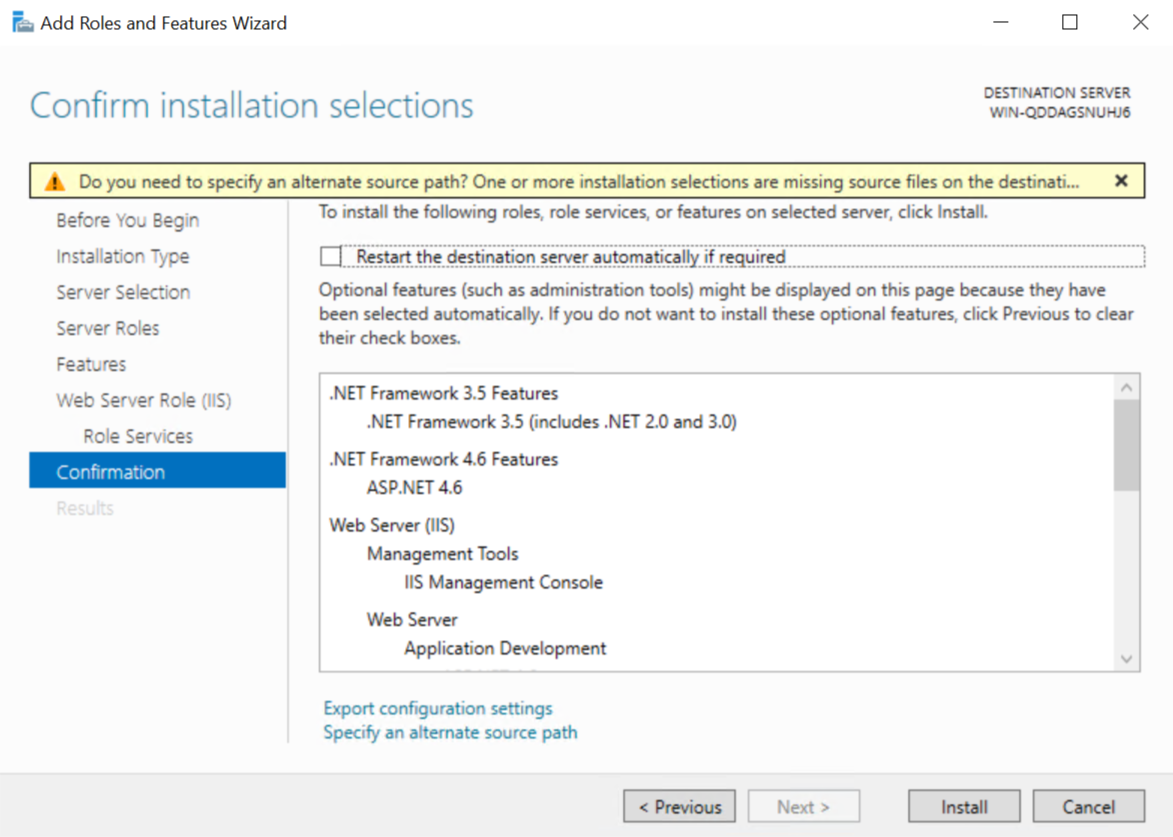
The "Confirm Installation Options" screen will be displayed, so click the "Install (I)" button.
-
Wait for the installation to complete.

-
After the installation is complete, click the "Close" button.

Change IIS Settings
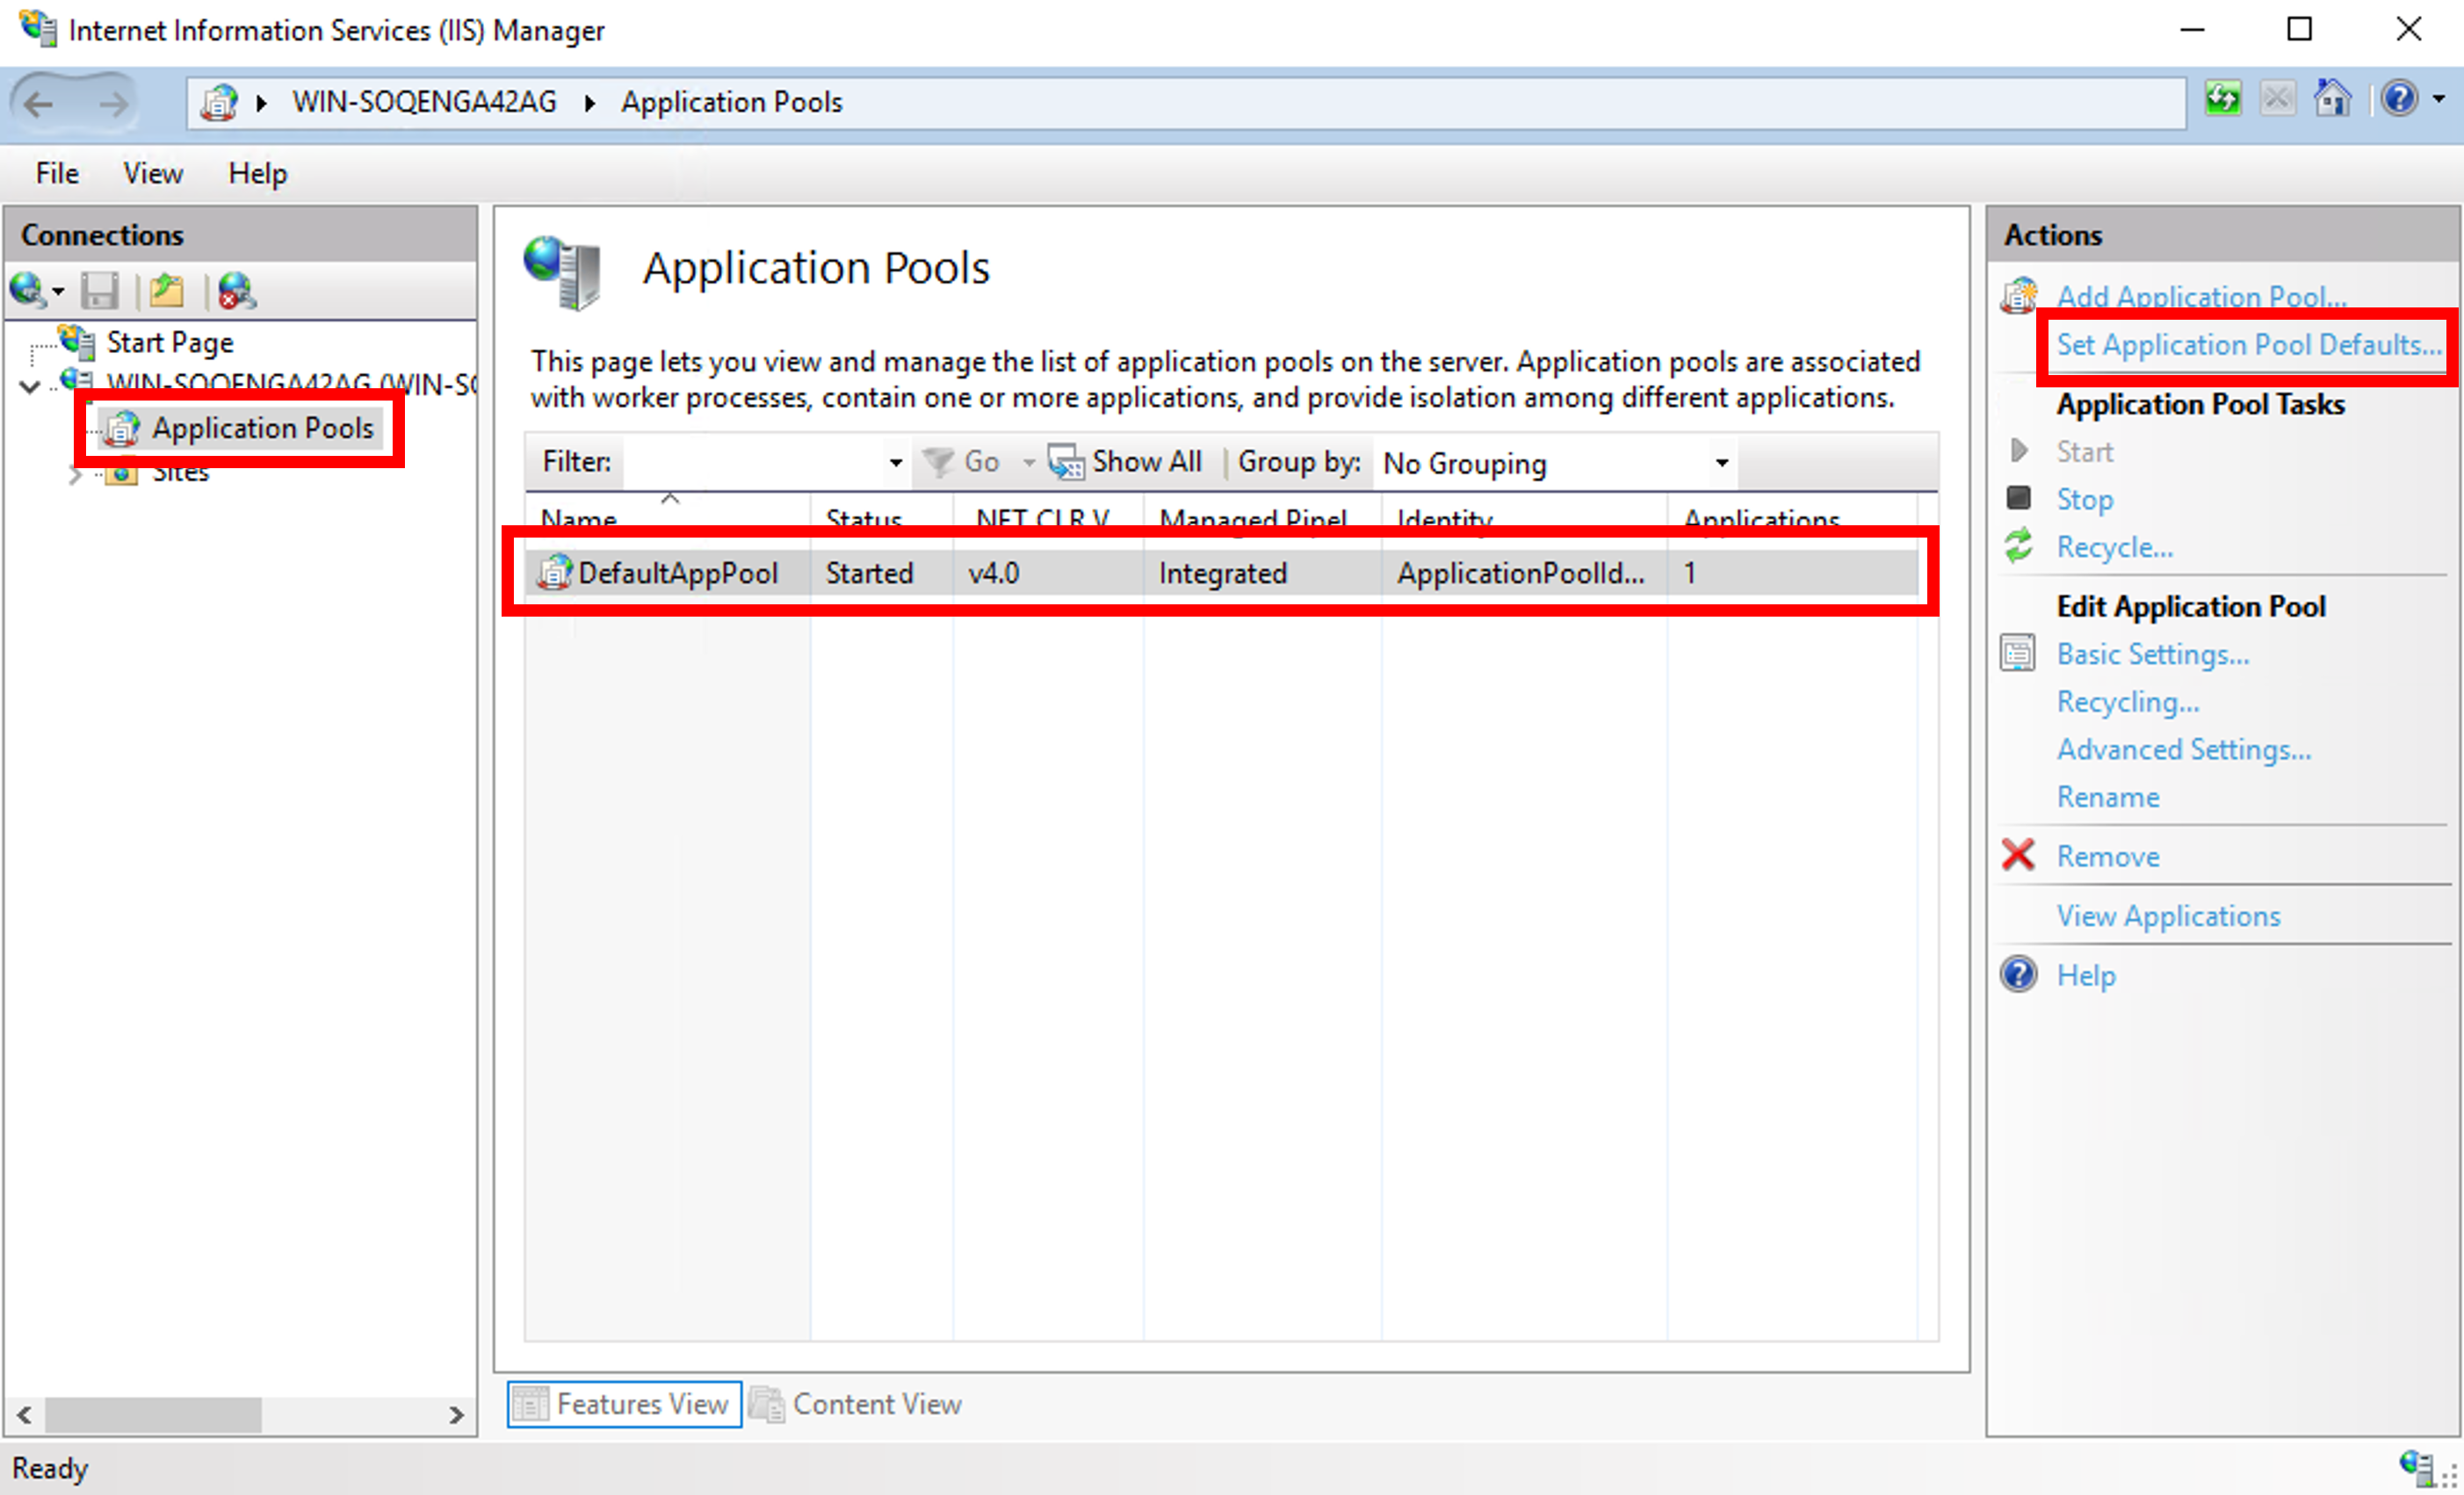
- Start "Internet Services (IIS) Manager" from "Server Manager".
- Select "DefaultAppPool" under "Application Pool" and click "Set Application Pool Defaults".
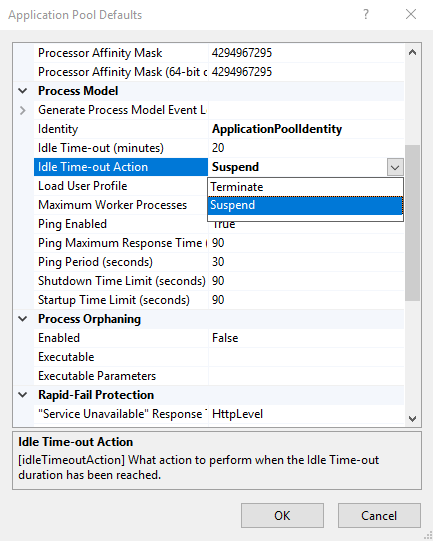
- Change "Idle Timeout Operation" under "Process Model" from "Terminate" to "Suspend" and click "OK".
When you have finished, install Pleasanter. Next step: Install Pleasanter