Display Service Announcements
Overview
The Announcement feature allows you to broadcast system-wide messages to all users—for example, to notify them of scheduled maintenance windows.
You control the feature by creating and configuring a "Time limited table" dedicated to announcements.
This lets you toggle announcements on and off and customize their appearance.
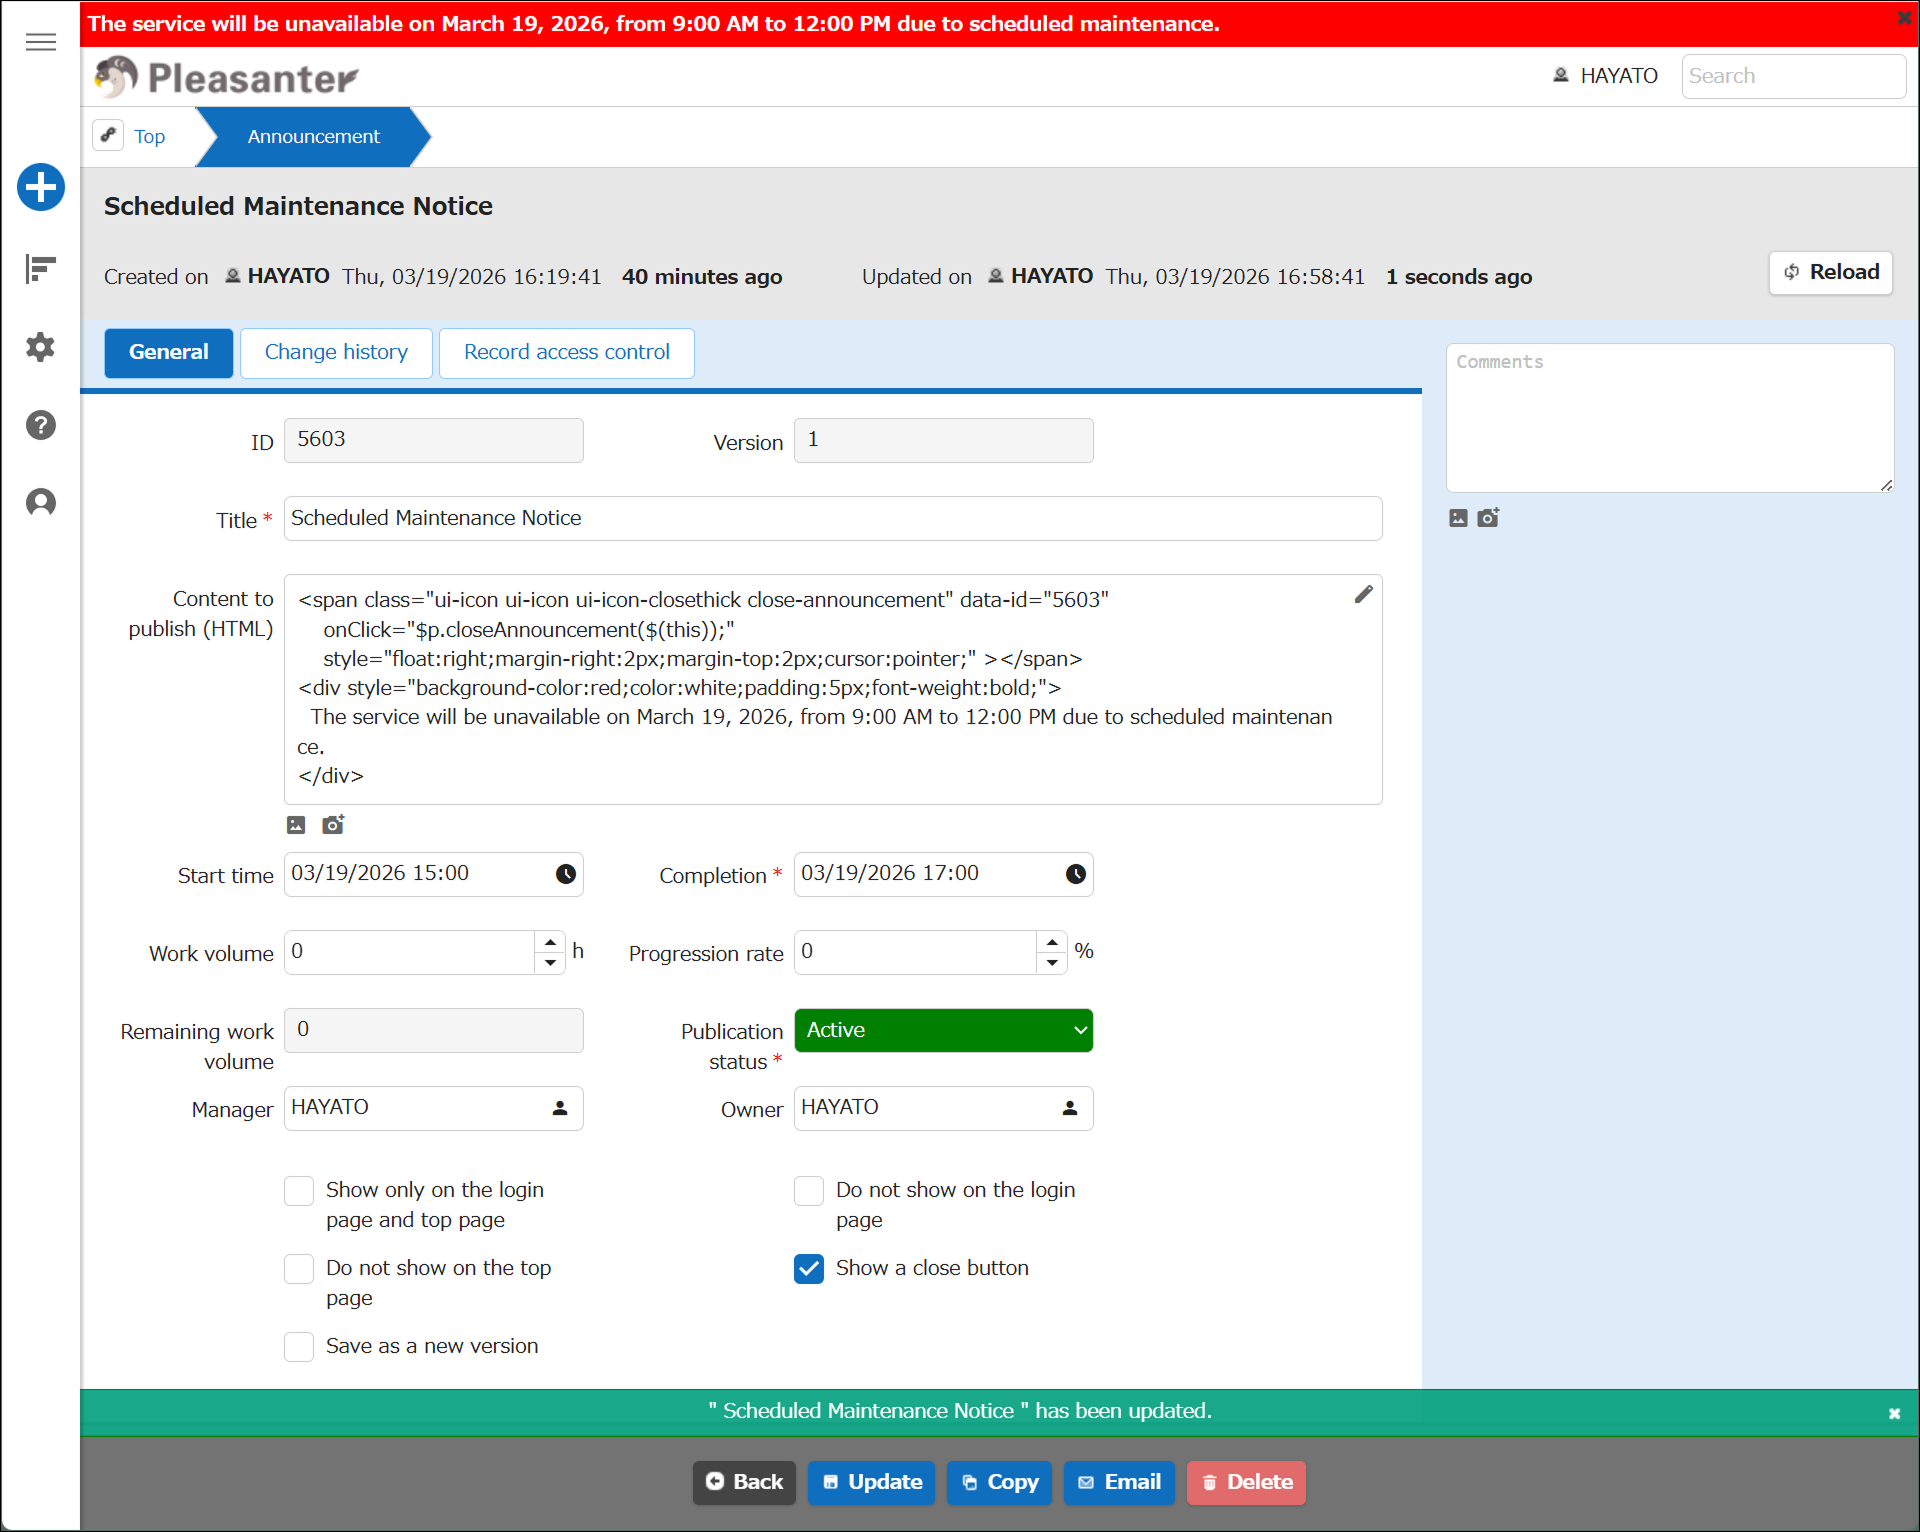
The screenshot below shows an example where an announcement with a red background is displayed as a warning to users.
Announcement displayed (Editor view)

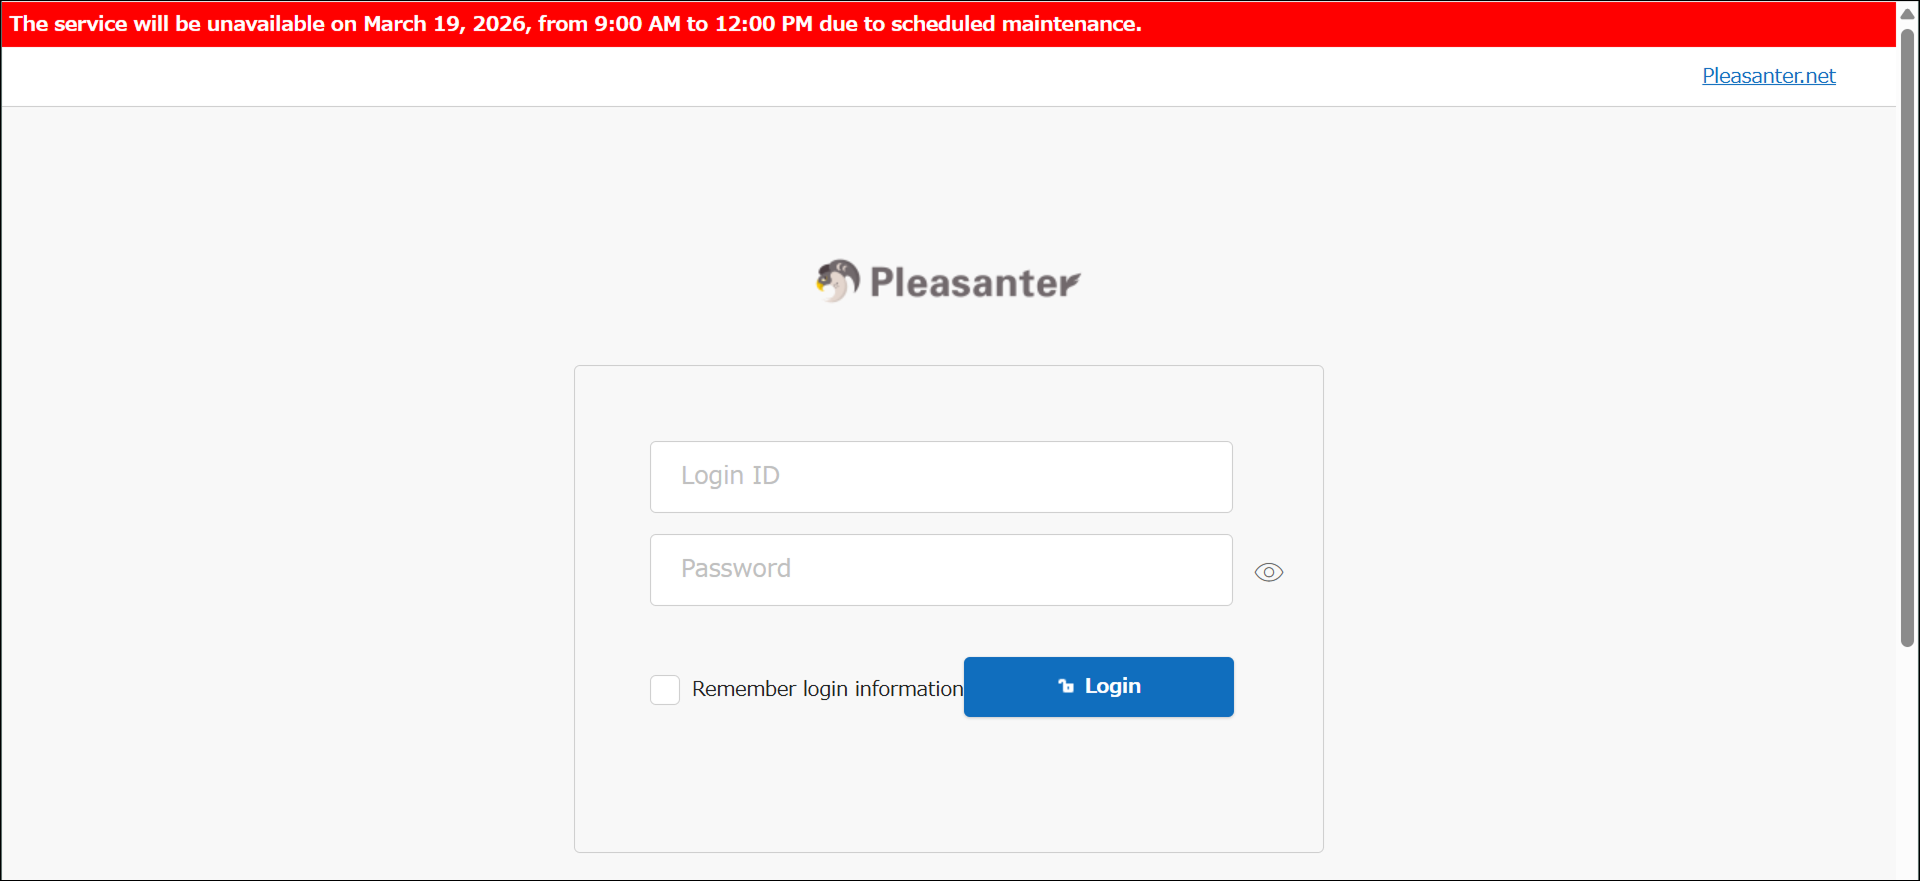
Announcements can also appear on the login page, making it possible to communicate information to users who are not yet logged in.
Announcement displayed (Login page)
Limitations
This feature is not available on the Free, Light, or Standard plans of Pleasanter.net.
Configuring the Announcement Feature
To use the Announcement feature, complete the following setup steps.
- Create a Time limited table and configure the following columns:
| No. | Column | Name displayed | Default value |
|---|---|---|---|
| ➊ | Body | Content to publish (HTML) | (blank) |
| ➋ | Status | Publication status | 200 |
| ➌ | CheckA | Show only on the login page and top page | Off |
| ➍ | CheckB | Do not show on the login page | Off |
| ➎ | CheckC | Do not show on the top page | Off |
| ❻ | CheckD | Show a close button | Off |
- In the "Advanced settings" for the "Status" column (➋), configure the "Option list" as follows:
- In the parameter file "Service.json", update the "AnnouncementSiteId" parameter as shown below and save the file.
Replace {Site ID} with the "Site ID" of the "Time limited table" you created.
-
After saving the parameter file, restart Pleasanter.
-
In the "Time limited table" you created for announcements, add a record with the following values:
| No. | Column | Value |
|---|---|---|
| - | Title | Scheduled Maintenance Notice |
| ➊ | Body | See HTML below * |
| - | Start | Date and time to begin publishing |
| - | Completion | Date and time to end publishing |
| ➋ | Status | Active |
| ➌ | Show only on the login page and top page | Off |
| ➍ | Do not show on the login page | Off |
| ➎ | Do not show on the top page | Off |
| ❻ | Show a close button | Off |
HTML to set in the Body column:
<div style="background-color:red;color:white;padding:5px;font-weight:bold;">
    The service will be unavailable on August 14, 2024, from 9:00 AM to 12:00 PM due to scheduled maintenance.
</div>
-
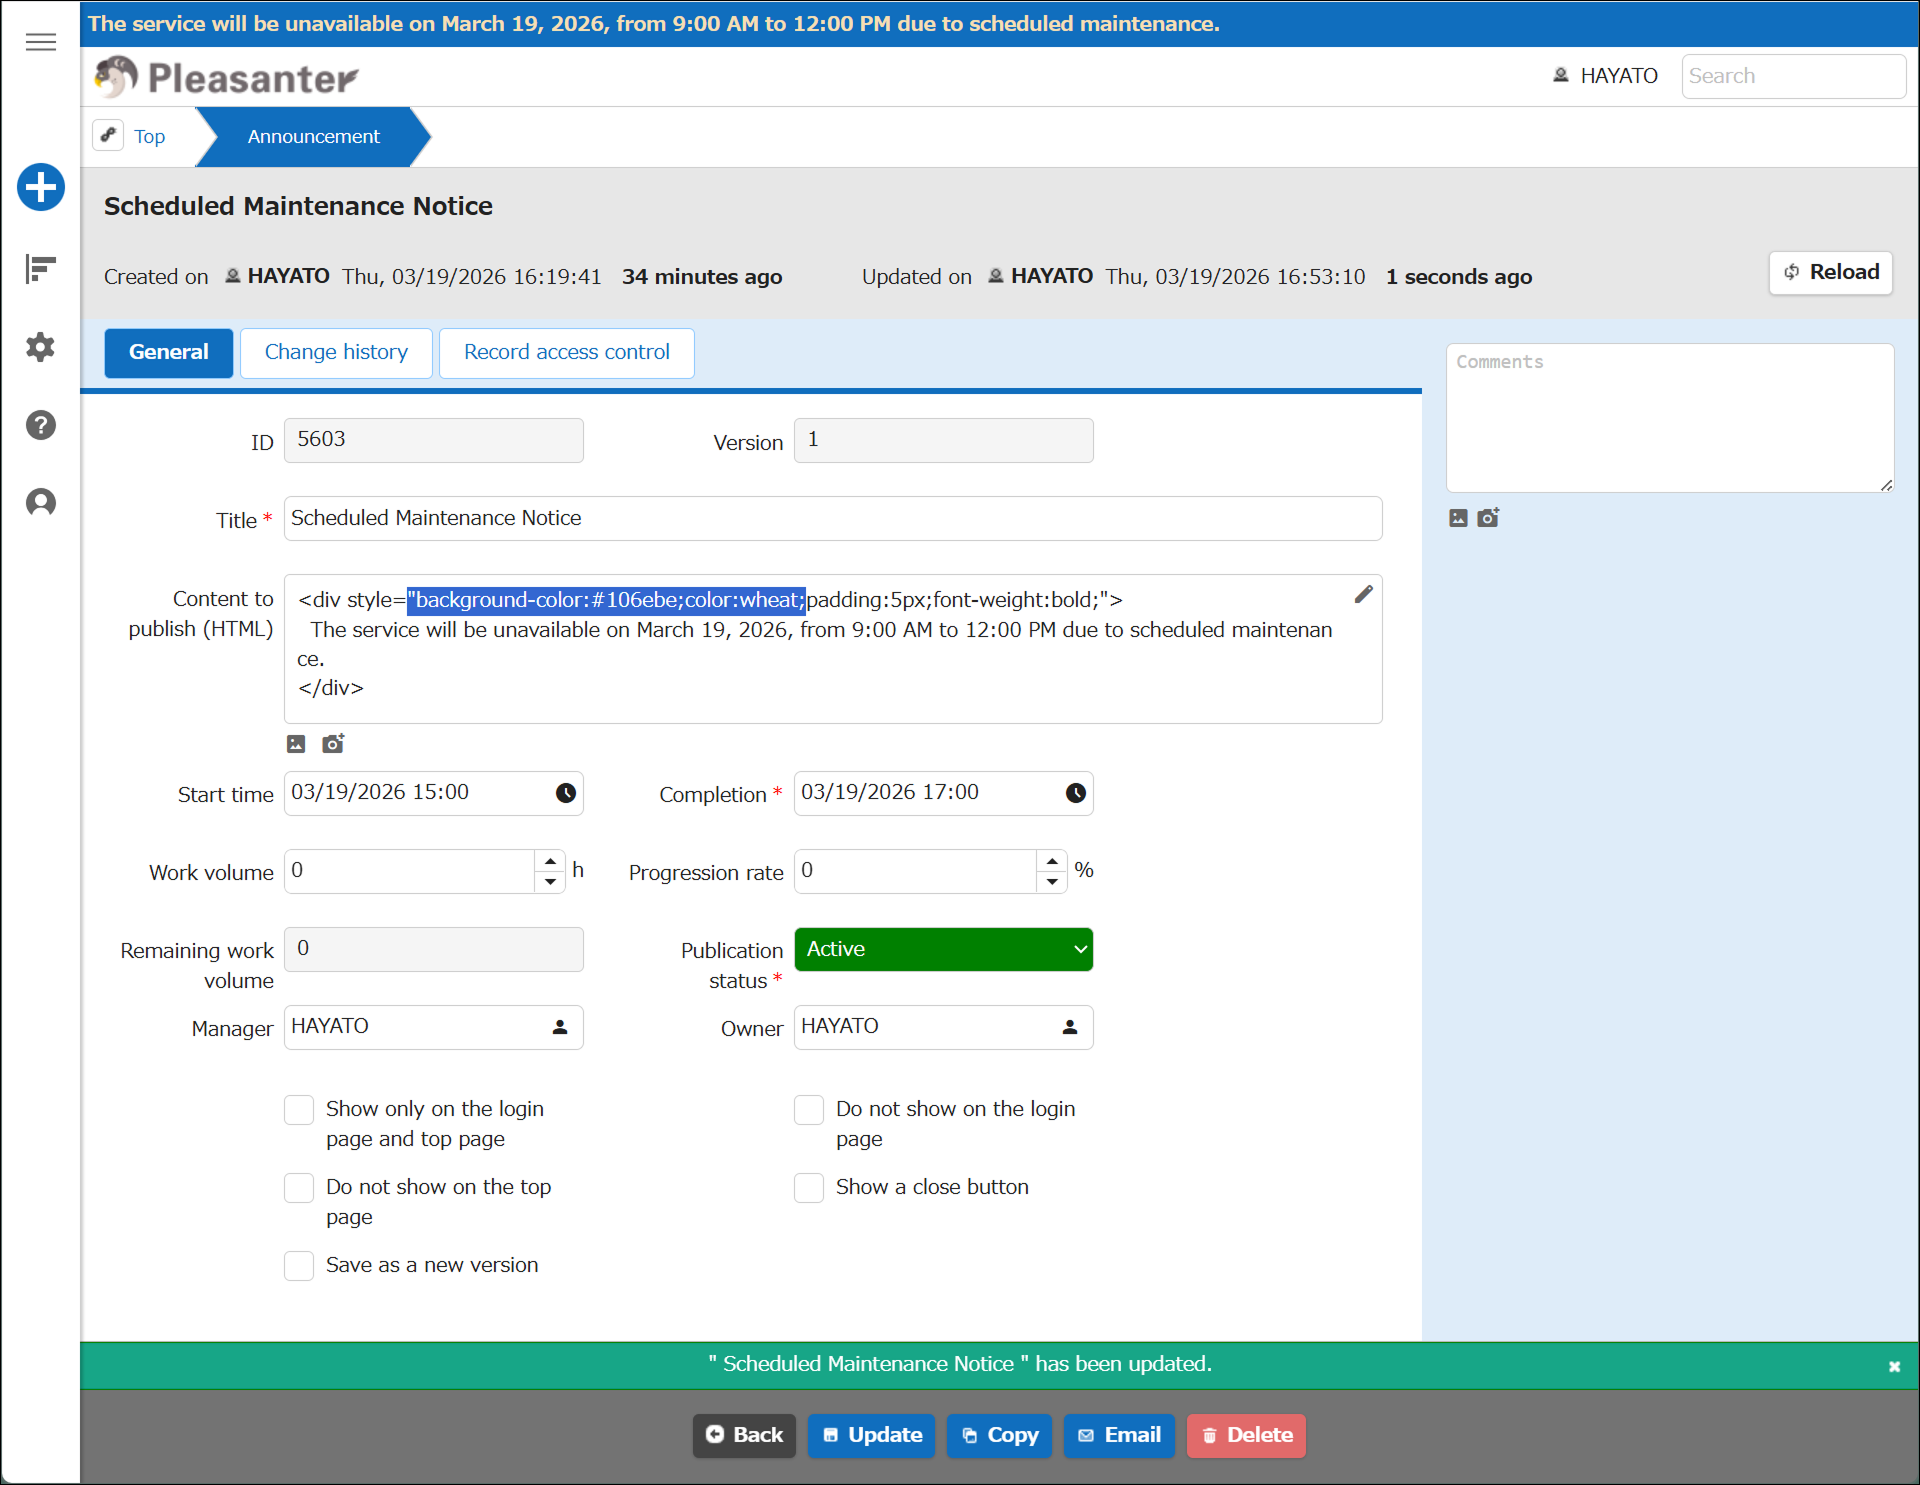
The announcement will appear at the top of each page.
Editing the HTML updates the displayed content.
-
Setting the "Status" column to "Closed" hides the announcement.

Even when "Status" is "Active", the announcement will not be shown if the current time falls outside the "Start"–"Completion" window.
This means the announcement is published automatically when the start time is reached and unpublished automatically when the completion time passes.
Announcement Feature Options
The Announcement feature provides four optional behaviors, each toggled by the corresponding "CheckA" (➌) through "CheckD" (❻) column.
➌ Show Only on the Login Page and Top Page
If an announcement appears on every page, it may interfere with workflows that rely on screenshots.
Enabling "Show only on the login page and top page" hides the announcement on all pages except the login page and the top page.
➍ Do Not Show on the Login Page
Some announcements should not be visible to users who are not logged in.
Enabling "Do not show on the login page" prevents the announcement from appearing on the login page.
Combined with "Show only on the login page and top page", this limits display to the top page only.
➎ Do Not Show on the Top Page
Use this option when you do not want the announcement to appear on the top page.
Enabling "Do not show on the top page" hides the announcement there.
Combined with "Show only on the login page and top page", this limits display to the login page only.
❻ Show a Close Button
If you want to allow users to dismiss an announcement themselves, enable "Show a close button" and add a close button element to the HTML.
The example below adds an "X" icon to the right side of the announcement banner.
Note that the value of "data-id="405" must match the record's ID—click "Create" first to have an ID assigned, then edit the HTML accordingly.
<span class="ui-icon ui-icon ui-icon-closethick close-announcement" data-id="405"
    onClick="$p.closeAnnouncement($(this));"
    style="float:right;margin-right:2px;margin-top:2px;cursor:pointer;"></span>
<div style="background-color:red;color:white;padding:5px;font-weight:bold;">
    The service will be unavailable on August 14, 2024, from 9:00 AM to 12:00 PM due to scheduled maintenance.
</div>
Clicking the "X" icon hides the announcement for the remainder of the user's session (until they log out).
The "X" icon is not shown on the login page, so the announcement cannot be dismissed there.
State with the close button configured