Editor: Tabs
Overview
On the tabs of Smart Design, you can carry out the following operations intuitively by dragging and dropping.
[1] Creating a new tab
[2] Reordering the tabs
[3] Changing the name displayed of a tab
[4] Deleting a tab
[5] Enabling and disabling columns on each tab
[6] Moving columns between tabs
This page explains [1] to [4] above. For [5] and [6], check "Smart Design: Editor: How to Use".
[1] to [6] above can also be done in the Editor of Manage Table.

| No. | Item | Description |
|---|---|---|
| ➊ | Name displayed | The name displayed of the tab. |
| ➋ | Number of columns | Shows the number of columns placed on the tab. |
| ➌ | Tab edit button | The gear-shaped button shown when you point at a tab. When you click it, the "Edit tab" screen opens. |
| ➍ | Tab handle | Shown on tabs that can be moved and deleted by dragging and dropping. It is not shown on the "General" tab, which can be neither moved nor deleted. |
| ➎ | Create new tab button | When you click it while it shows "+", you can add a tab. When you drag the tab you added, it changes to "-". When you drop the tab you want to delete while it shows "-", you can delete it. |
| ➏ | Delete tab button |
Limitations
- Check the limitations of "Manage Table: Editor: Tabs".
Prerequisites
- "Site management permission" is required to make the settings.
Operation Steps
[1] Creating a new tab
You can create a new tab. There is no limit on the number of tabs you can create.
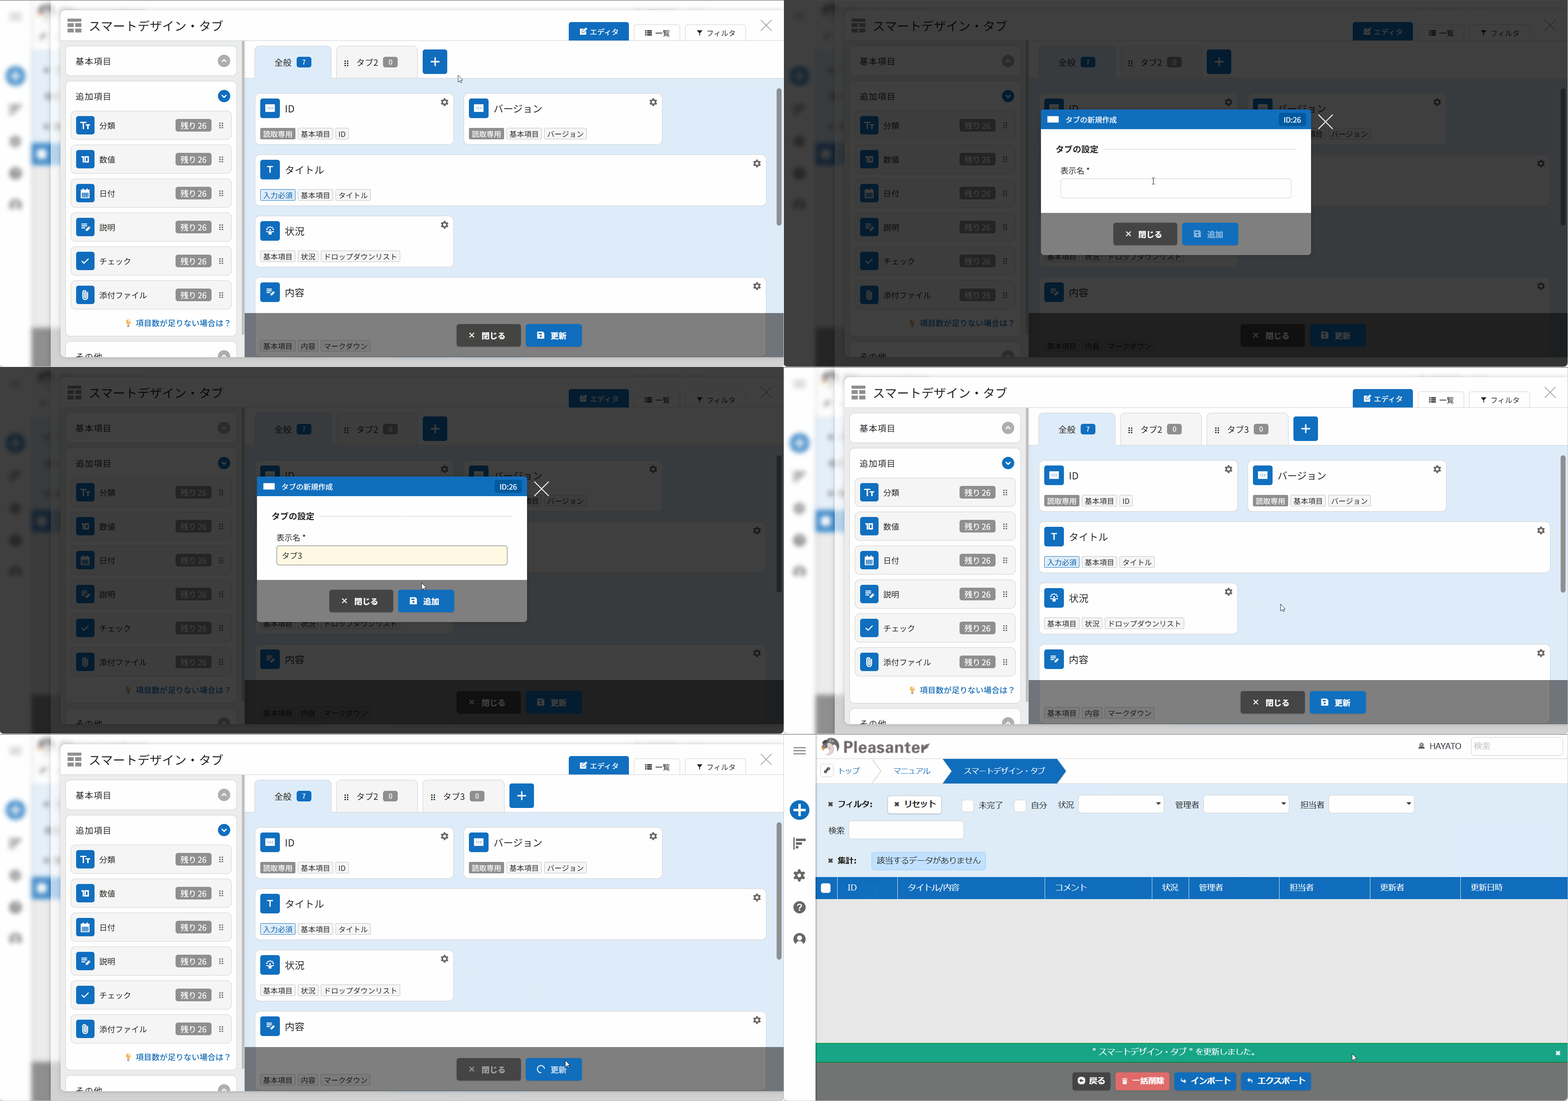
- Click the "Create new tab" button.
- Enter the Name Displayed and click the "Add" button.
- The tab you created is added at the right end of the existing tabs (to the left of the "Change history index" tab).
When the number of tabs grows and the display no longer fits the window width, a horizontal scroll bar is shown below the tabs.
Use the horizontal scroll bar when you want to show a hidden tab or to use the create new tab button.

The maximum display width of a single tab is 300 pixels.
A tab name that does not fit in this width is abbreviated as follows.

- On the record edit screen, the tab name is displayed without being abbreviated. If you give a tab a name that is too long, the display can look cut off when you narrow the window width.
[2] Reordering the tabs
Tabs with a tab handle can be reordered by dragging and dropping.

- They cannot be moved to the left of the "General" tab.
- The "General" tab cannot be moved.
[3] Changing the name displayed of a tab
You can change the name displayed of the "General" tab and of tabs you created. You can give the same name displayed to several tabs.
- Click the tab edit button (the gear icon), or double-click the tab.

- The edit tab screen opens. Change the Name Displayed to any string you like and click the "Update" button.

- Click the "Update" button in the command button area.
[4] Deleting a tab
(1) Using the edit tab screen
Tabs with a tab handle can be deleted. A tab you deleted cannot be restored.
- Click the tab edit button (the gear icon), or double-click the tab.

- The edit tab screen opens. Click the "Delete" button.

- When you try to delete a tab on which columns are placed, a screen like the following is displayed. If it is all right to delete it, click the "Delete" button. Note that the columns you placed are reset when the tab is deleted.
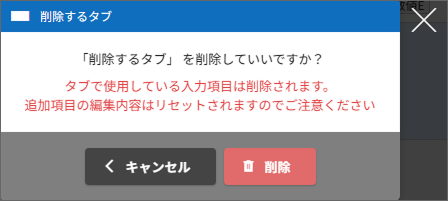
When you try to delete a tab on which no columns are placed, a screen like the following is displayed. If it is all right to delete it, click the "Delete" button.

- Click the "Update" button in the command button area.
(2) Dragging and dropping onto the delete tab button
You can also delete a tab with a tab handle by dragging and dropping it onto the "Delete tab" button.
- Drag and drop a tab with a tab handle onto the "Delete tab" button.
- When columns are placed on it, a deletion confirmation screen is displayed. If it is all right to delete it, click the "Delete" button. Note that the columns you placed are reset when the tab is deleted.
When no columns are placed on it, no confirmation dialog is displayed and it is deleted straight away. - Click the "Update" button in the command button area.

Supported Versions
| Supported Version | Description |
|---|---|
| 1.5.3.0 and later | Function added |