Manage Table: Editor: Column Advanced Settings: Multiple Selection
## Overview
This setting allows you to select multiple options for class column.

## Limitations
1. If multiple selection is enabled in the parent table and there is a class column with a link setting, the sort function for the class column of the parent table displayed in the link list on the child table editing screen will not work.
## Operation Procedure
Open the Editor tab from Manage Table in the Manage menu.
Select the class column for which you want to use the multiple selection function from the Enabled column and click the Advanced Settings button.

Check "Multiple Selections" on the Advanced Settings screen and click the Change button. Return to the Editor screen and click the Update button.

## Usage
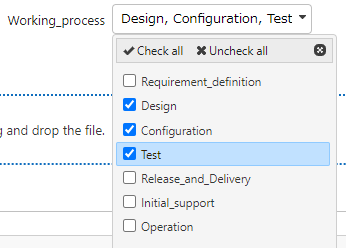
For class column for which multiple selection is enabled, a check box will be displayed at the beginning of the line of options, allowing multiple selections, as shown below.

If the search function is enabled, multiple selections can be made in the search dialog. Hold down the Ctrl key (Windows) or Command key (Macintosh) while clicking the columns you want to select. Range selection with the Shift key is also possible.

In the list screen, multiple selected columns will be displayed side by side as shown below.

## Export
Class column with multiple selection enabled will be exported as follows.
```
["Ishida Shokichi"]
["Yamada Taro", "Suzuki Suzuko", "Sato Satomi"]
```

## Set Export
Class column with multiple selection enabled can be exported as follows, with or without checks for each column. Open the Export tab from the Manage Table in the Manage menu, select the column with multiple selection enabled, and click Advanced Settings.

Check the Output Class column check box in the dialog and click Change. When you return to the export screen, click Update.

Selections will be output as individual columns, with 1 written for selected columns.

## Import
Similar to the export, columns with 1 written in the columns will be imported as selected.


## Related Information
・[Manage Table: Editor](/manual/table-management-editor)
・[Manage Table: Export](/manual/table-management-export)
・[Import CSV Data to Pleasanter](/manual/table-record-import)
