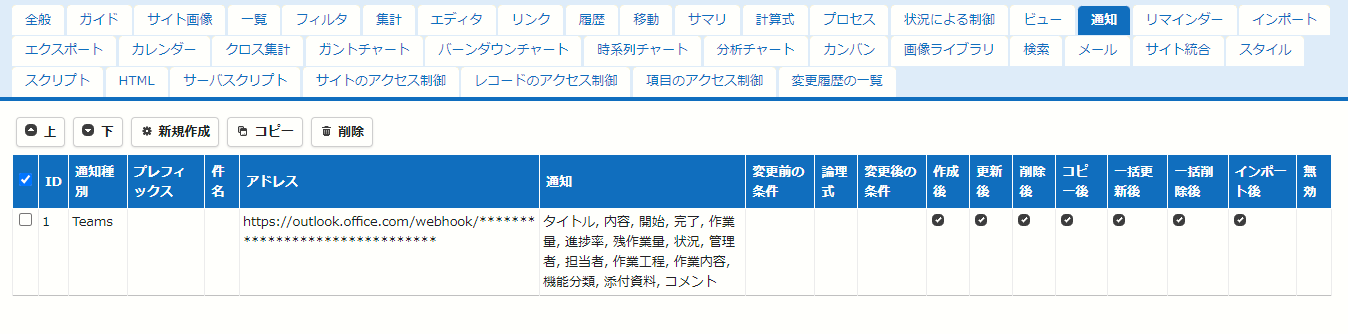
Set Up to Send Notifications to Microsoft Teams
# Information regarding Teams notifications
<b><font color="red">The Office 365 Connectors feature in Microsoft Teams was retired on May 22, 2026. As a result, this procedure can no longer be configured. We have prepared an alternative procedure, so customers who use Teams notifications should review their settings.</font>
[Set Up to Send Notifications to Microsoft Teams (Using Workflows)](teams-workflows)<b>
---
## Prerequisites
Create a team and a channel for notifications in the Microsoft Teams app.
[Create a channel](https://support.microsoft.com/en-us/office/create-a-standard-private-or-shared-channel-in-microsoft-teams-fda0b75e-5b90-4fb8-8857-7e102b014525)
## Add Incoming Webhook connector and get URL
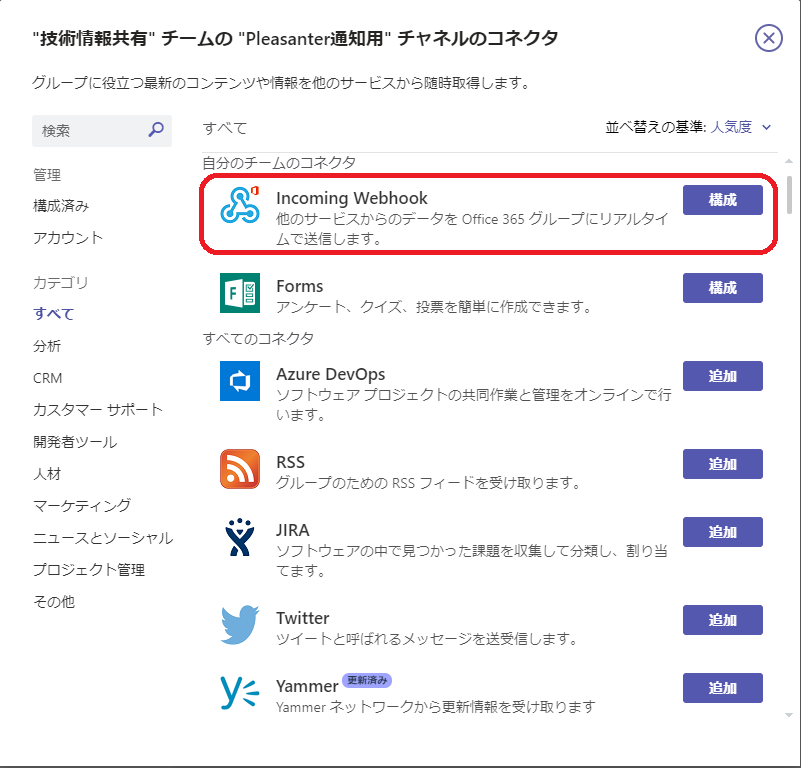
Add the connector "Incoming Webhook" to the channel for notification.
- Click the "..." icon next to the channel.
- Click "Connector".
- Click "Configuration" for the "Incoming Webhook" connector on the channel connector screen.
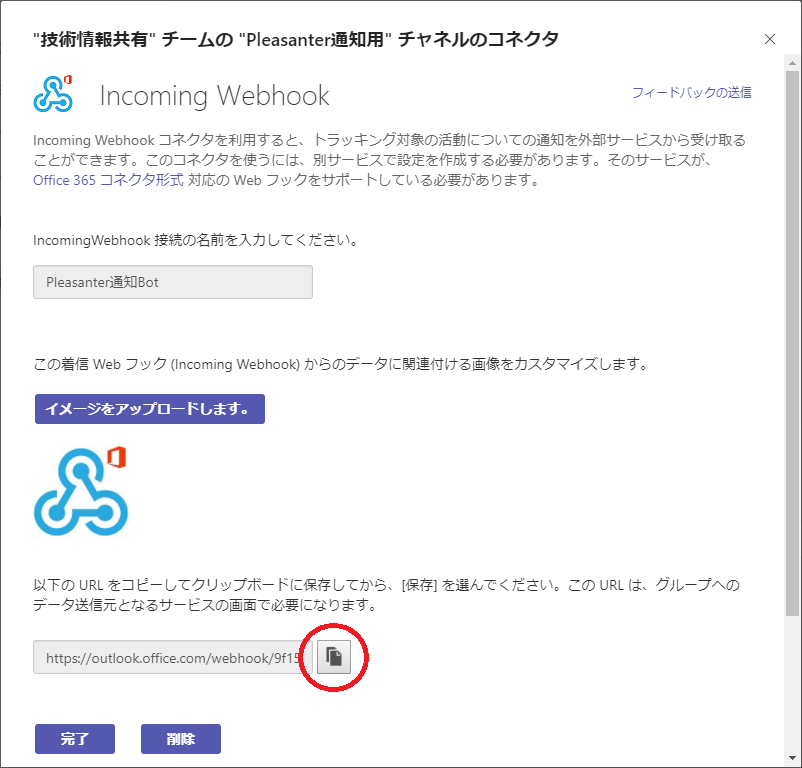
- Enter the name of the connector and click "Create", then copy the URL on the screen below.
## Pleasanter Settings
1. Select the table for which you want to set notifications, open the "[Manage Table](/en/manual/table-management)" - "「Notification」" tab, and click the "Create New" button.

2. Select "Microsoft Teams" as the notification type, paste the URL you copied when adding the Incoming Webhook connector into the address field, and click the "Add" button.
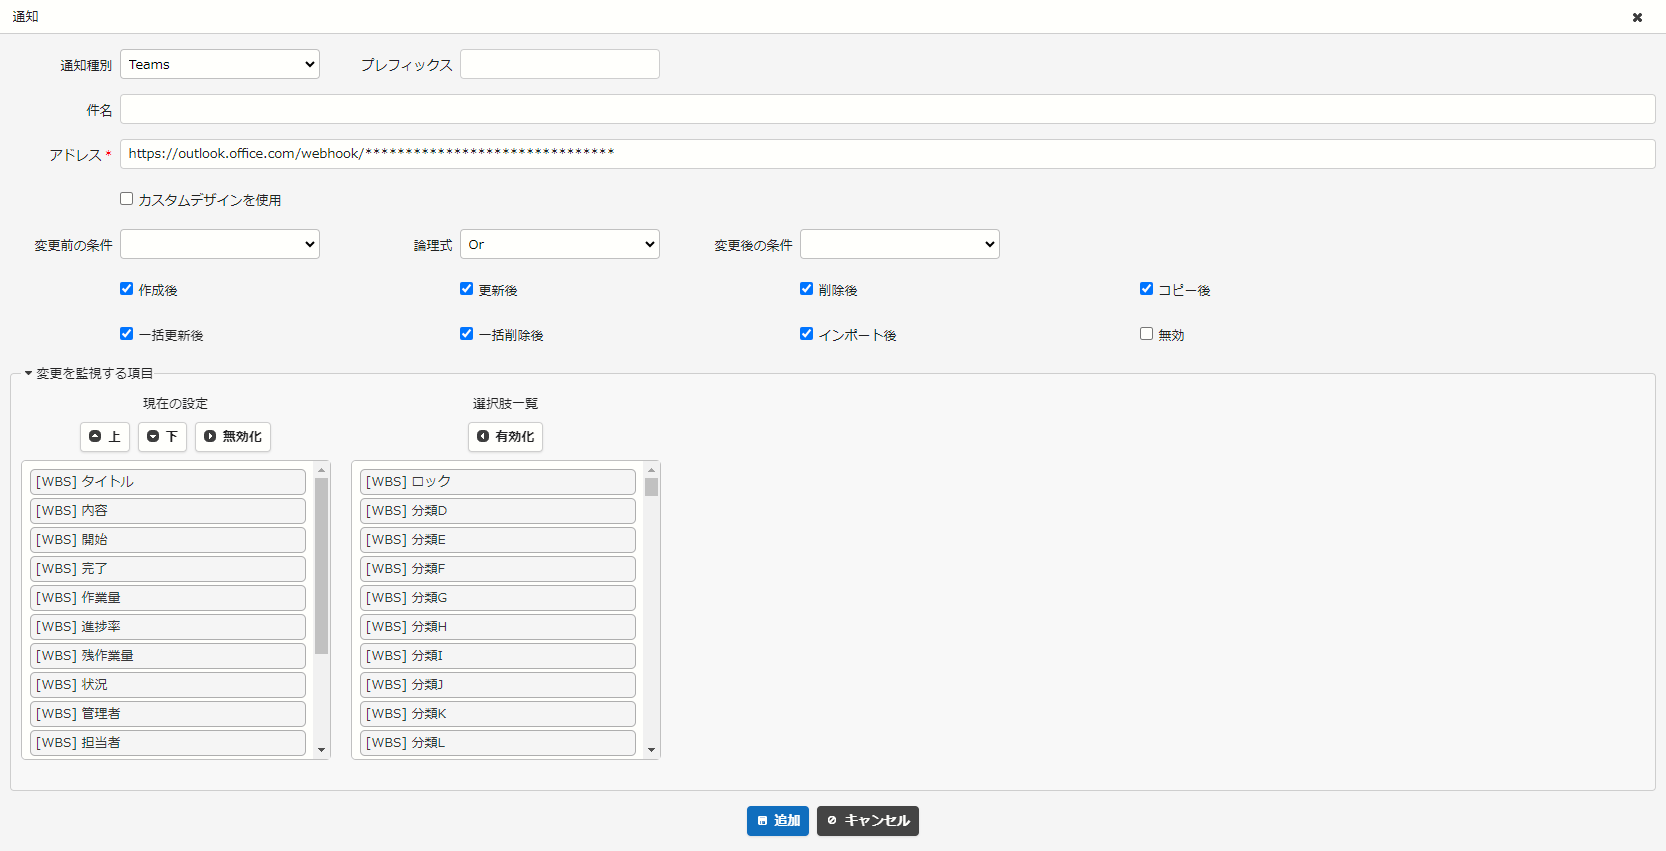
3. Click the "Update" button. This completes this procedure.